How to Configure DHCP on SECUI Bluemax Next Generation Firewall
In modern network management, automating IP address distribution is essential. One of the most efficient ways to achieve this is by enabling DHCP (Dynamic Host Configuration Protocol). DHCP helps administrators by automatically assigning IP addresses to client devices without manual configuration.
On the SECUI Bluemax NGF (Next Generation Firewall), DHCP functionality is built-in and can be configured directly via the web interface. This article will guide you step by step to set up DHCP, including IP Pools, DNS, and Default Gateway.
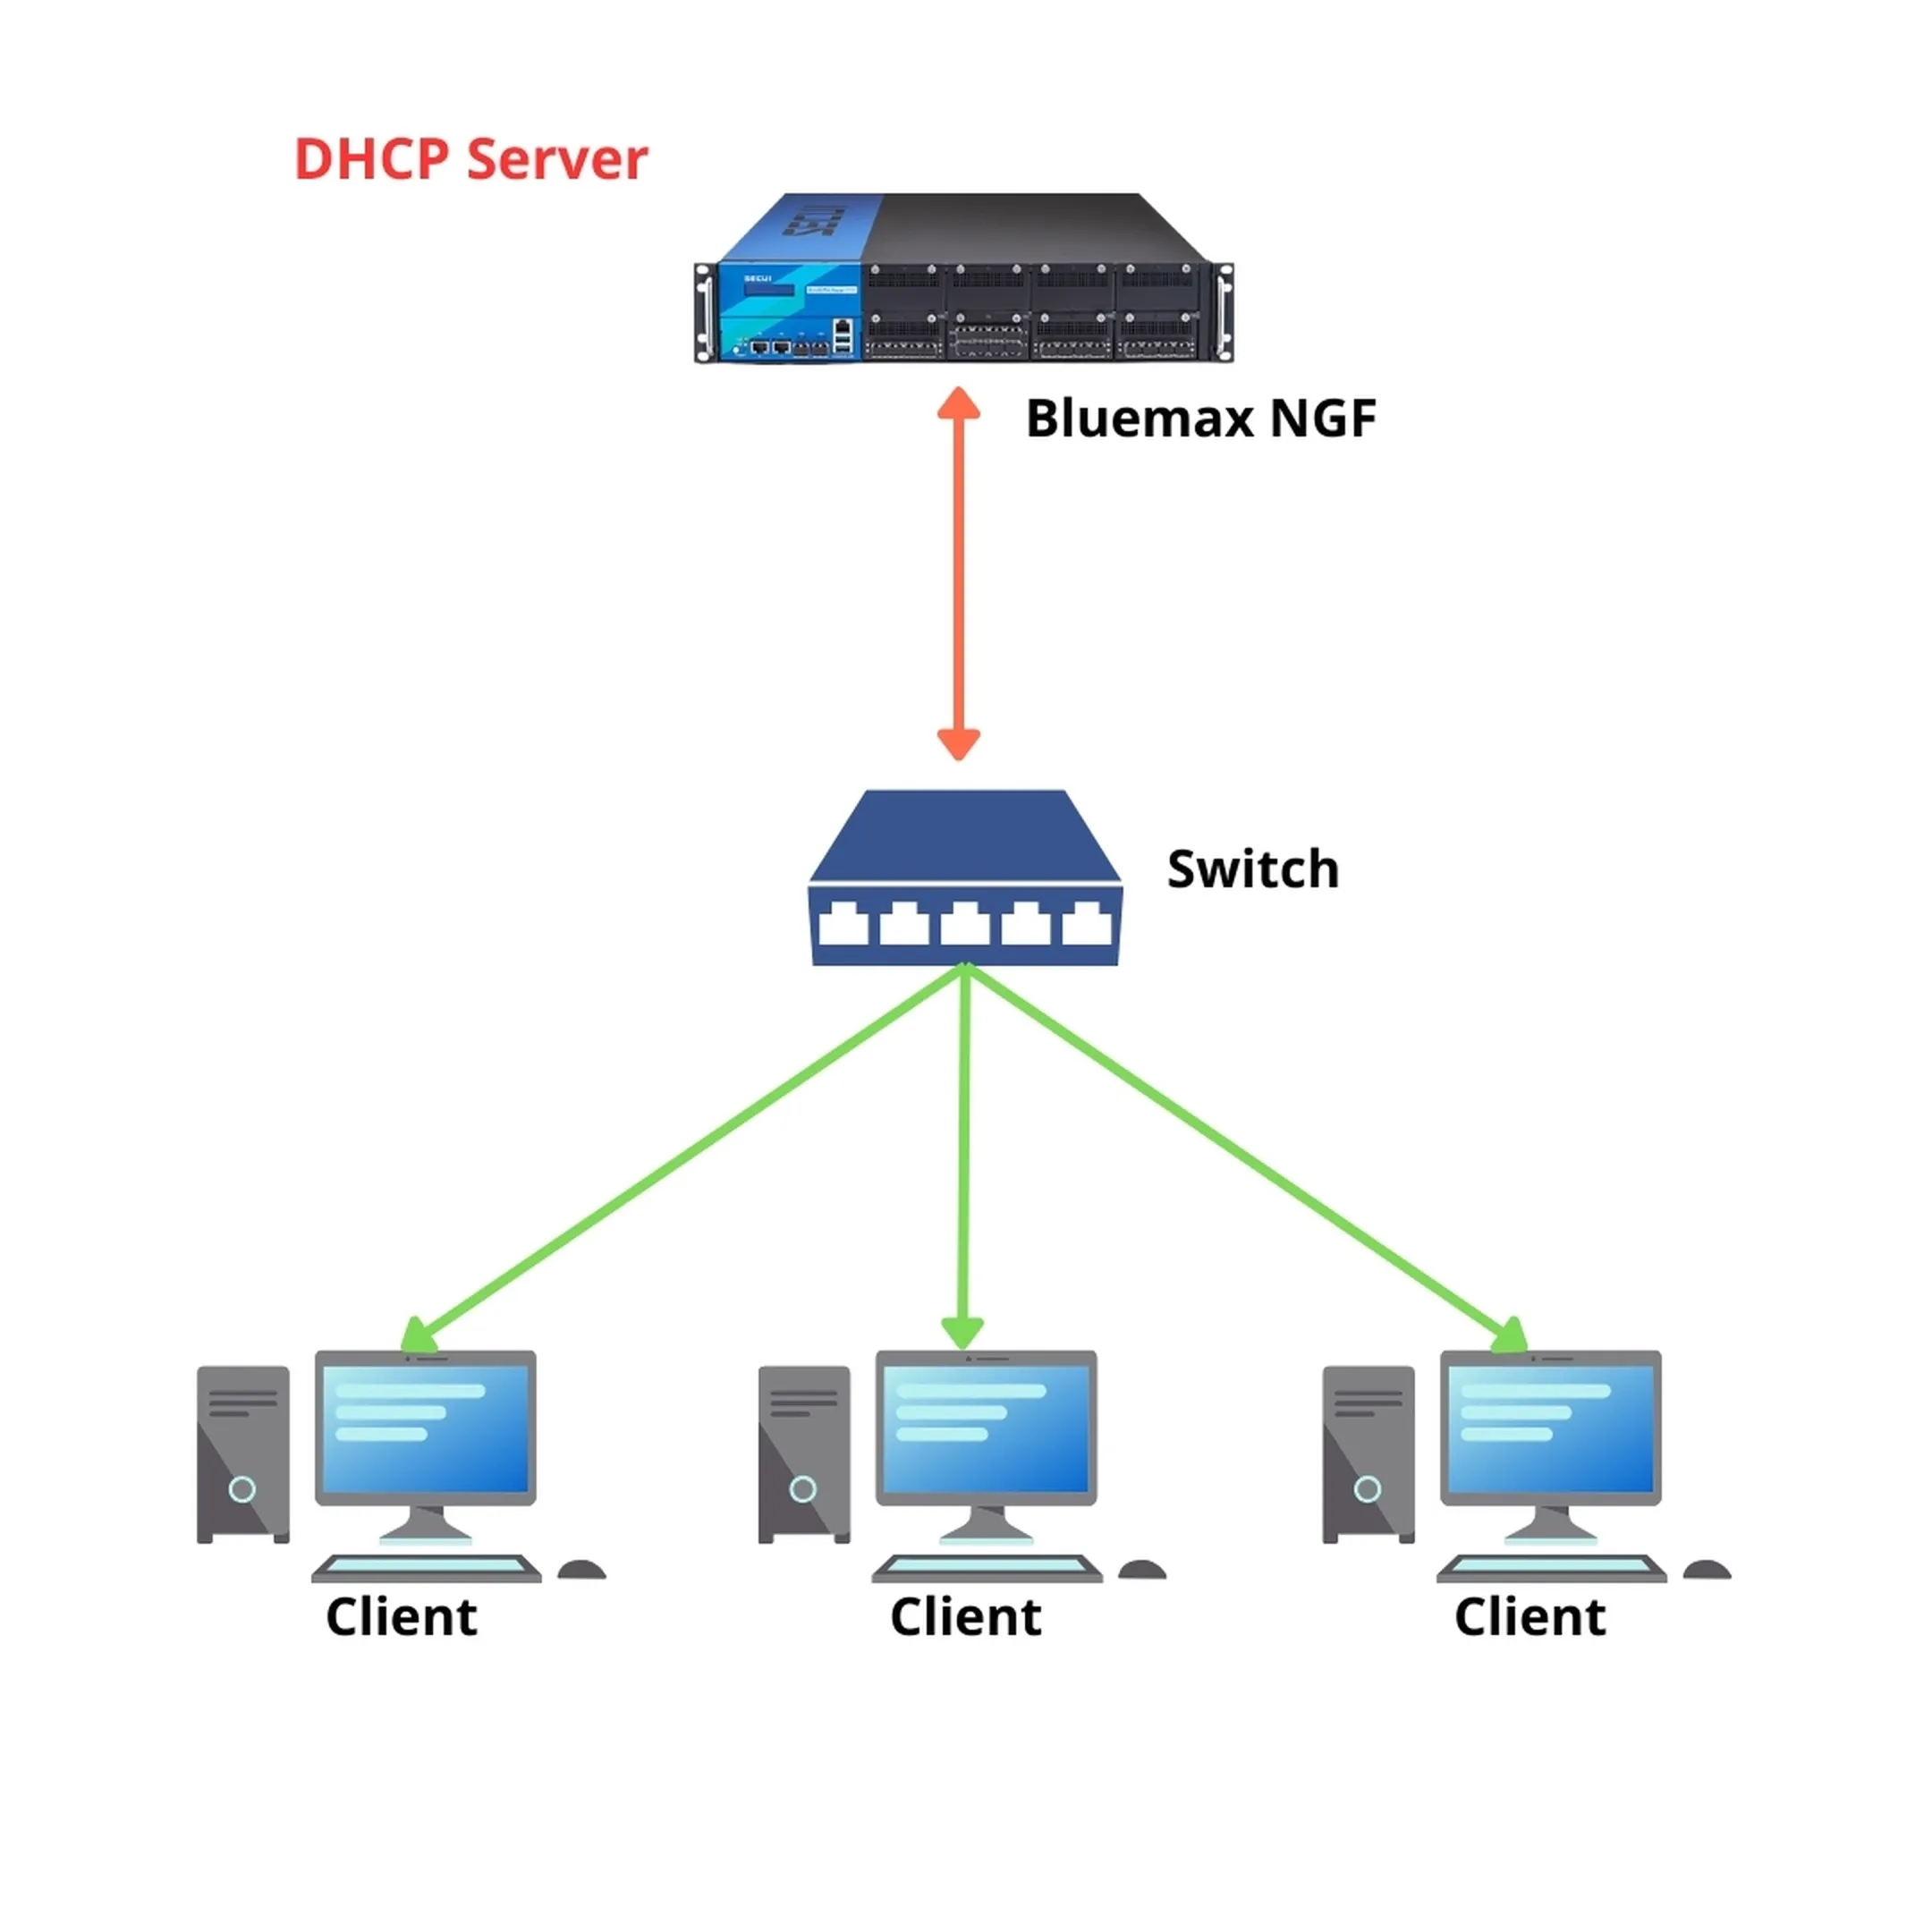
Figure 0.1 DHCP Server Topology
1. Log in to Bluemax NGF Interface
Open your web browser and log in to the Bluemax NGF web interface as usual. Make sure you use administrator credentials.
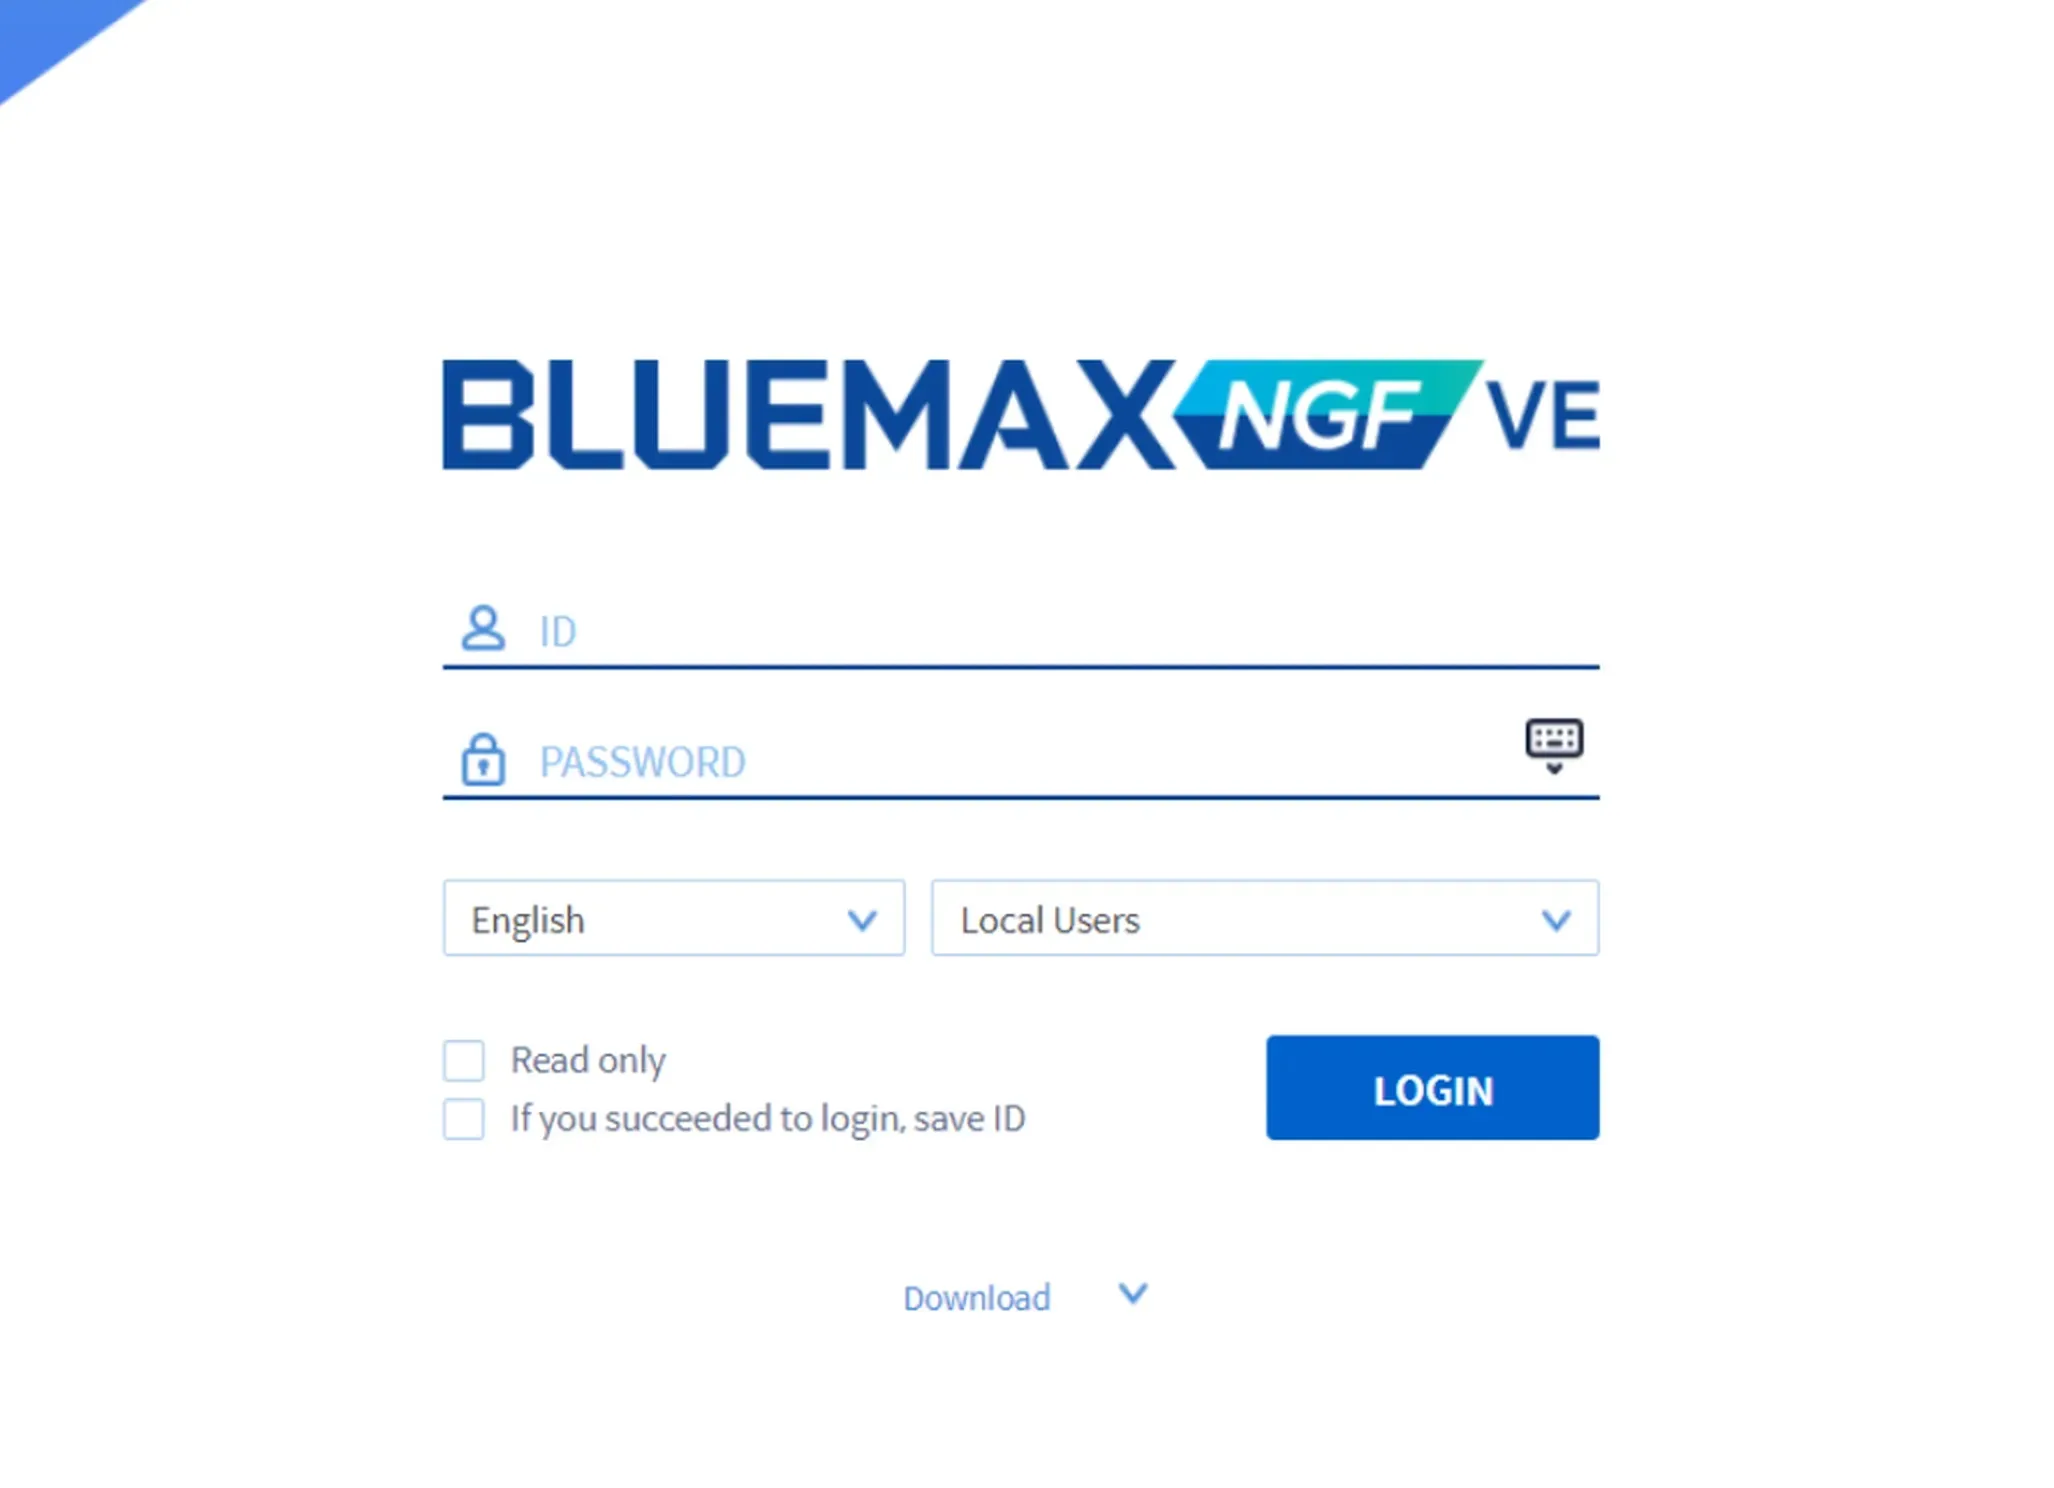
Figure 1.1 Bluemax NGFW Login Page
2. Navigate to DHCP Settings Menu
Once you’re on the dashboard, navigate to:
System > DNS Settings > DHCP Settings
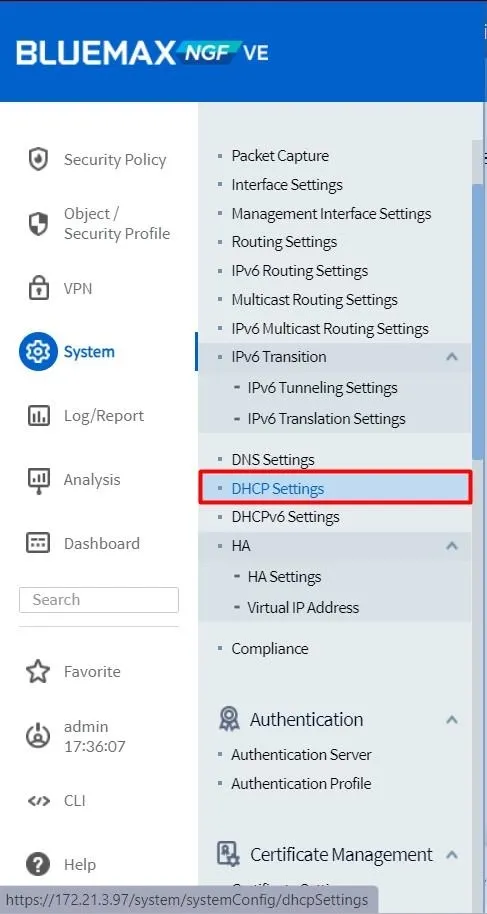
Figure 2.1 DHCP Settings Menu
Enable Enable DHCP to activate the DHCP service on the firewall.

Figure 2.2 Enable DHCP Server
3. Configure DNS for Clients
Under the DNS Settings section, enter the DNS server IP address that clients will use. This ensures proper domain resolution when they are connected.
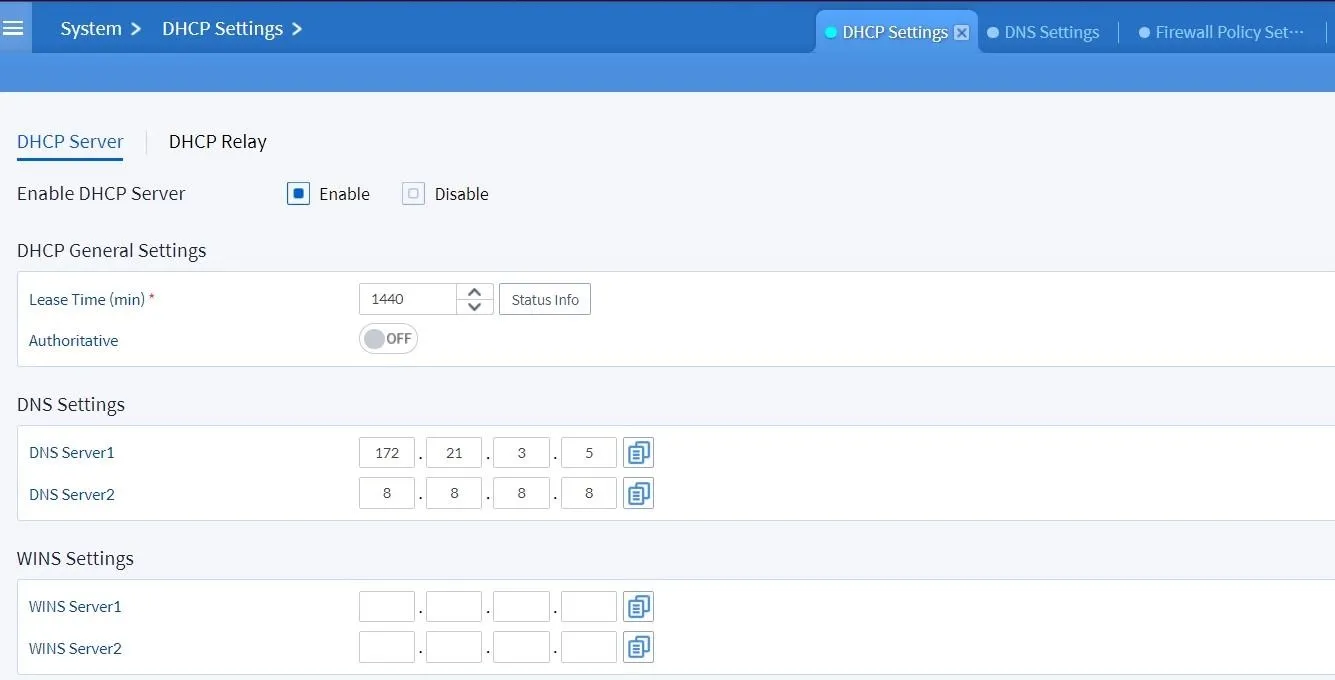
Figure 3.1 DNS Configuration
4. Add DHCP IP Pool
Go to Static Area Setting, then click Add to create an IP range for DHCP clients.
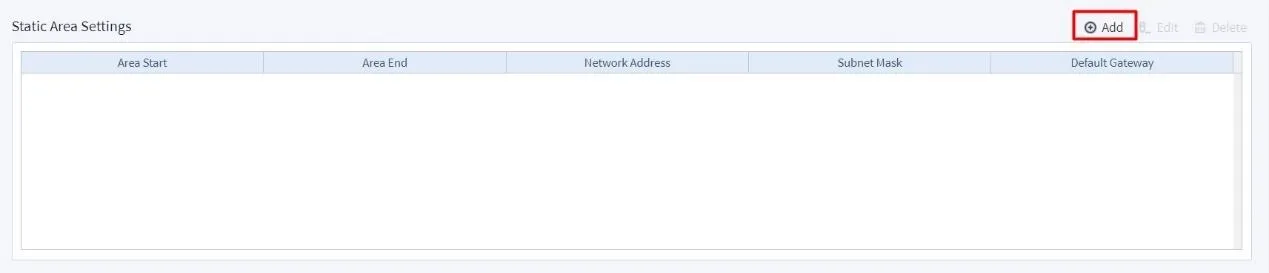
Figure 4.1 Add DHCP IP Pool
Fill in the following parameters according to your network:
- Area Start: Starting IP address of the pool.
- Area End: Ending IP address of the pool.
- Network Address: Network IP address.
- Subnet Mask: Subnet mask of the segment.
- Default Gateway: Gateway IP for the clients.
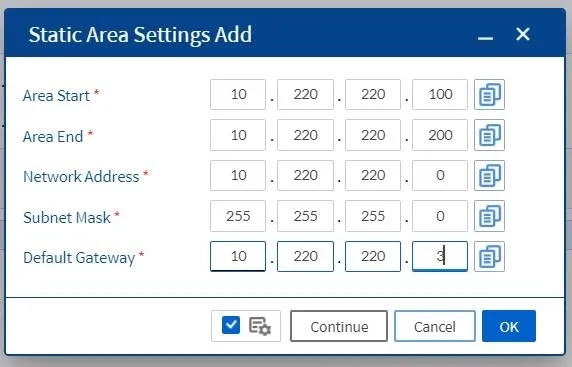
Figure 4.2 DHCP IP Pool
After completing the details, click Apply. The system will save and activate the DHCP server based on the pool you created.
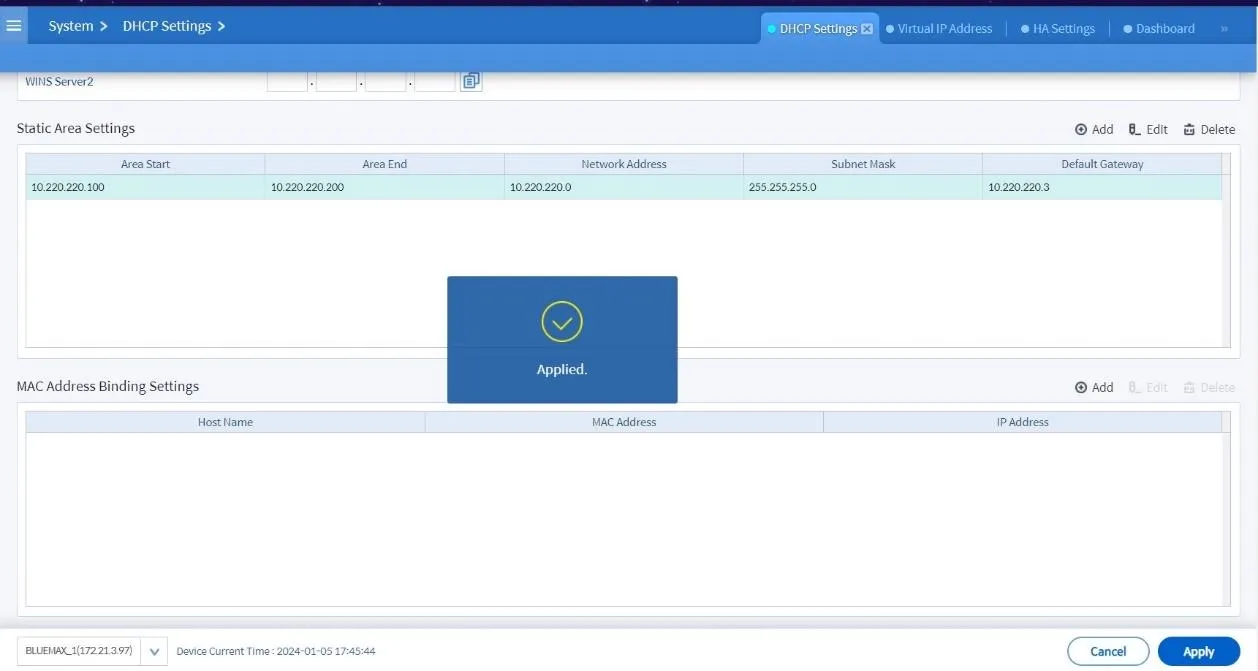
Figure 4.3 Apply DHCP Settings
5. Verify DHCP Clients
To confirm DHCP is working, check one of the clients to ensure it has received an IP address from the configured pool. If correct, DHCP is successfully enabled.
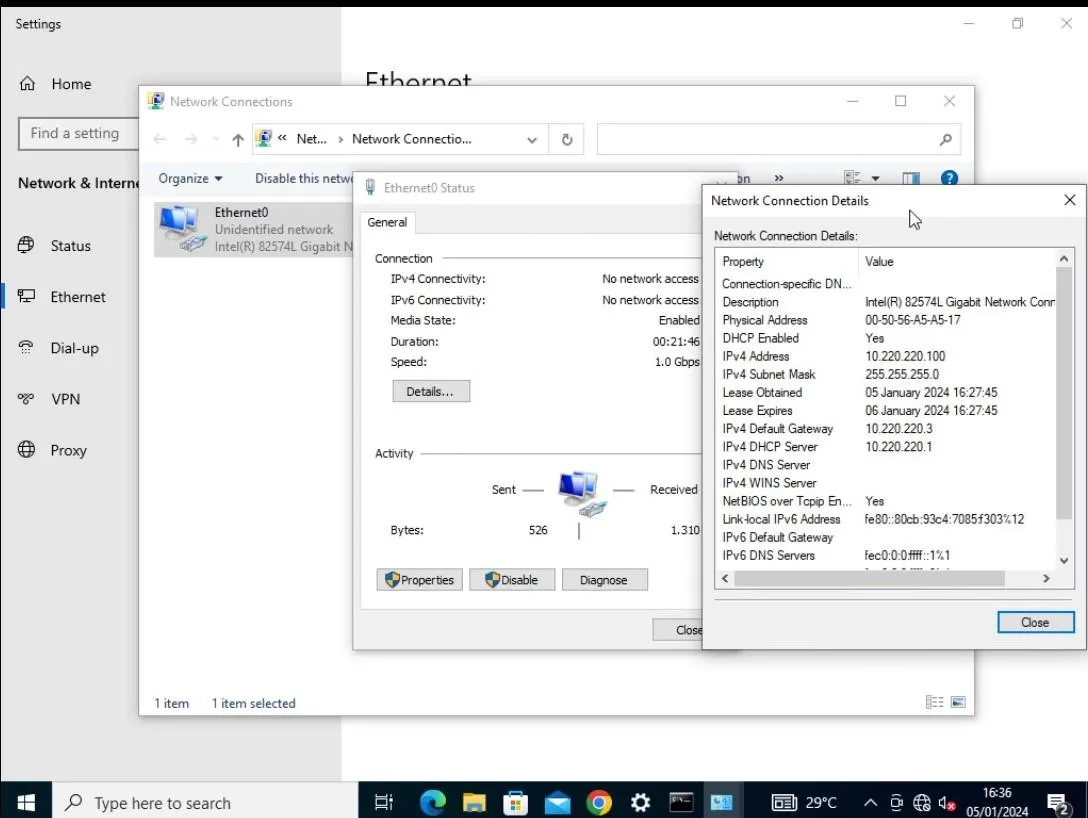
Figure 5.1 Verify DHCP Client
Conclusion
Enabling DHCP on SECUI Bluemax Next Generation Firewall makes IP distribution automatic and hassle-free, improving network efficiency and reducing errors. With the correct setup, you can prevent IP conflicts and speed up client provisioning.
🚀 Need advanced configuration assistance? Contact our team here.
Last Updated
September 4, 2025
Category
SECUI Configuration, Network Security
Share This
On This Page
Contact us for
Free Consultation!
Share your challenges, and we'll provide the best solutions for your business, Connecting with us is as simple as clicking a button, and let us come to you.