DLP (Data Loss Prevention) Configuration on Bluemax NGF
Data is one of the most valuable assets in any organization—especially when it comes to sensitive information like identity numbers, financial records, or internal documents. One powerful feature you can use to prevent that kind of data from leaking is DLP, or Data Loss Prevention.
The main goals of DLP are:
- To detect and prevent sensitive data from being sent out of the network.
- To control network activity based on defined security policies.
- To protect information from theft or leaks.
Let’s walk through the complete setup in this guide. We'll show you how to activate DLP on Bluemax NGF using two approaches:
- Blocking specific file types (such as Word, Excel, PDF).
- Blocking files based on file names or keywords (e.g., filenames containing "confidental").
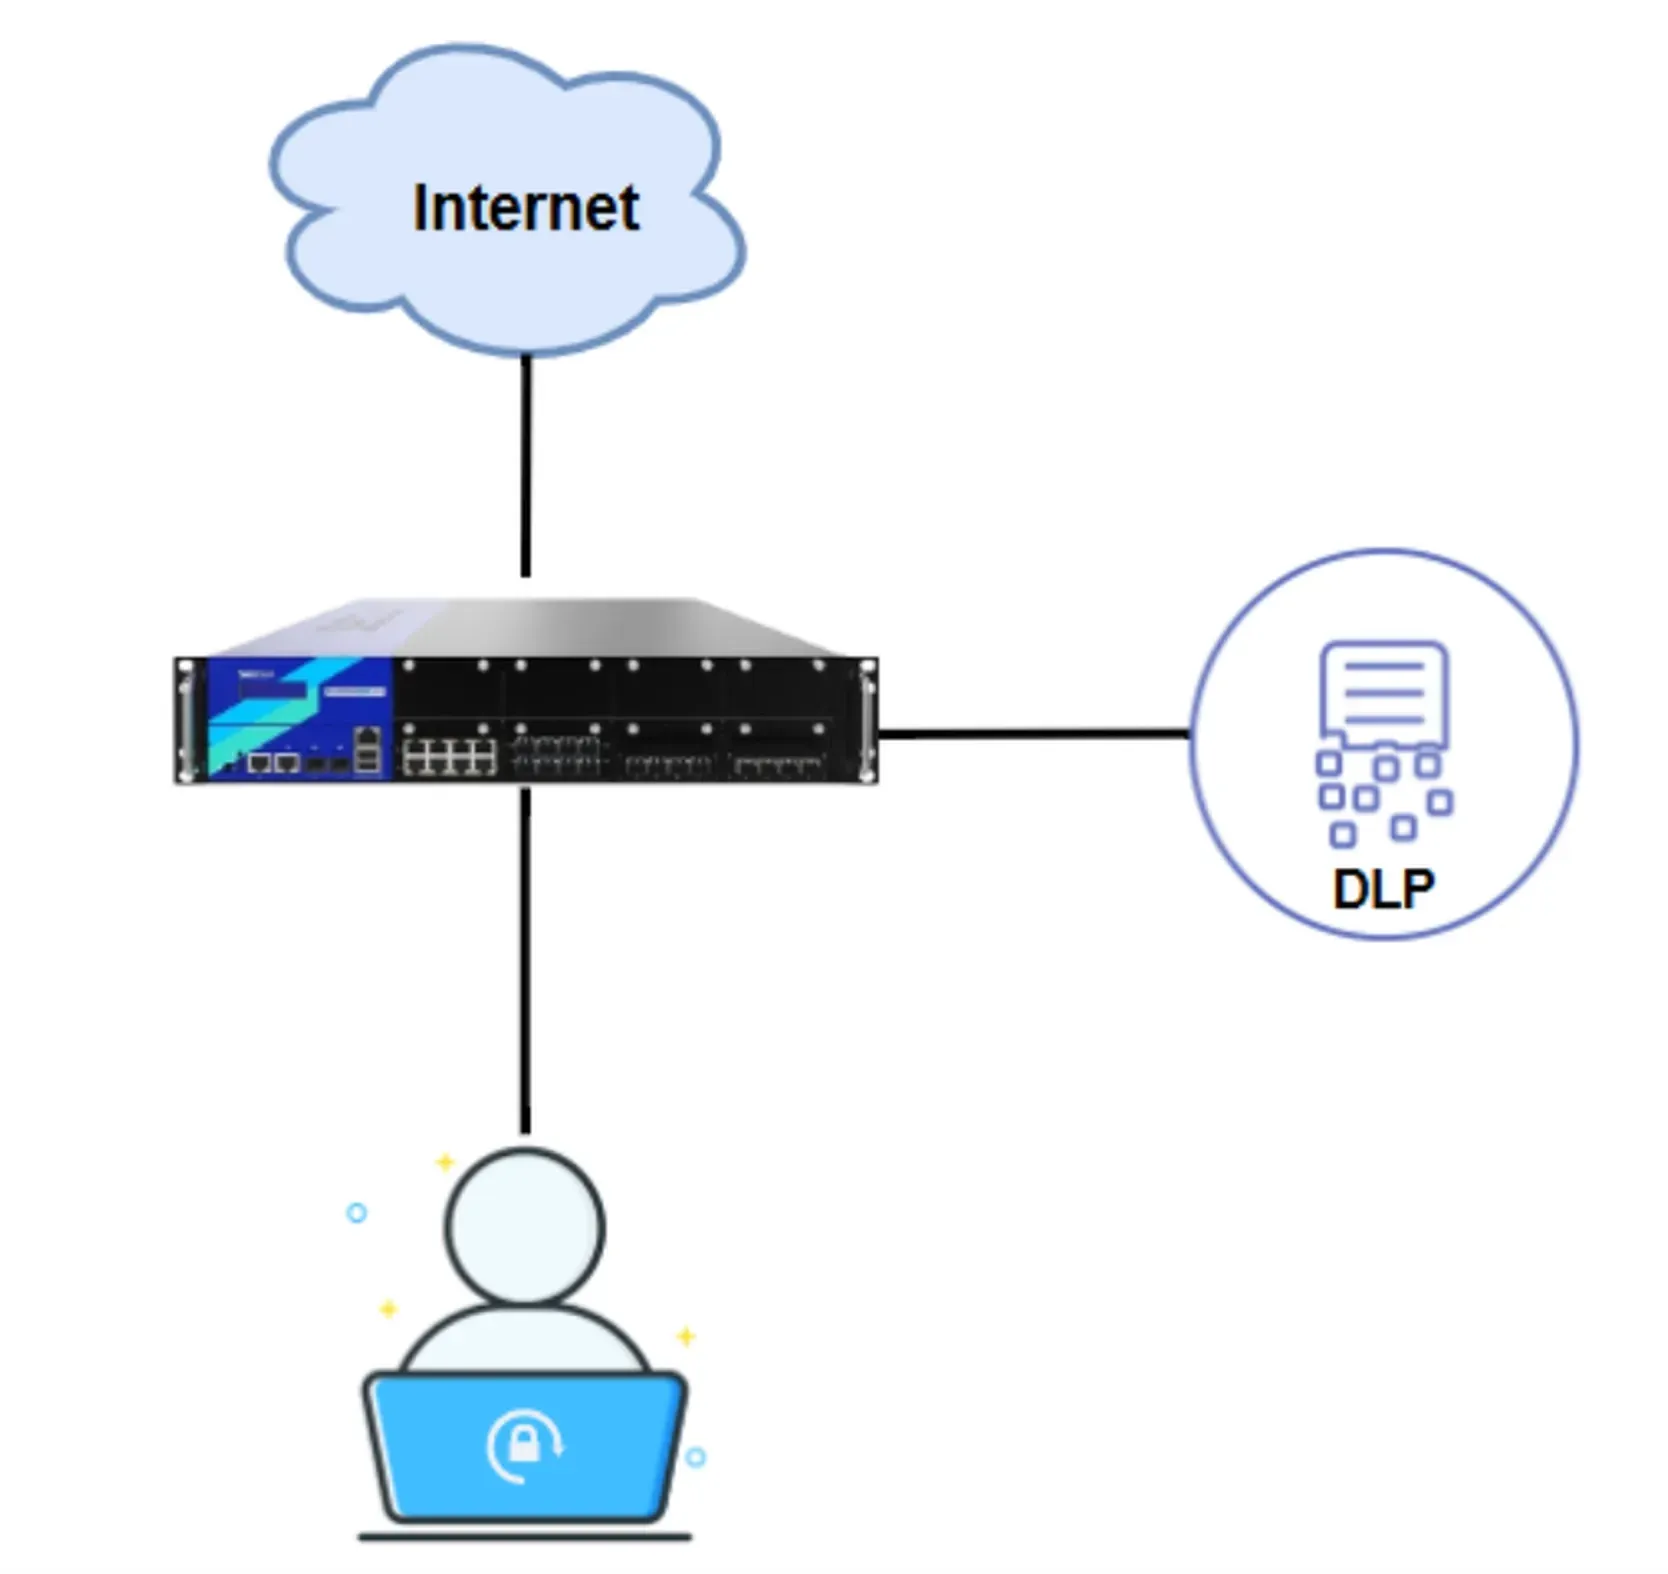
Image 0.1 Topology
1. Login to the Bluemax NGF Web Interface
First, open your browser and log in to the Bluemax NGF web interface using the IP address and an account with configuration access.
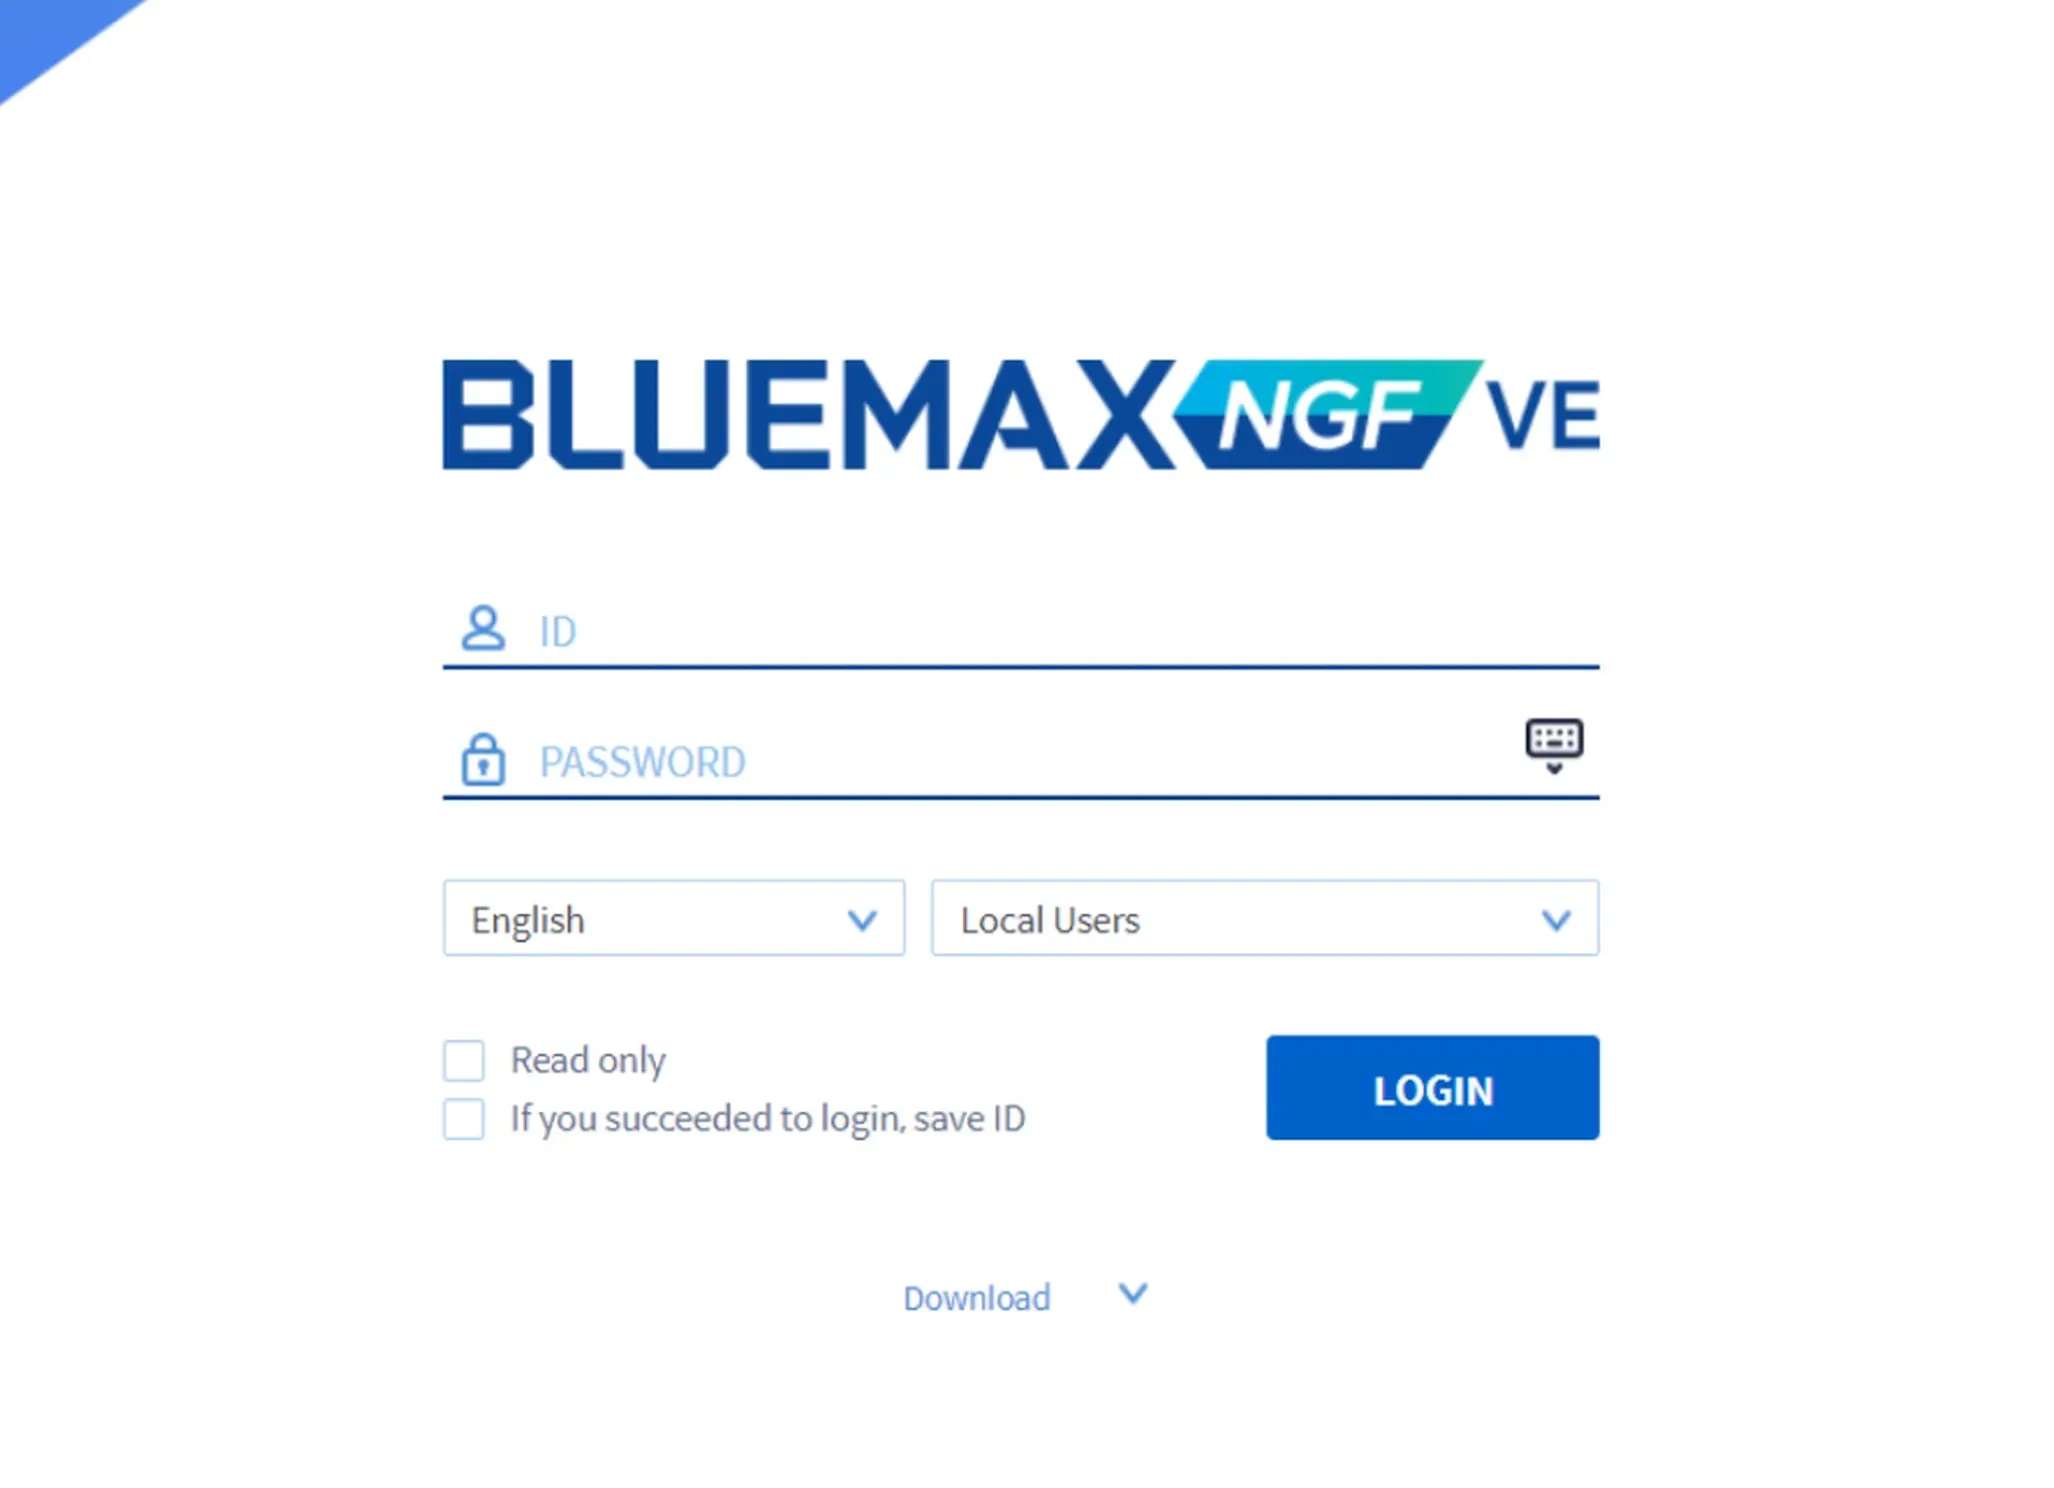
Image 1.1 Bluemax NGF Login Page
2. Configure to Block Specific File Types
1) Navigate to the DLP Profile Menu
Once inside Bluemax NGF, go to:
Object / Security Profile > DLP > DLP Profile
This is where you’ll create a new DLP profile. Click Add (or a similar button) to get started.
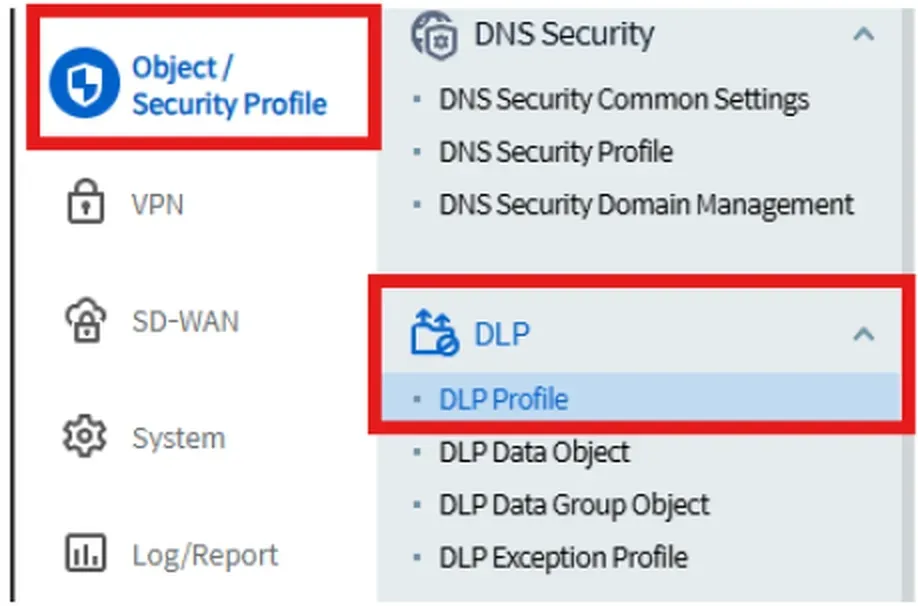
Image 2.1 DLP Profile Menu
2) Create and Enable a DLP Profile
Give the profile a name that fits your needs, like DLP_Block_Doc. Then make sure to tick "Enable" so it can be used.

Image 2.2 Add DLP Profile
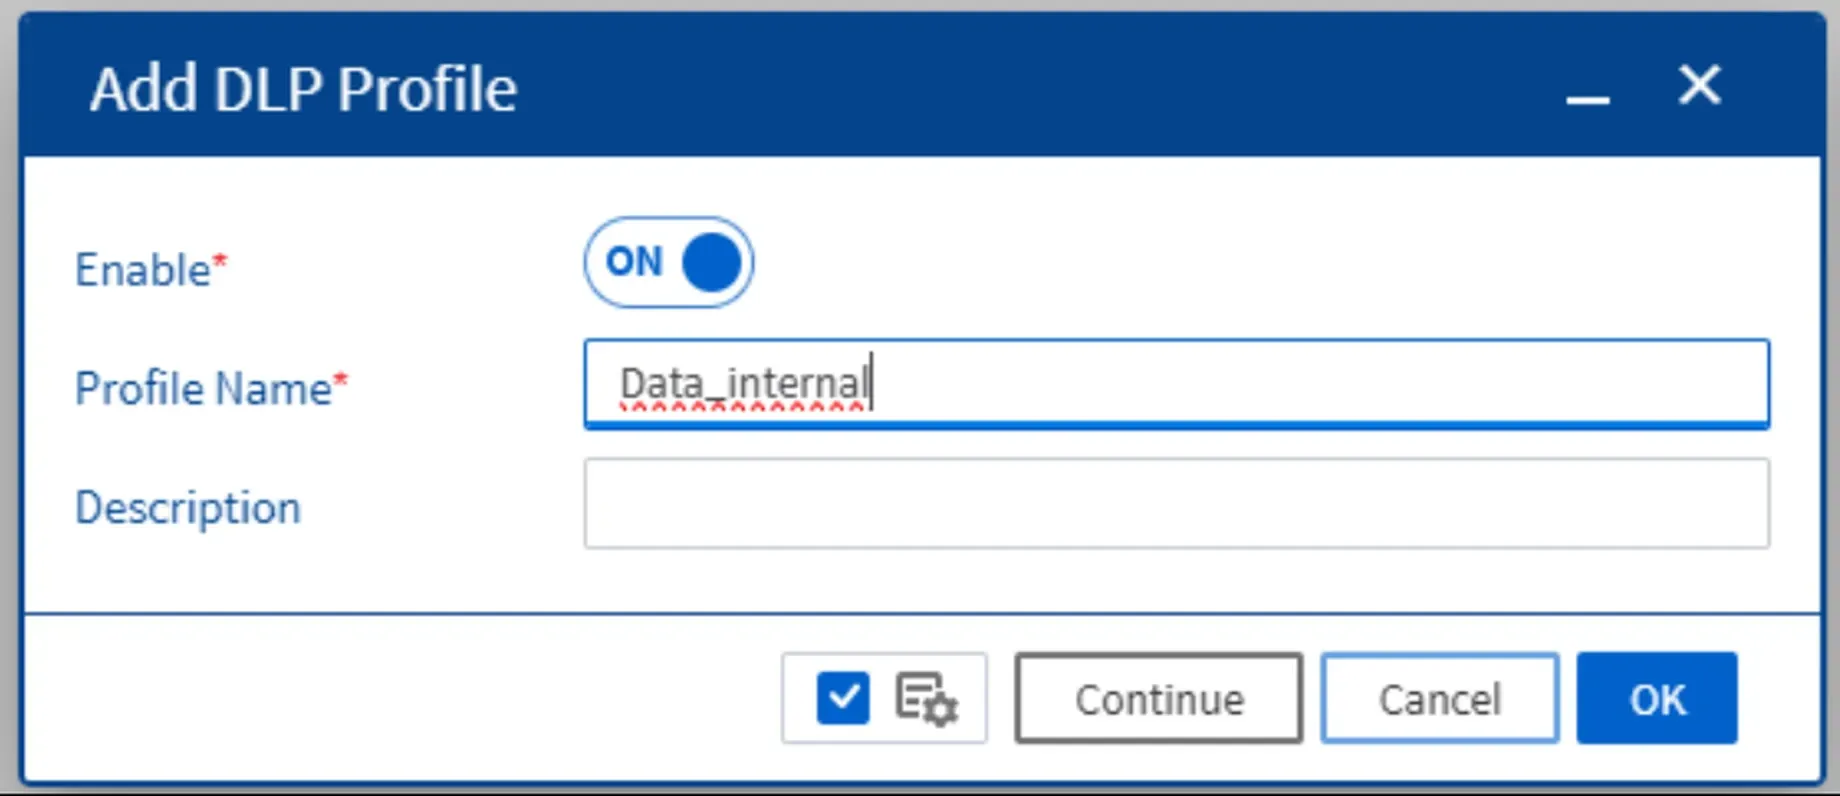
Image 2.3 DLP Profile Details
Once created, it will appear like this below. Simply click on the profile to configure it.
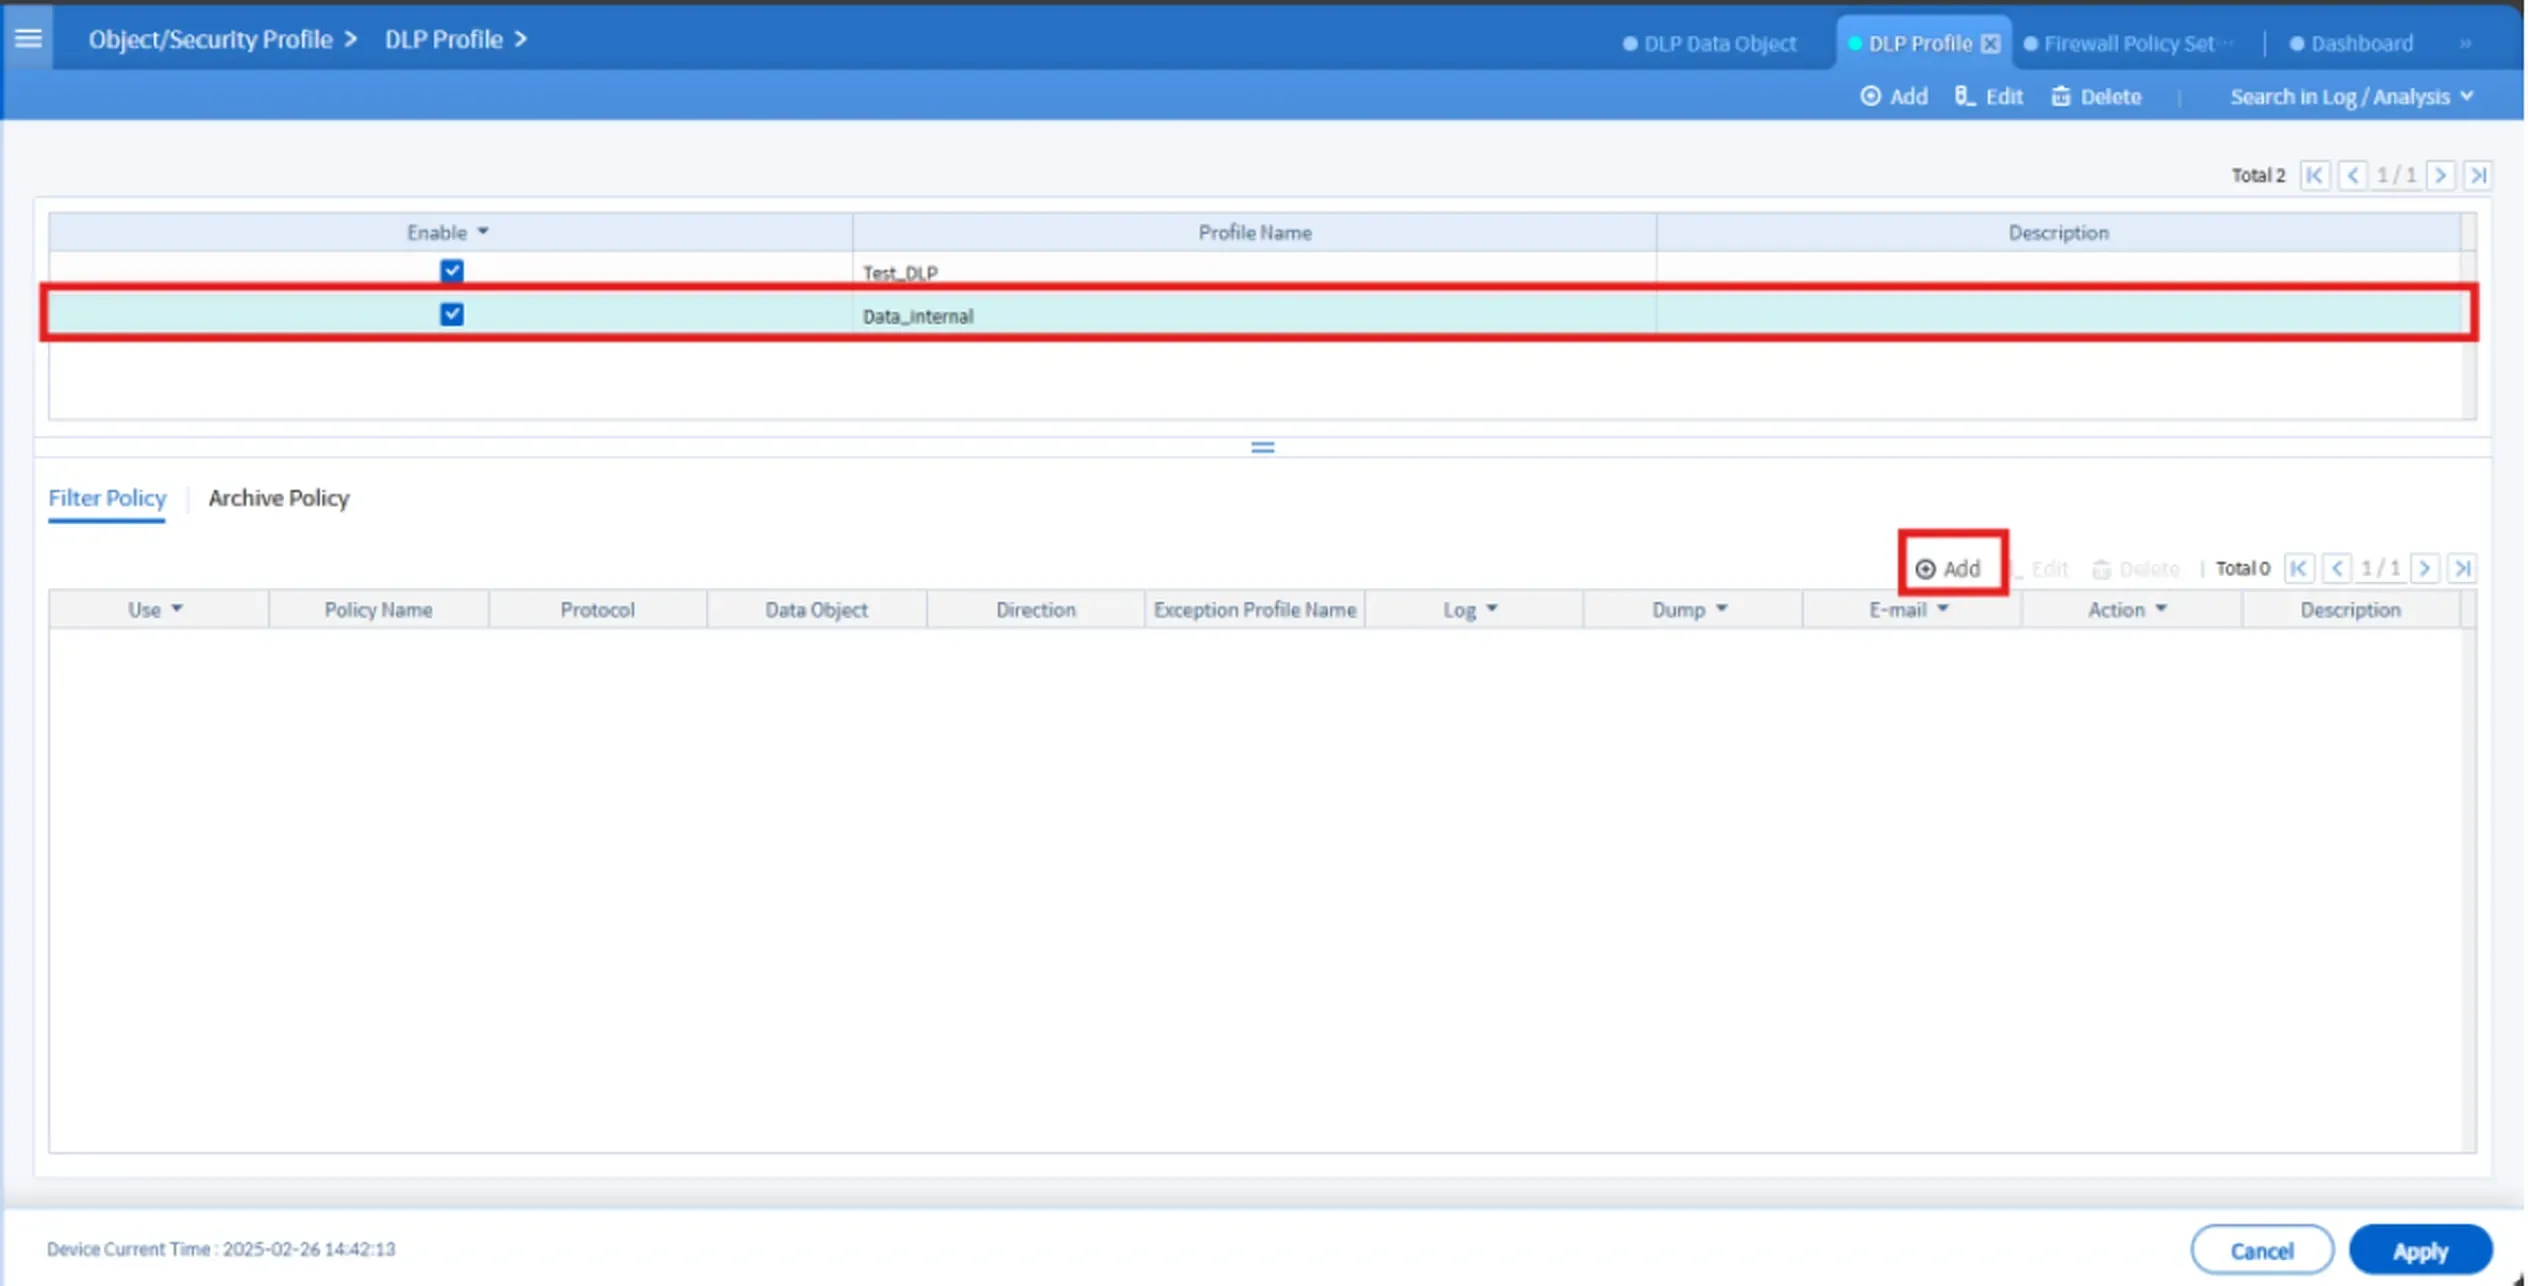
Image 2.4 Created Profile
3) Set the DLP Parameters
Click on the profile you just created and fill in the following fields:
- Policy Name: For example, “Block Word File”
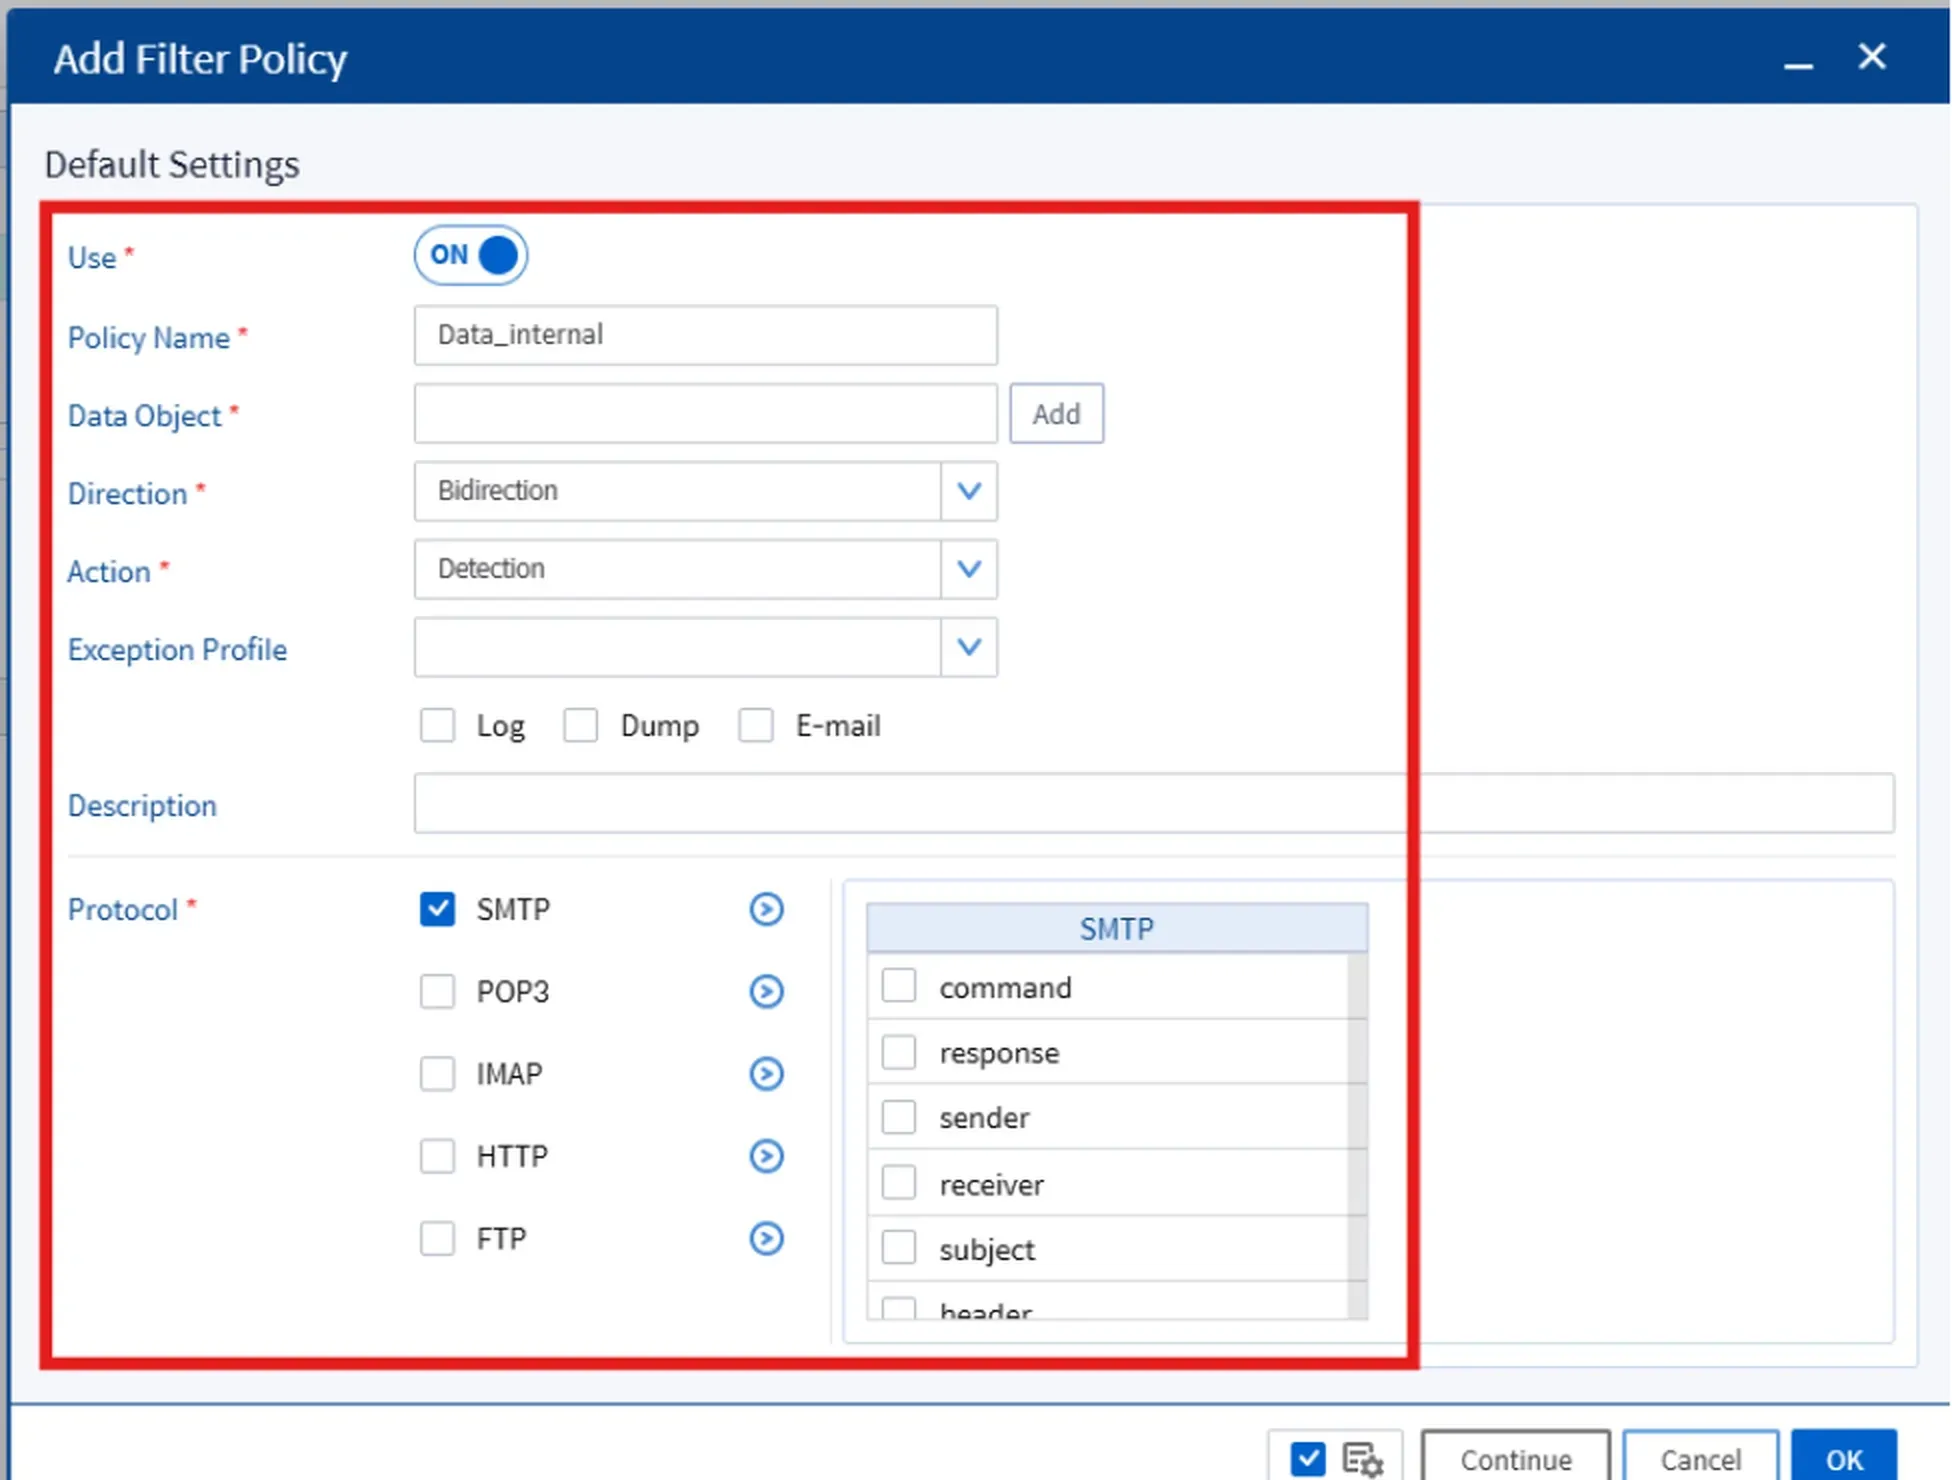
Image 2.5 Parameters
- Data Object: The type of data you want to block, such as
.docdocuments.
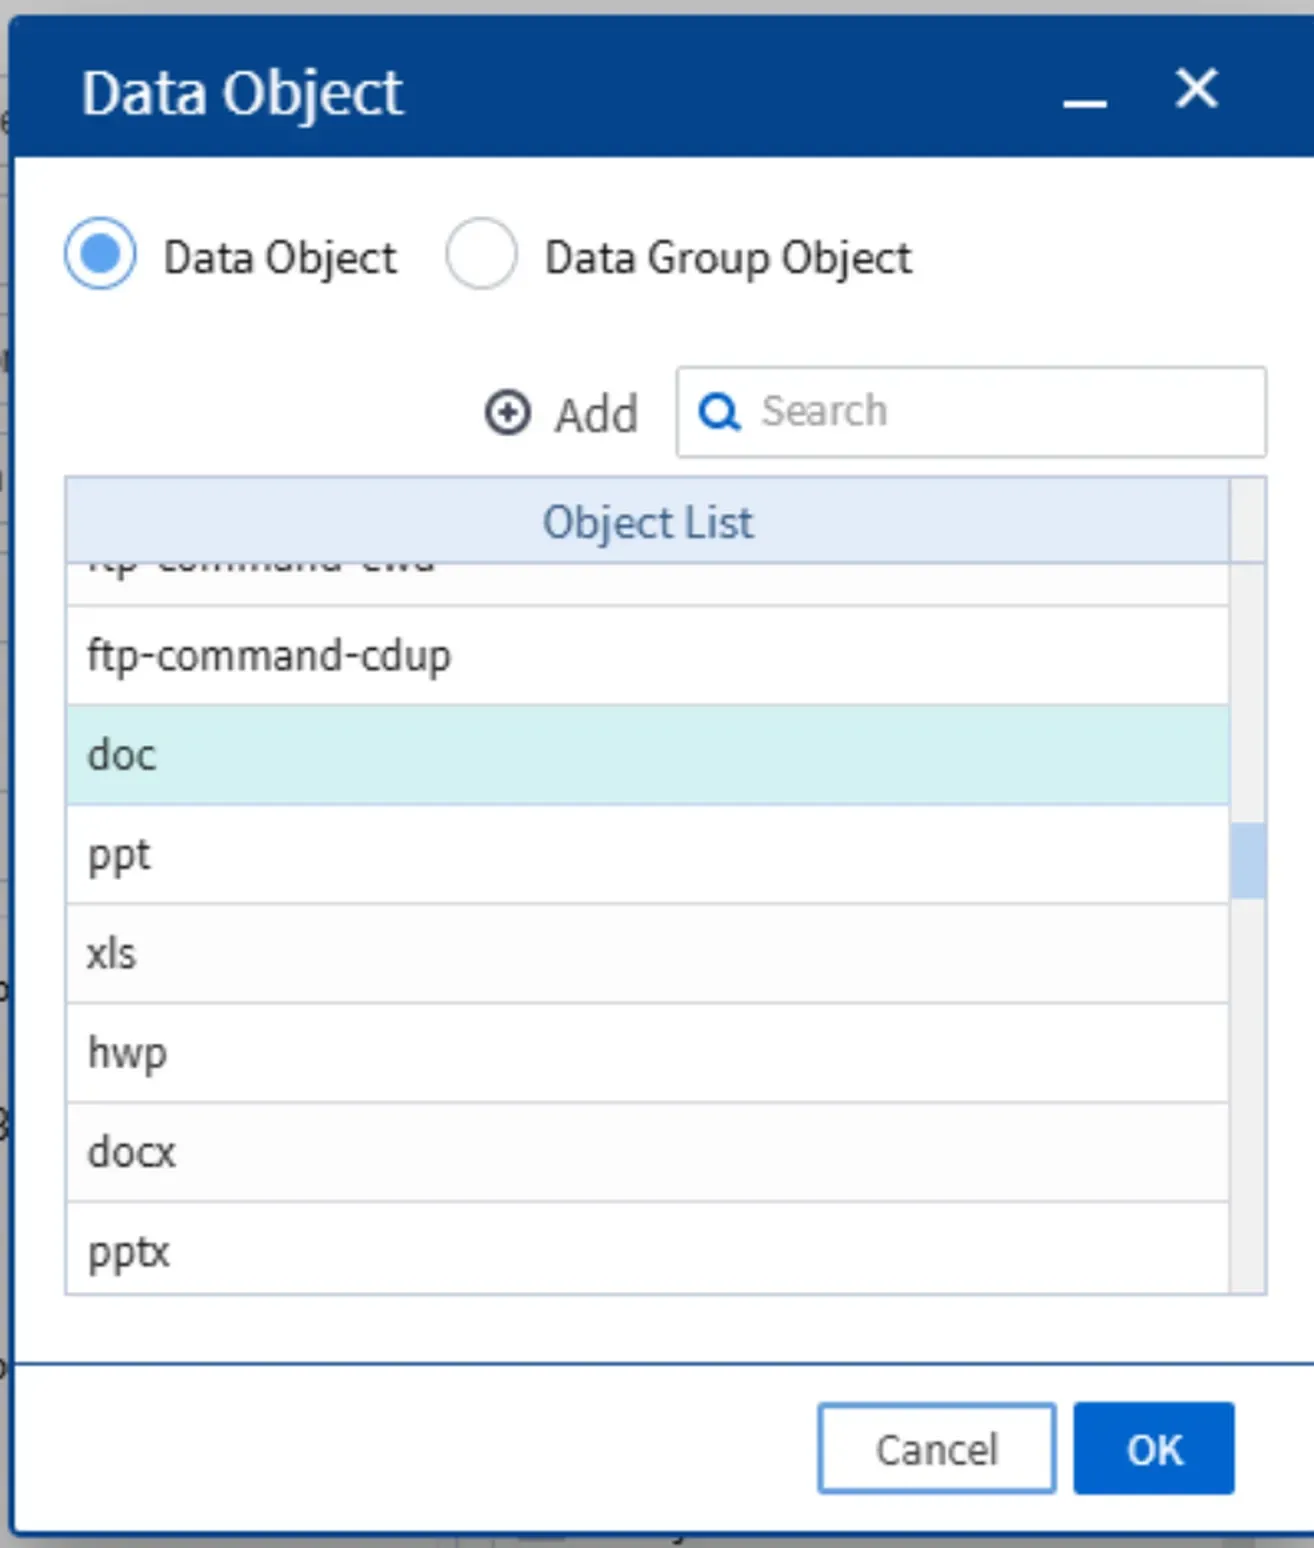
Image 2.6 Data Object
- Direction: Traffic direction—can be Outbound, Inbound, or Bidirectional.
In this case, choose
Bidirectionfor simplicity and complete coverage.
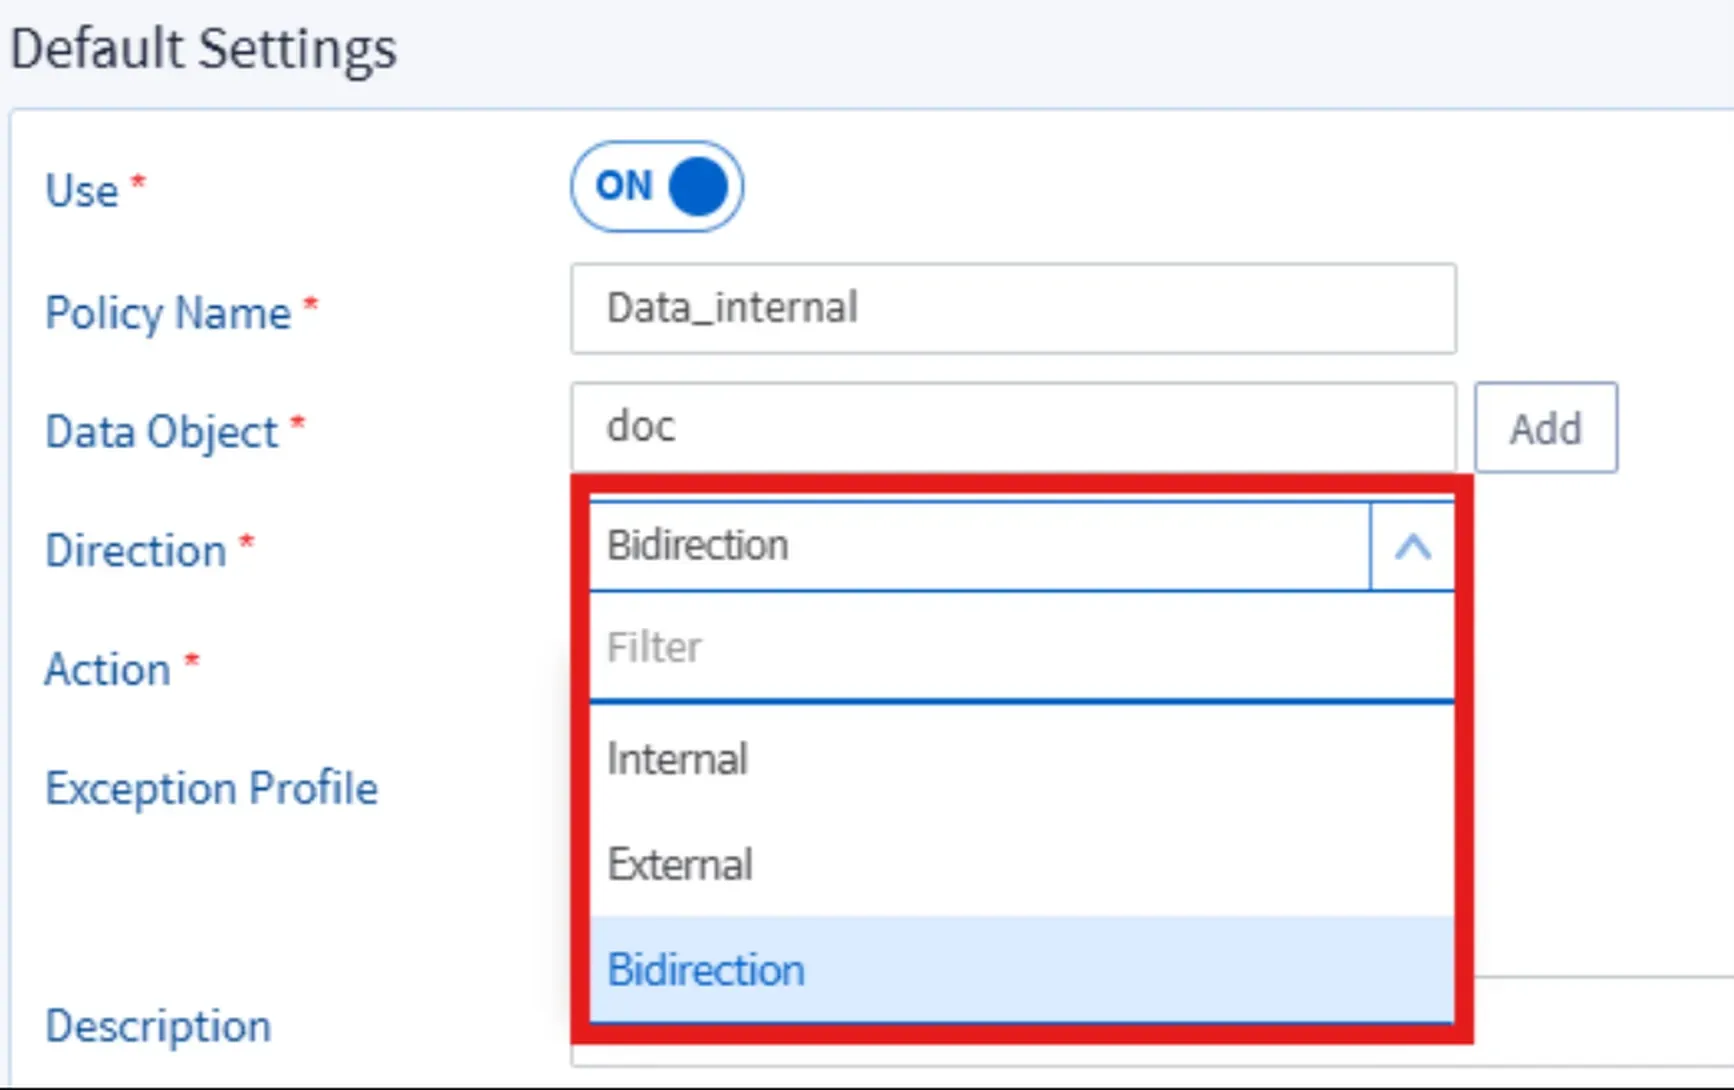
Image 2.7 Direction
- Action: Choose Block to stop the specified data from passing through.
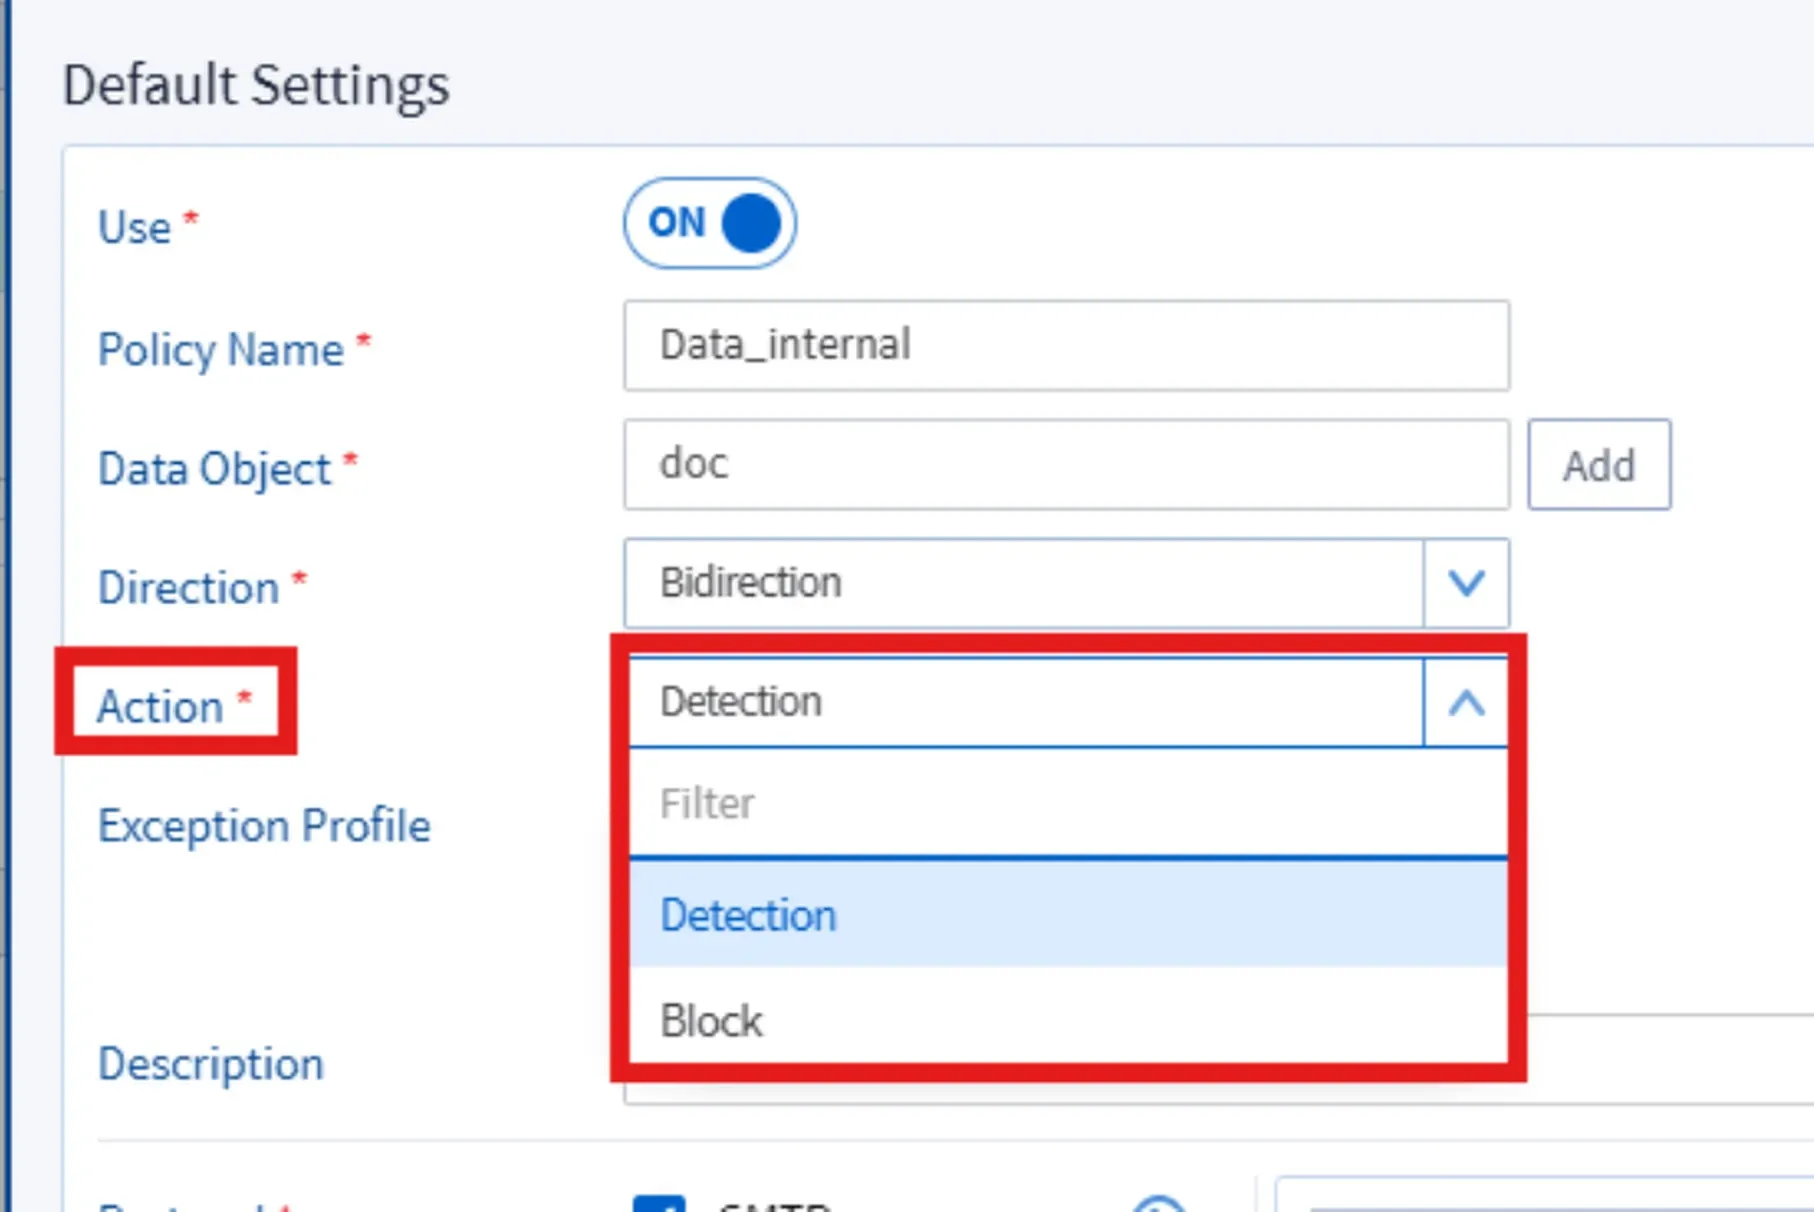
Image 2.8 Action
- Protocol: Select which protocols you want to monitor—selecting all gives full coverage.
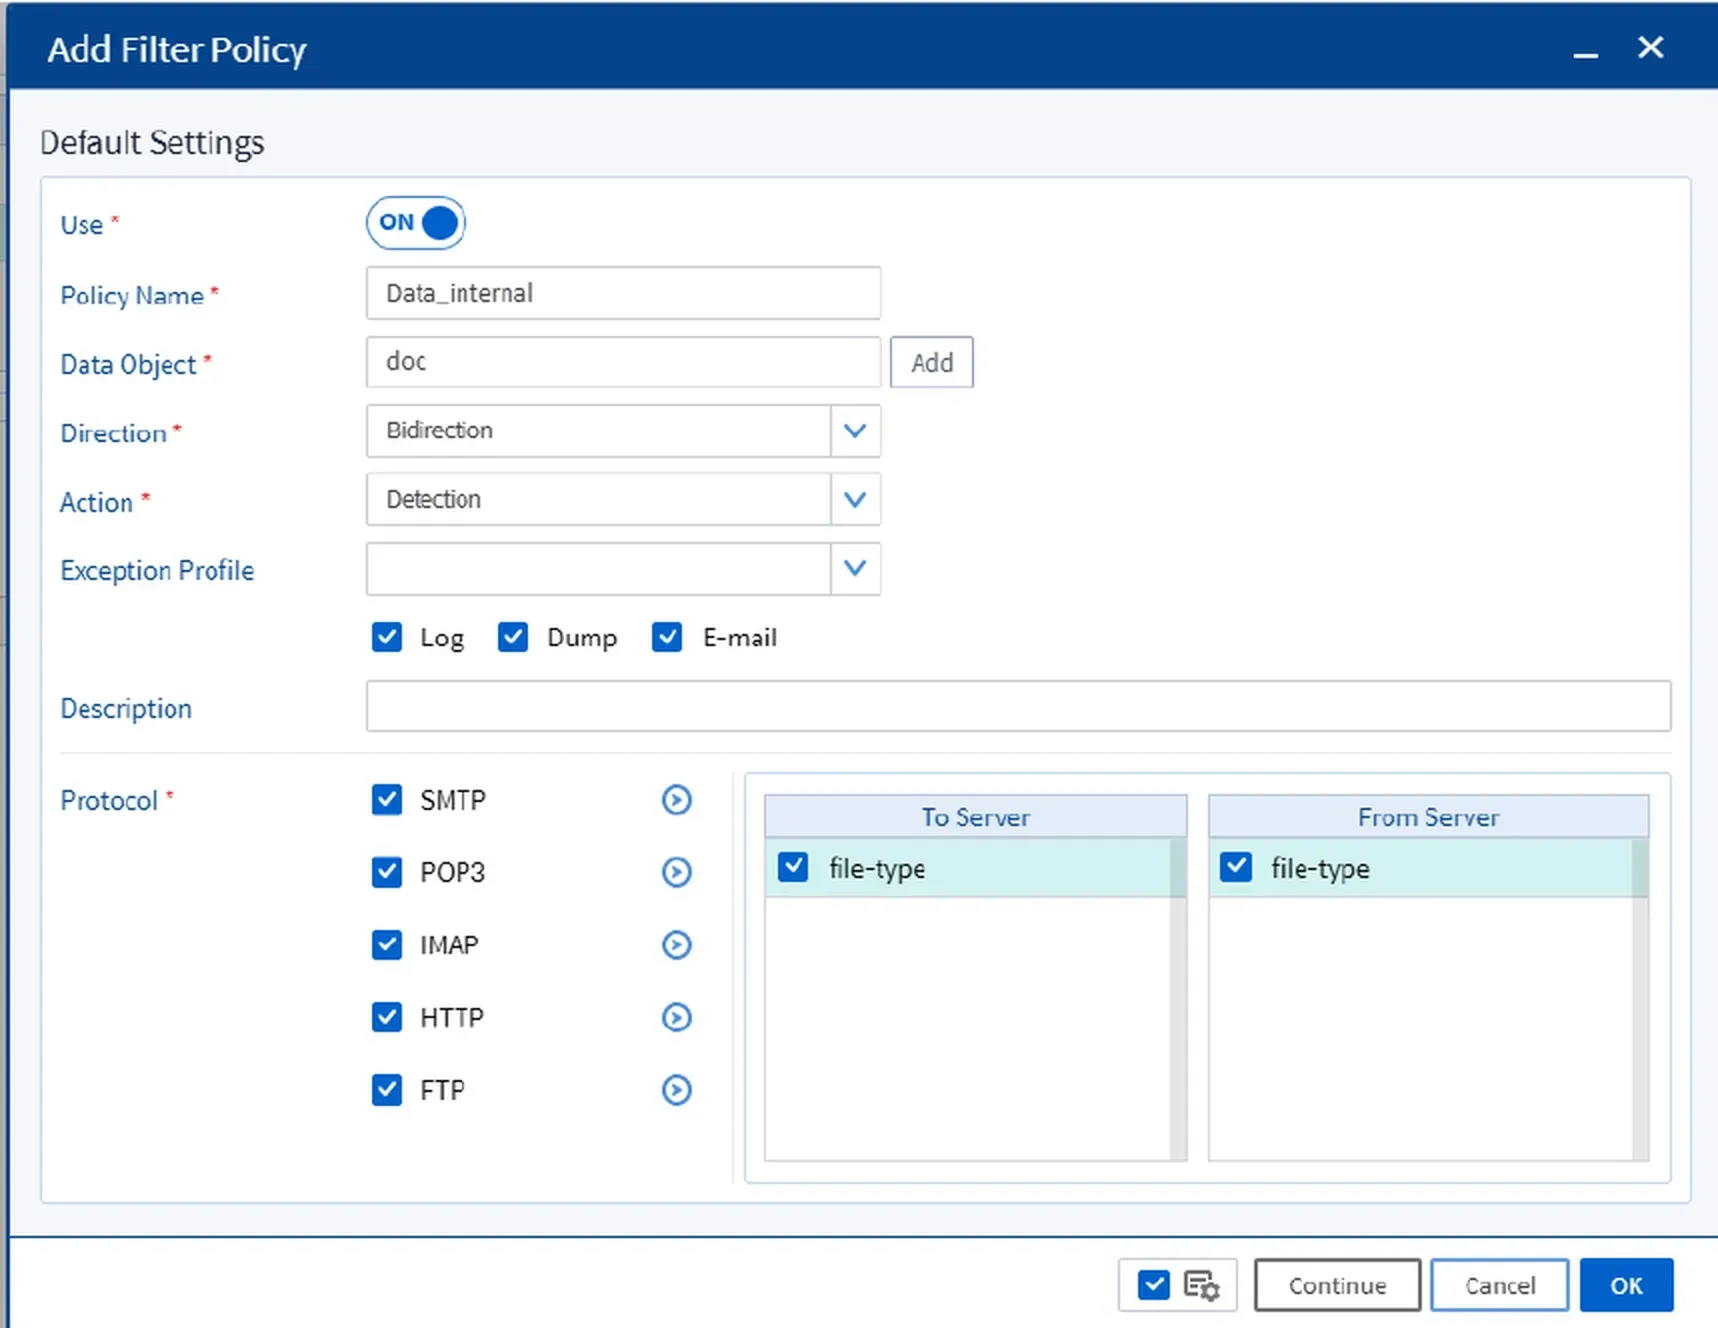
Image 2.9 Protocol
4) Activate the Profile
After completing the settings, make sure to check the Use box to activate the profile.

Image 2.10 Activate Profile
3. Configure to Block Specific File Names
1) Navigate to the DLP Data Object Menu
Before creating a DLP profile, first define the data object. Go to:
Object/Security Profile > DLP > DLP Data Object
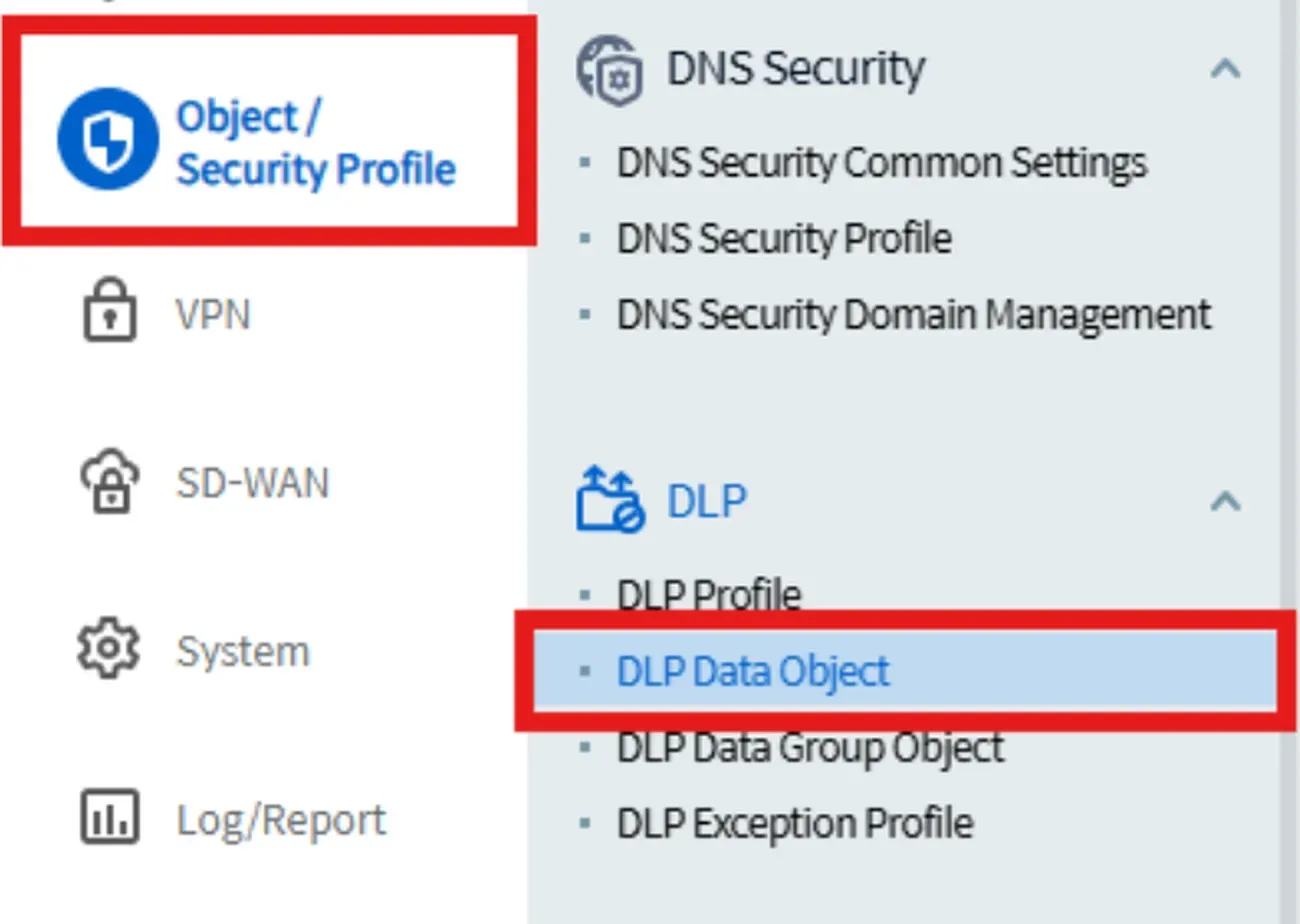
Image 3.1 DLP Menu
Before building the profile, decide what data should be blocked from leaving the network. Steps:
- Click
Add

Image 3.2 Add Object
Fill out the following parameters:
- Enable: Check
- Data Object Name: e.g.,
confidental_data - Data Type: Choose Character Strings
- Data Value: e.g.,
confidentalor any sensitive keyword
When done, click
OKand thenApplyto save.
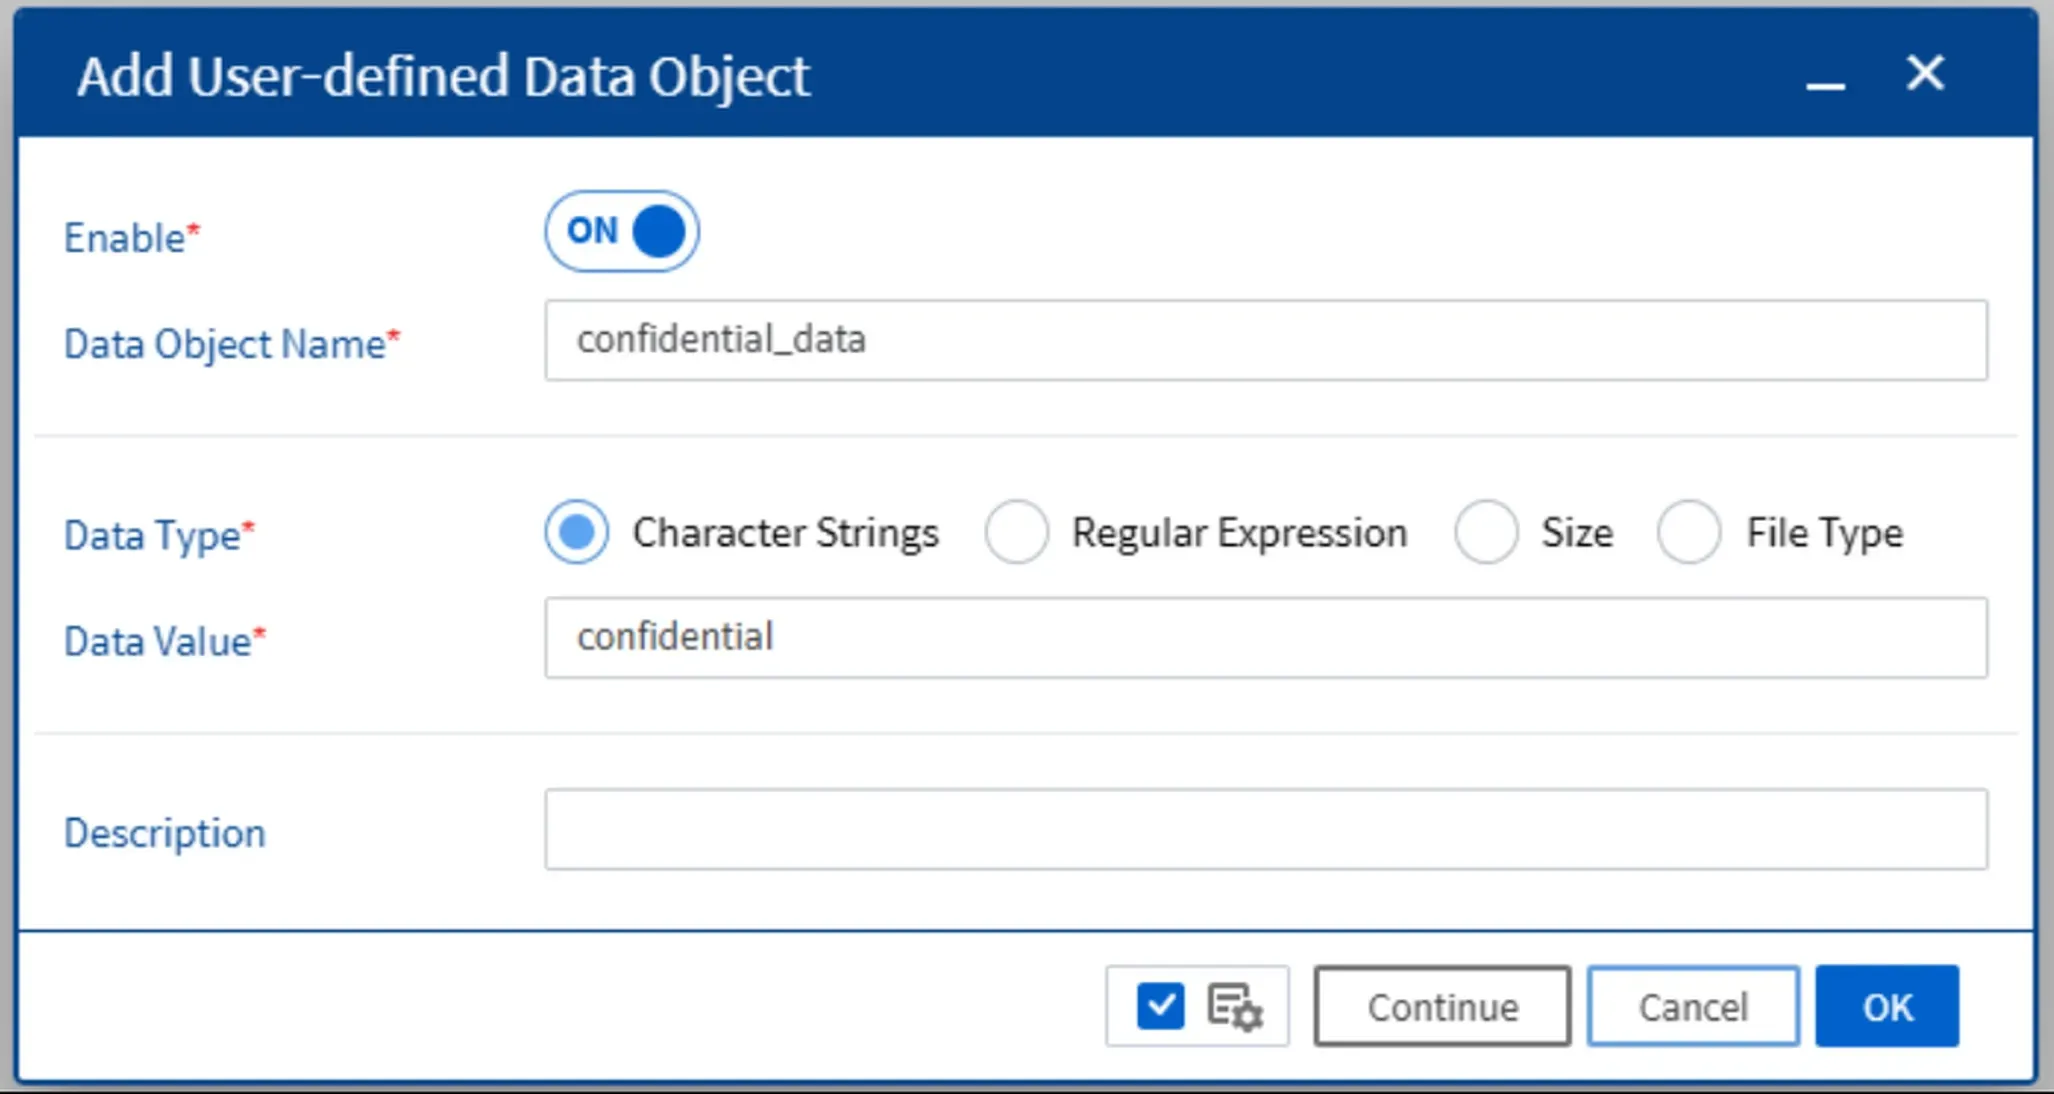
Image 3.3 Data Object Parameters

Image 3.4 Result
Tip: You can use regex for more flexible detection.
2) Create a DLP Profile
Now that the object is ready, move on to creating the DLP profile:
- Click
Addto create a new DLP Profile.

Image 3.5 Add DLP Profile
- Enable the profile and give it a name.

Image 3.6 Profile Details
Click the profile, go to Filter Policy, and enter the following:
- Use: On
- Policy Name: e.g.,
Data_internal - Data Object: Select the one you just created
- Direction: Bidirection
- Action: Block
- Protocol: Choose as needed (or all for full coverage)
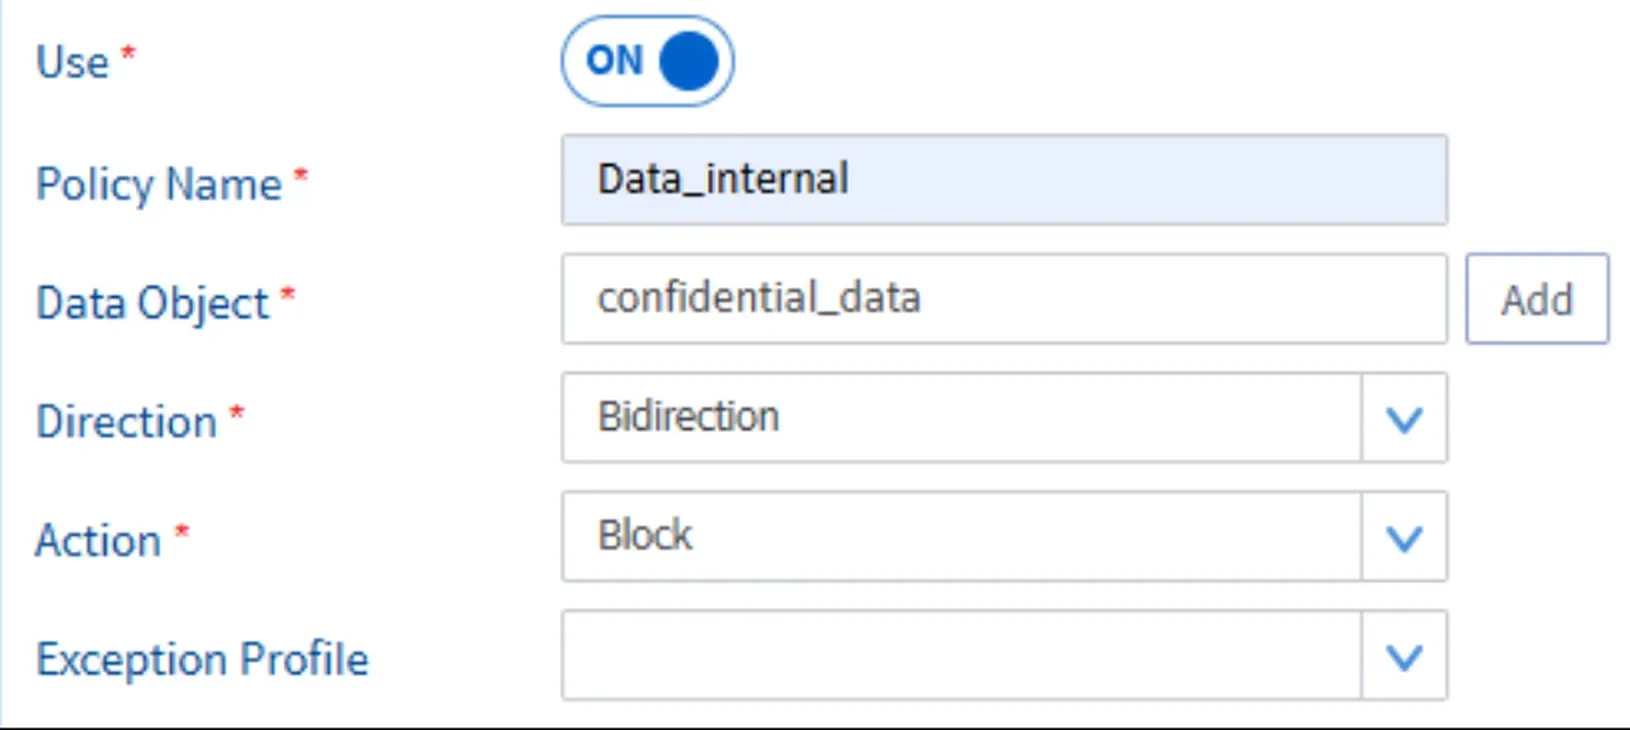
Image 3.7 Data Object
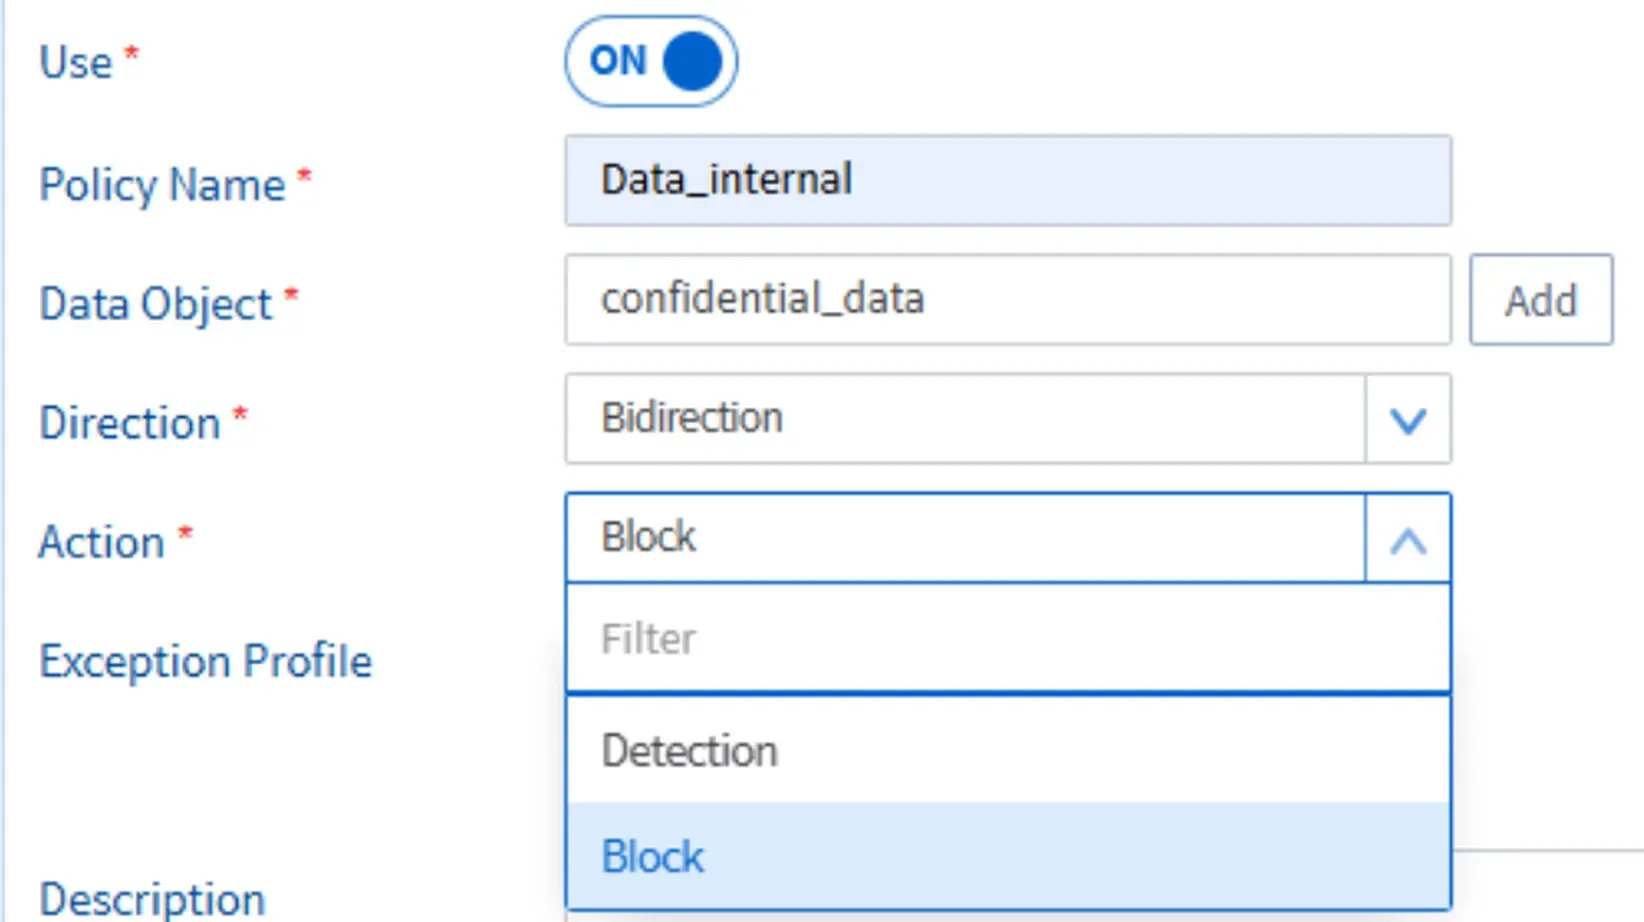
Image 3.8 Filter Policy Parameters
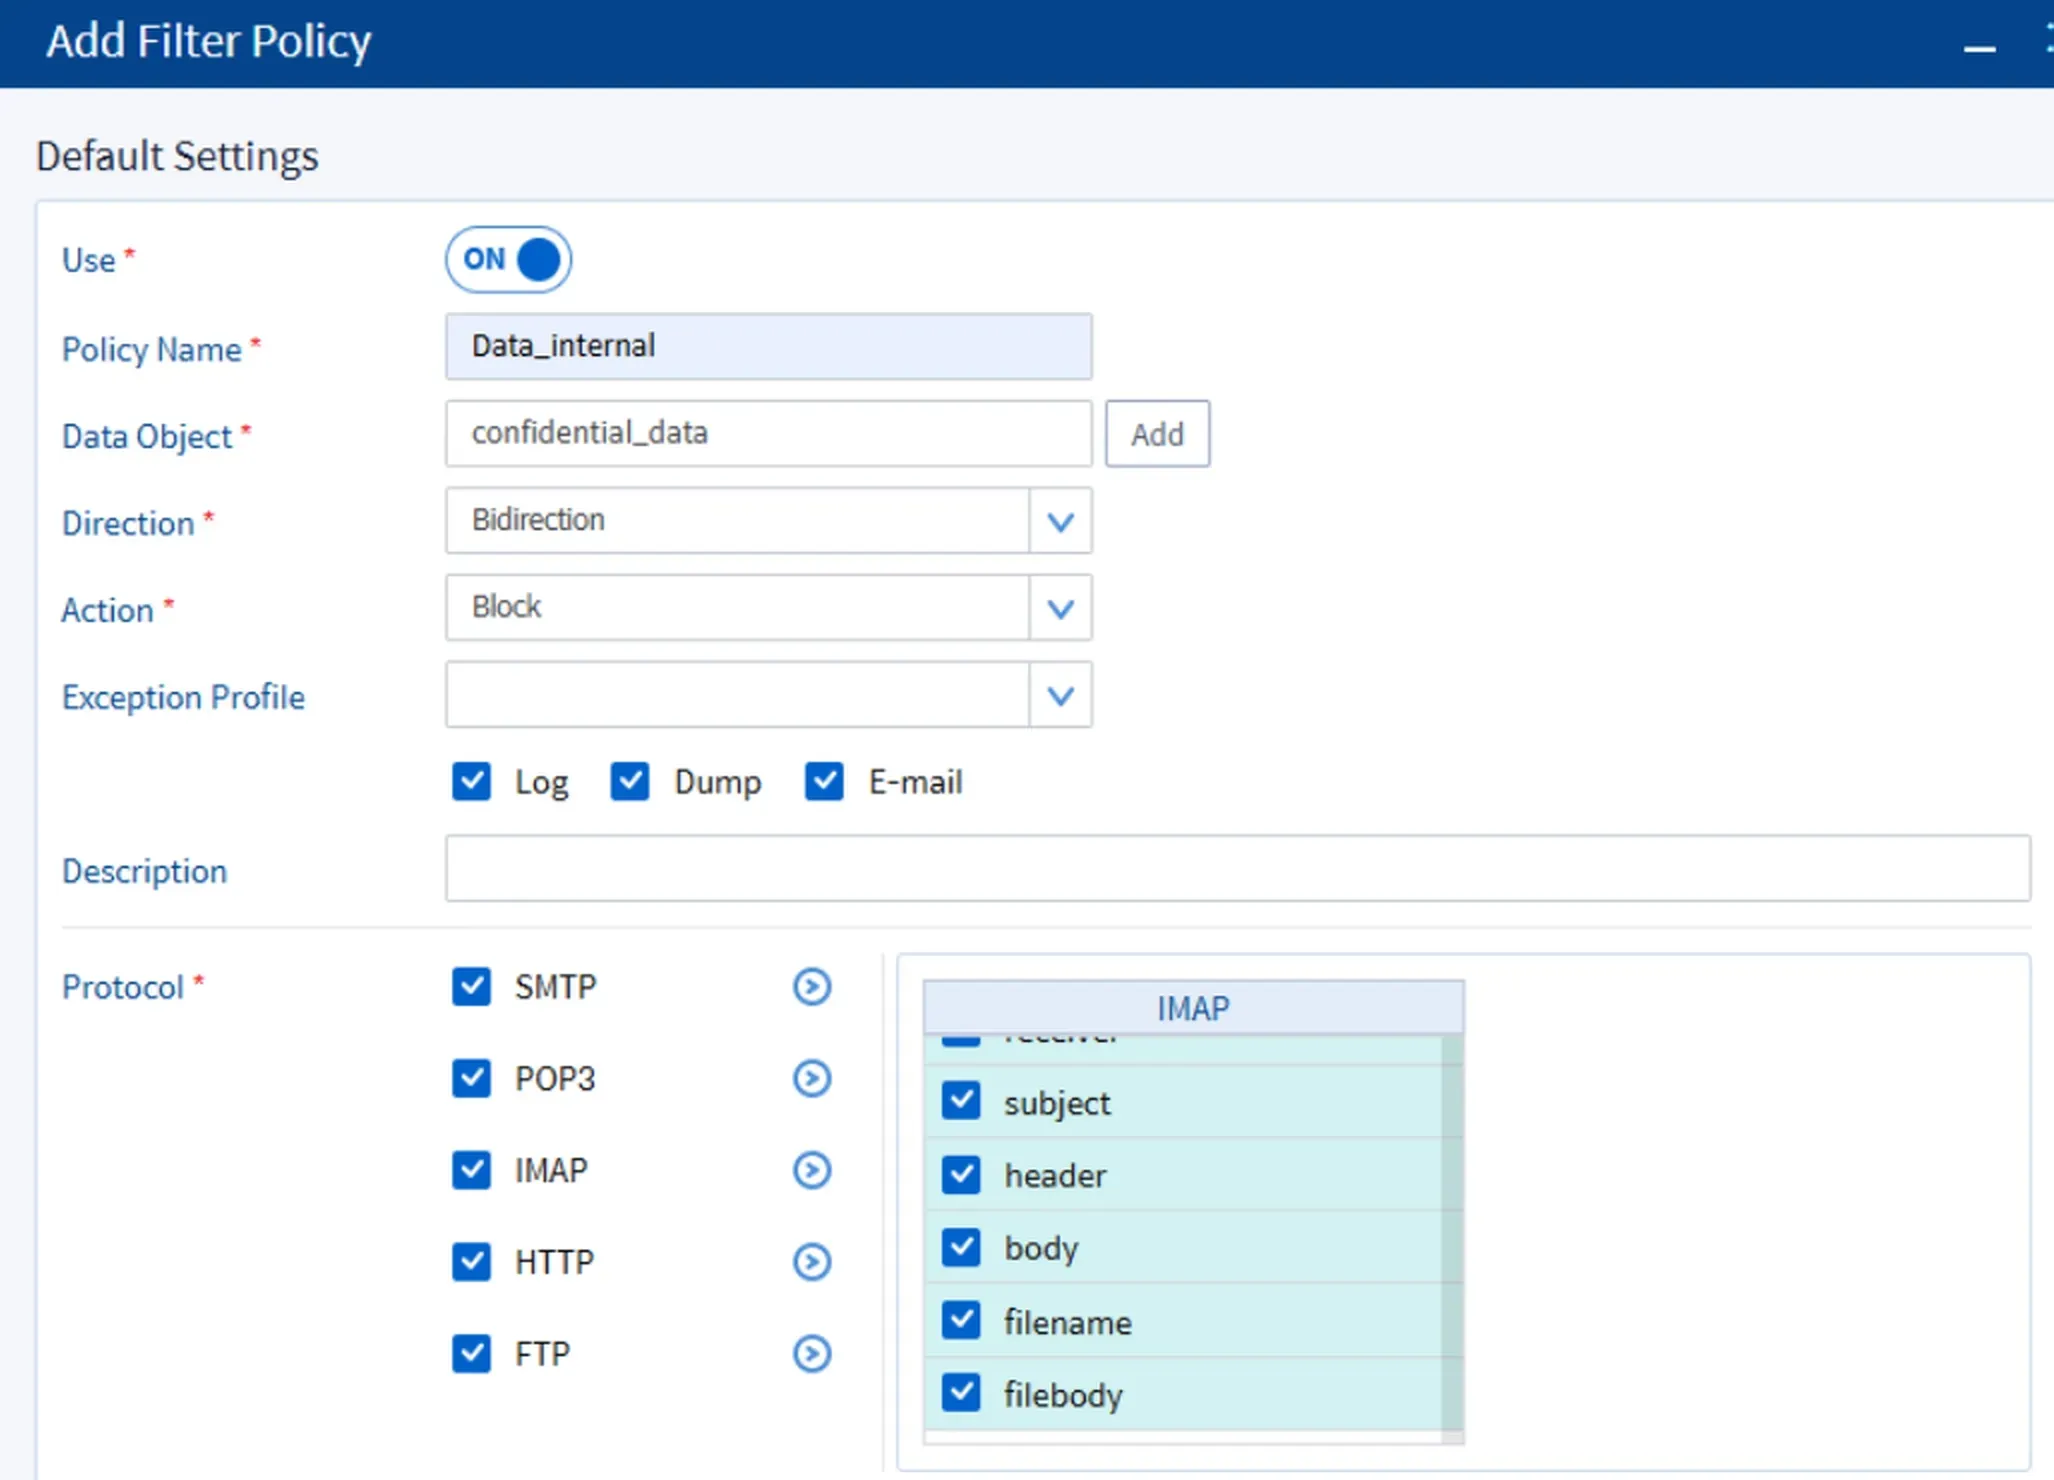
Image 3.9 Protocol Selection
- Once complete, don’t forget to check
Useso the profile becomes active.
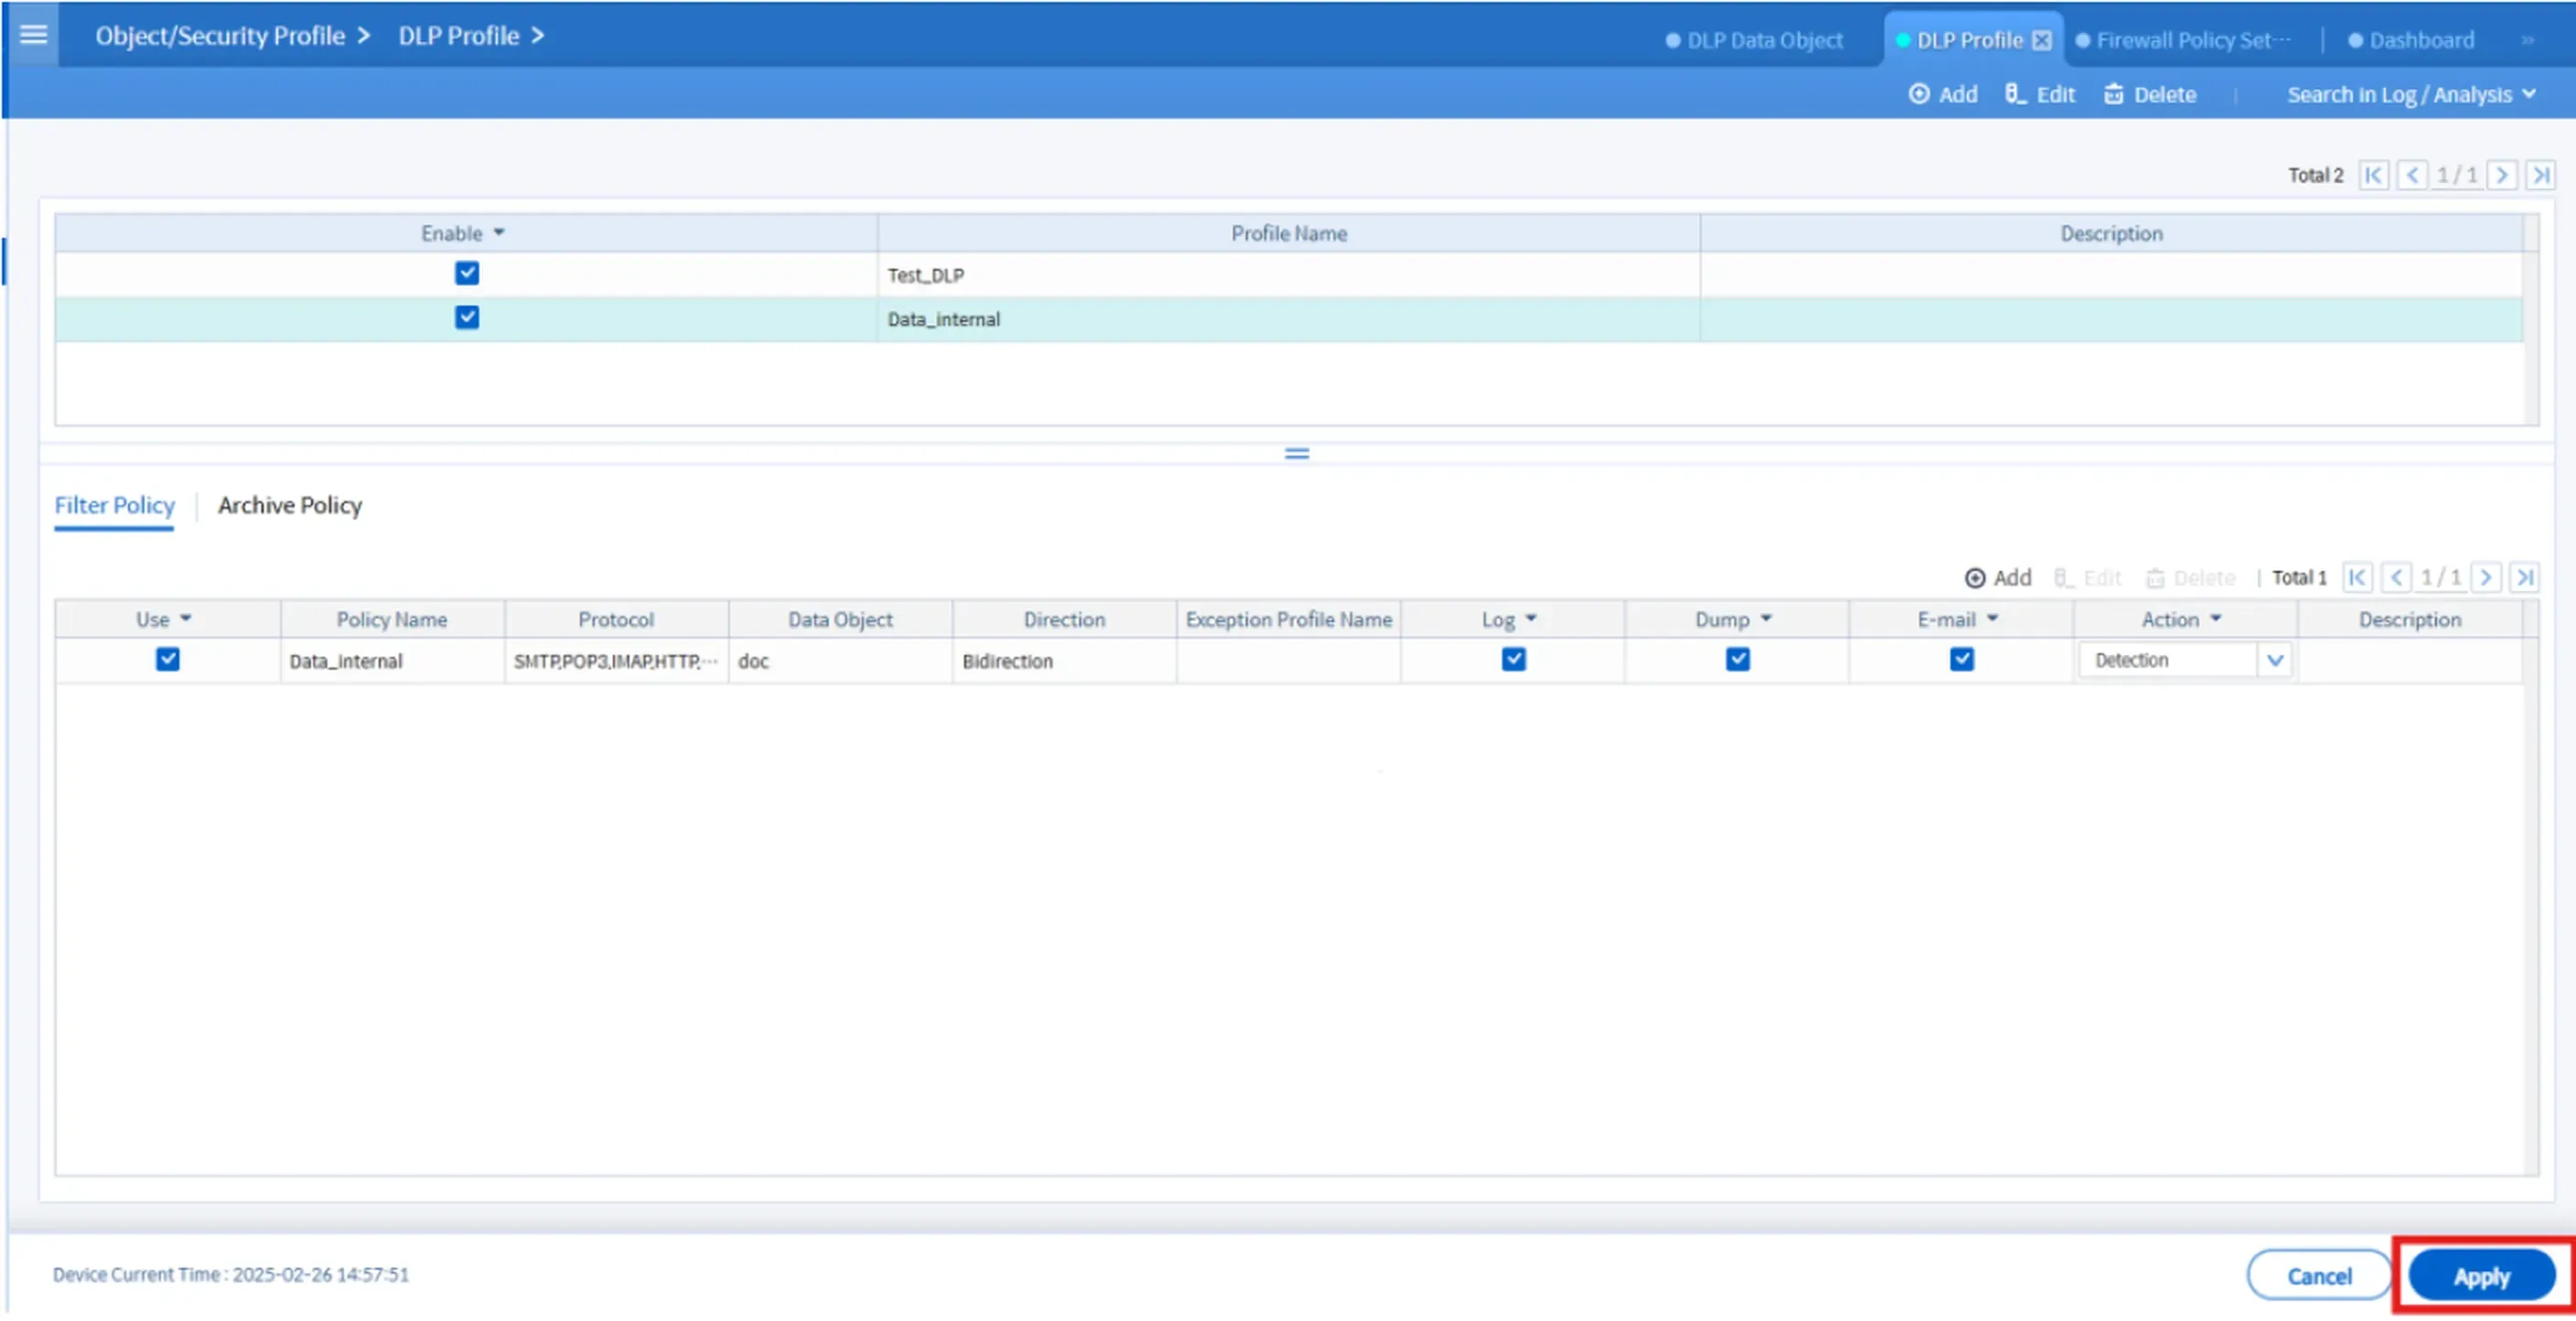
Image 3.10 Apply Policy
4. Link DLP Profile to Firewall Policy
Finally, go to Security Policy > Firewall > Firewall Policy Settings, and attach the DLP profile you created to the active firewall policy. This ensures all traffic will be monitored by the DLP engine.
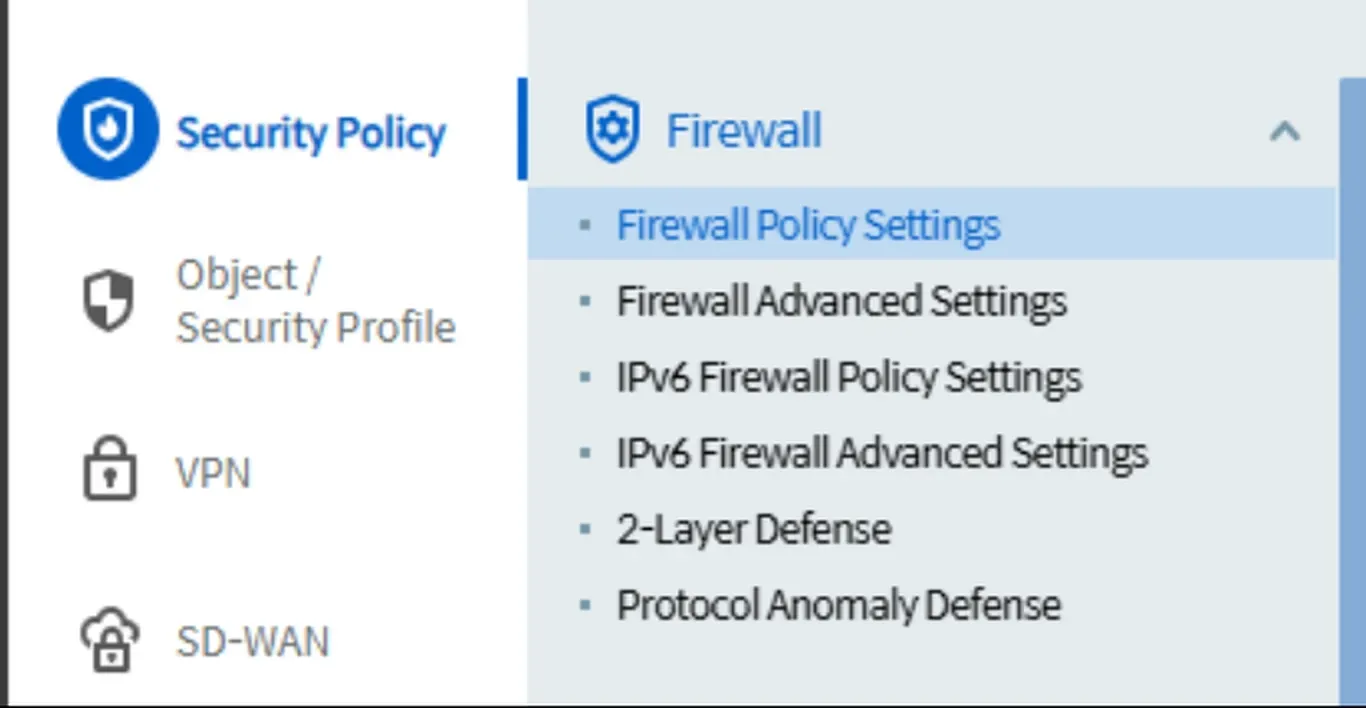
Image 4.1 Security Policy Menu
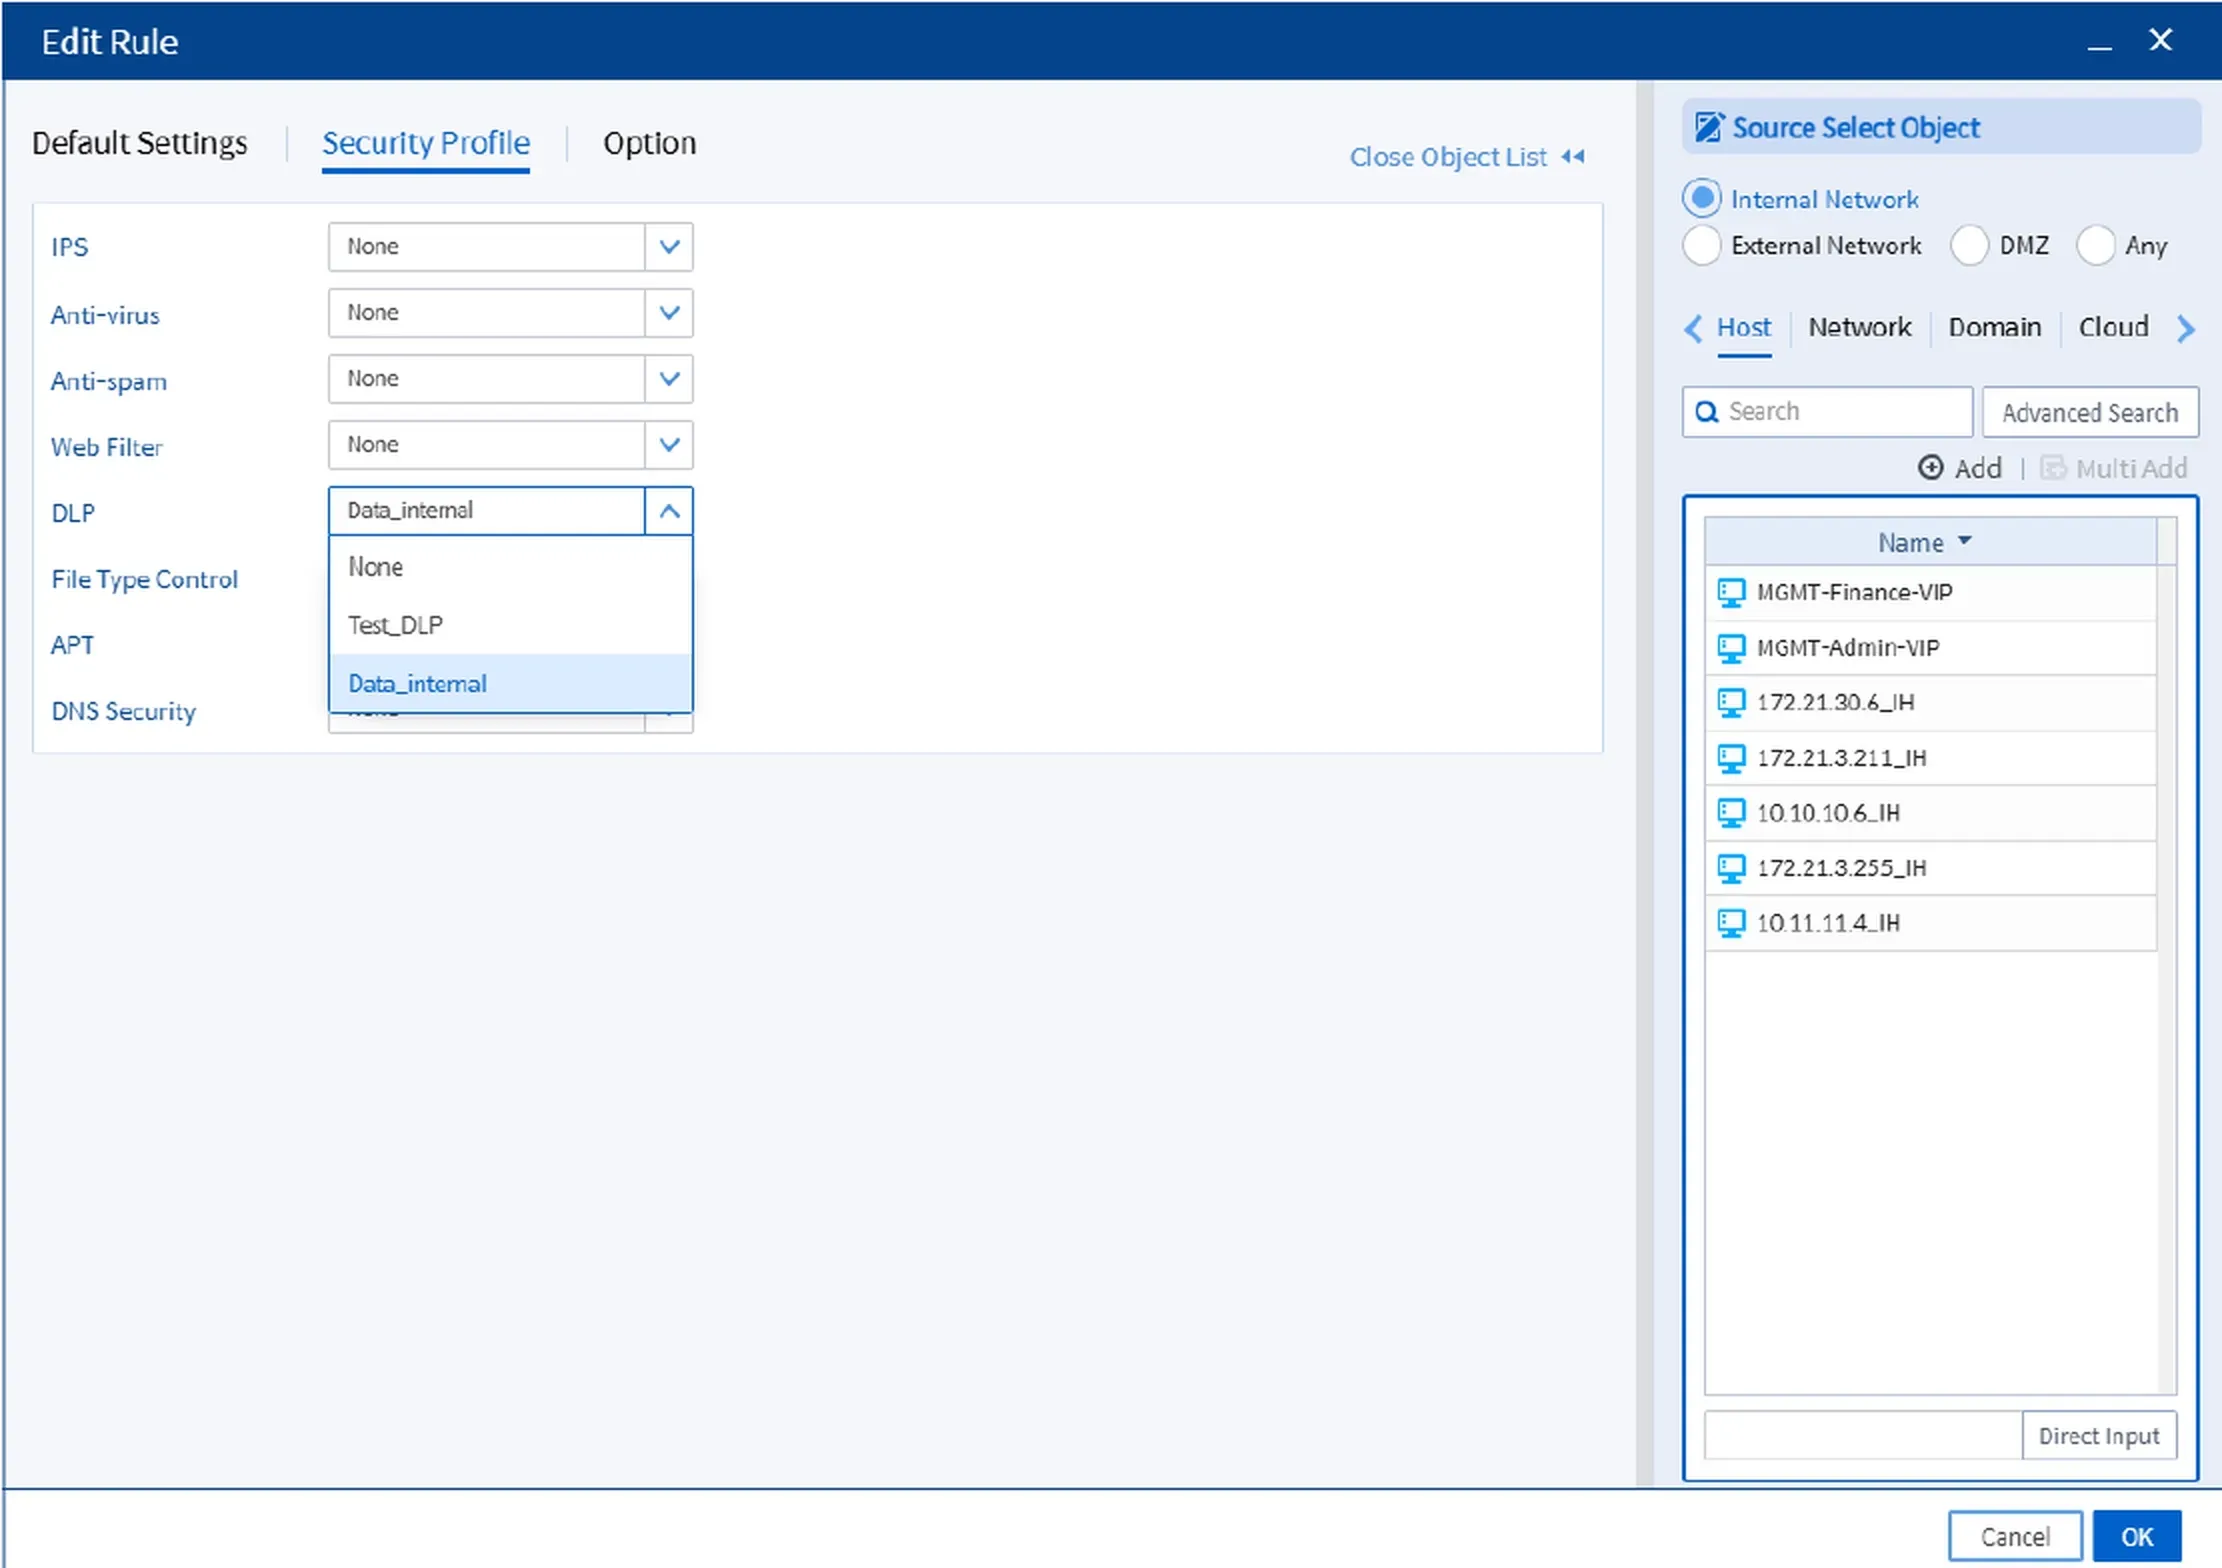
Image 4.2 Attach Firewall

Image 4.3 Result
Conclusion
By enabling DLP on the Bluemax NGF firewall, you can better protect your company’s sensitive data from internal or external threats. The setup process is straightforward: define the profiles, specify which data needs to be monitored, and attach the profile to your firewall policy. Don’t forget to test everything to make sure it’s working as expected.
Need more information or want to consult about mobile app security or network protection? Reach out to our team here.
Last Updated
August 11, 2025
Category
Data Protection , SECUI Configuration
Share This
On This Page
Contact us for
Free Consultation!
Share your challenges, and we'll provide the best solutions for your business, Connecting with us is as simple as clicking a button, and let us come to you.