DNS Configuration Guide in SECUI Bluemax Next Generation Firewall
In any network system, the Domain Name System (DNS) plays a crucial role in connecting users to websites or services by their domain names. Without DNS, accessing the internet would be far less convenient since you’d need to remember numeric IP addresses for every site.
In a Next Generation Firewall (NGFW) such as SECUI Bluemax NGF, configuring DNS isn’t just about enabling domain resolution. It also supports critical functions like logging, system updates, and security features that rely on connections to external domains.
This guide walks you through the process step by step, from accessing the firewall dashboard, adding DNS server IPs, to testing connectivity so you can be confident everything runs smoothly.
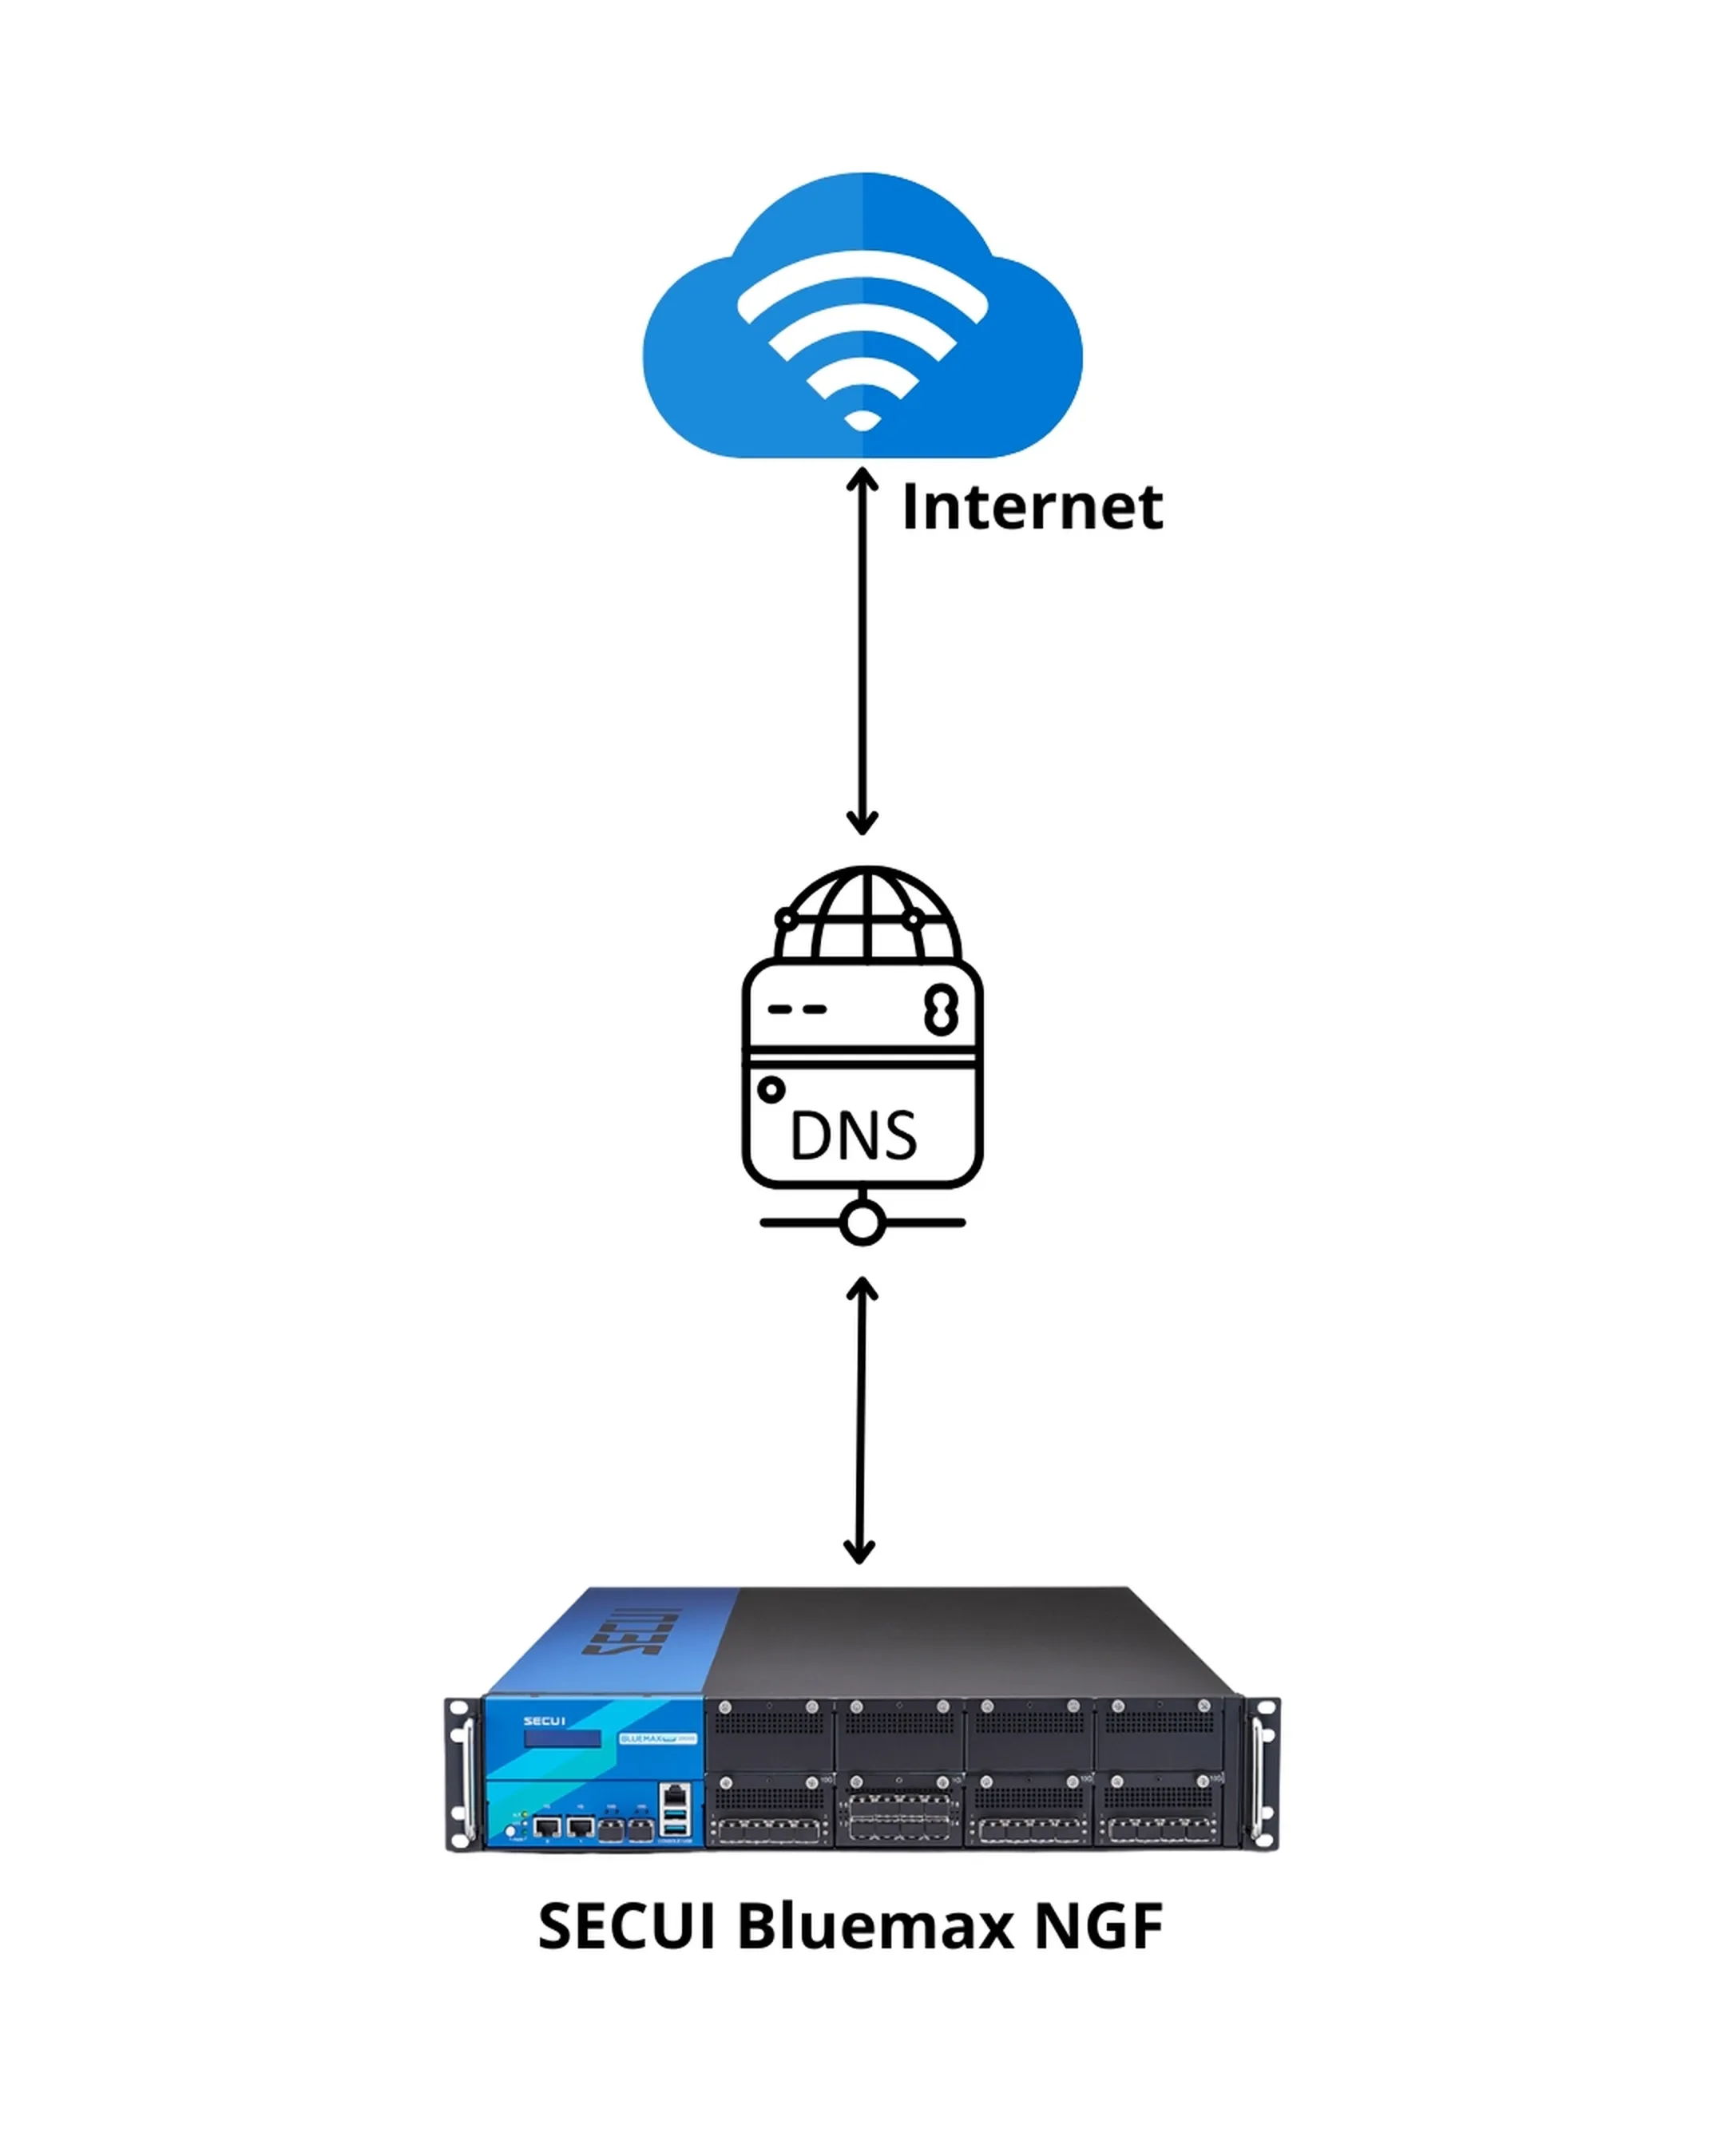
Figure 0.1 DNS Topology
1. Log In to the SECUI Bluemax NGF Interface
The first step is to access the firewall control panel. Open your browser, enter the IP address of your SECUI Bluemax NGF device, and log in using an administrator account.
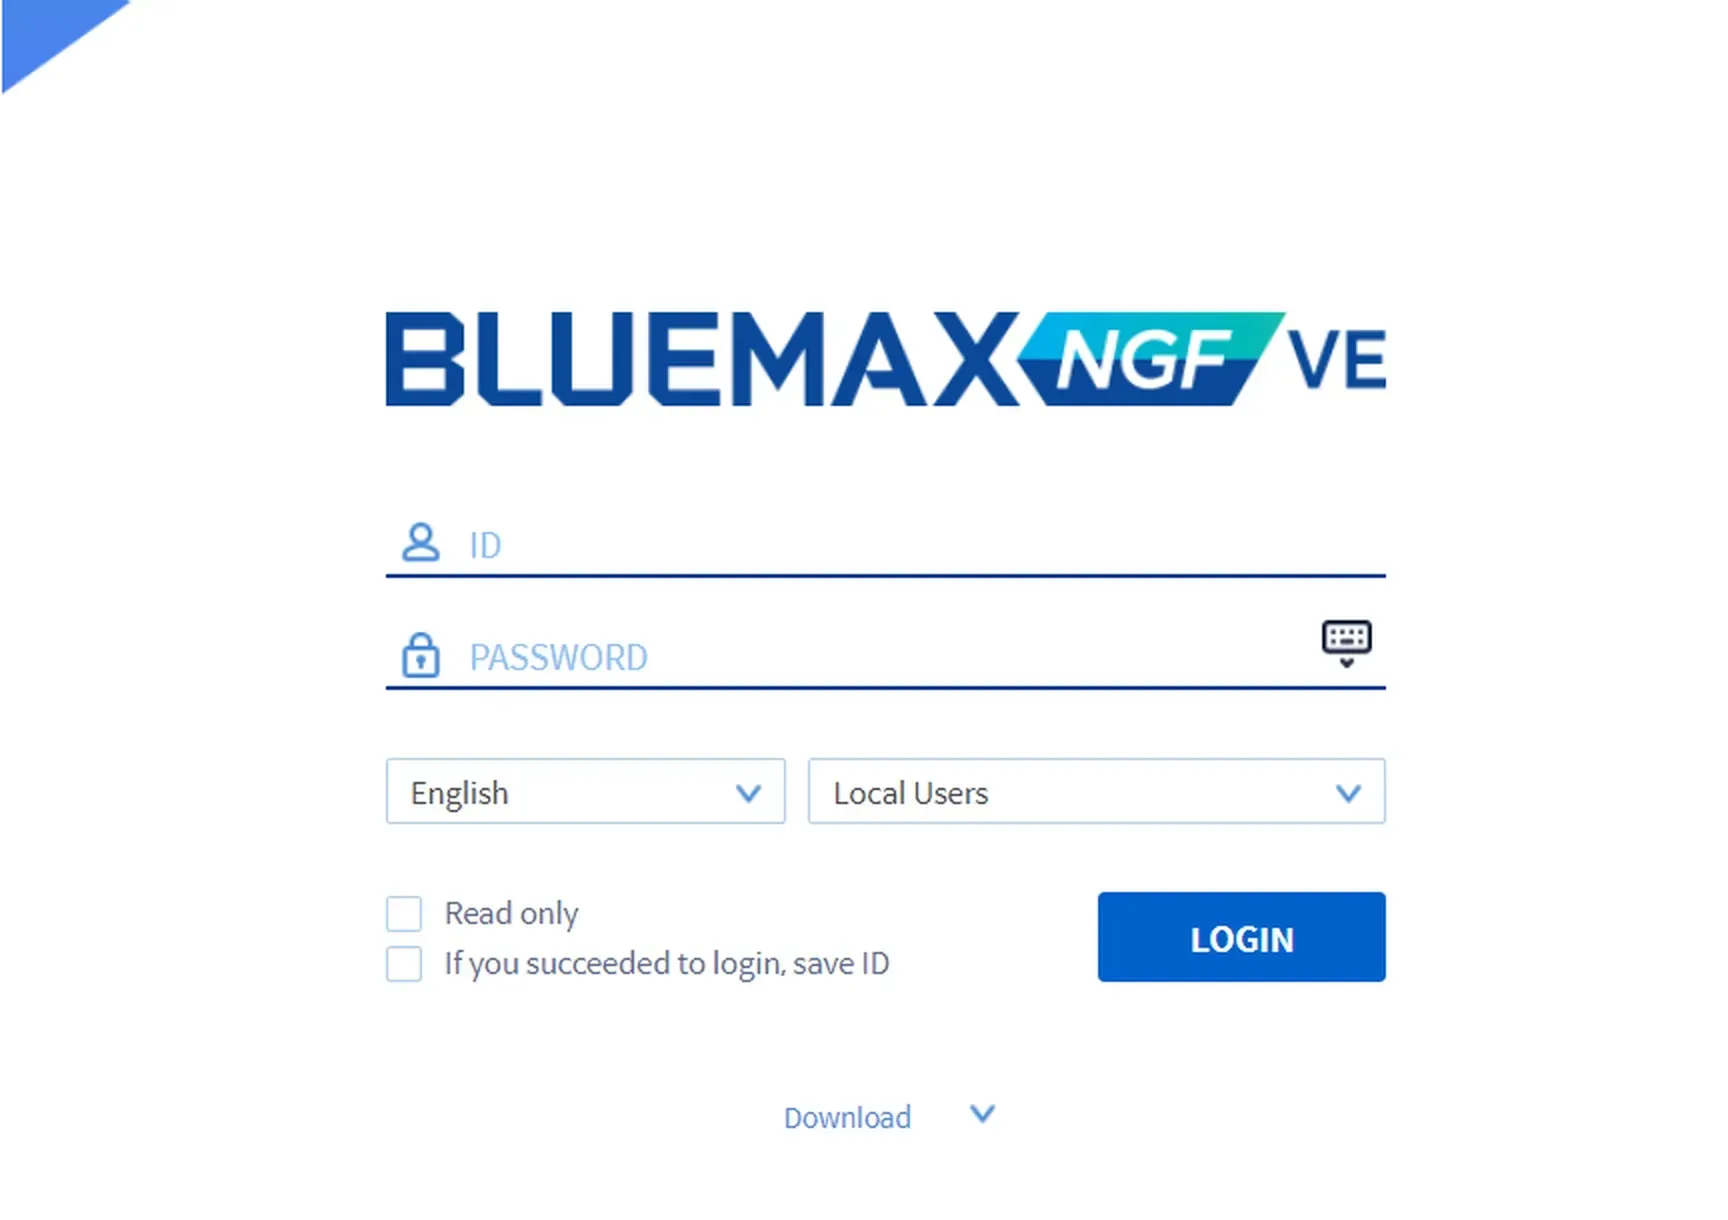
Figure 1.1 Bluemax NGF Login Page
2. Access the DNS Setting Menu
Once logged in, go to:
System > DNS Setting
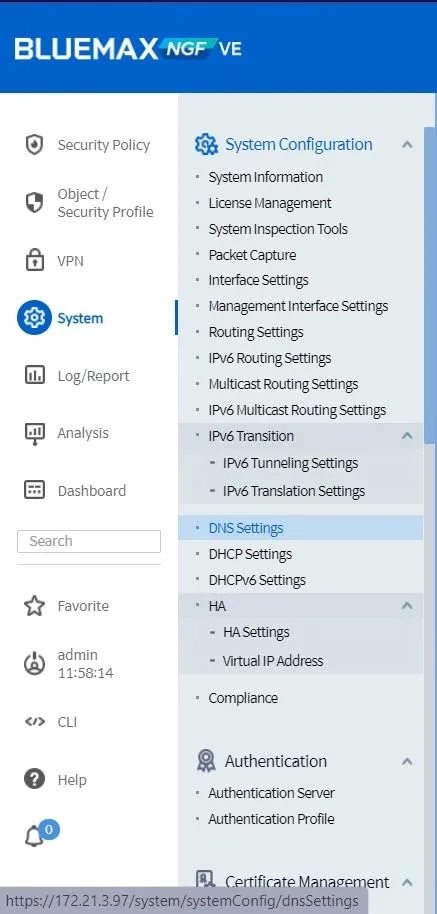
Figure 2.1 DNS Setting Menu
3. Add DNS Server IPs
Click Add and enter the DNS server IPs you want to use, for example:
- 8.8.8.8 (Google DNS)
- 1.1.1.1 (Cloudflare DNS)
Then click OK.
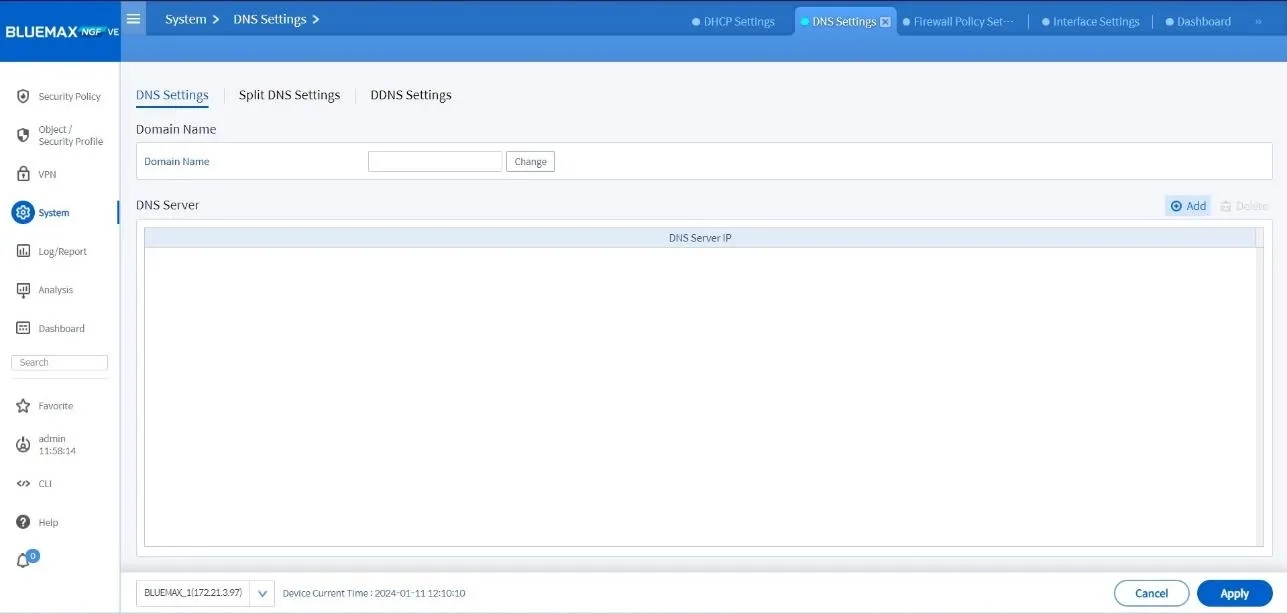
Figure 3.1 Add DNS Server IP
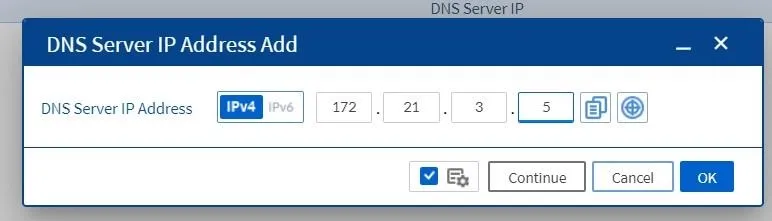
Figure 3.2 Add DNS IP
4. Apply the Settings
After adding all required DNS servers, click Apply to save and activate the configuration.
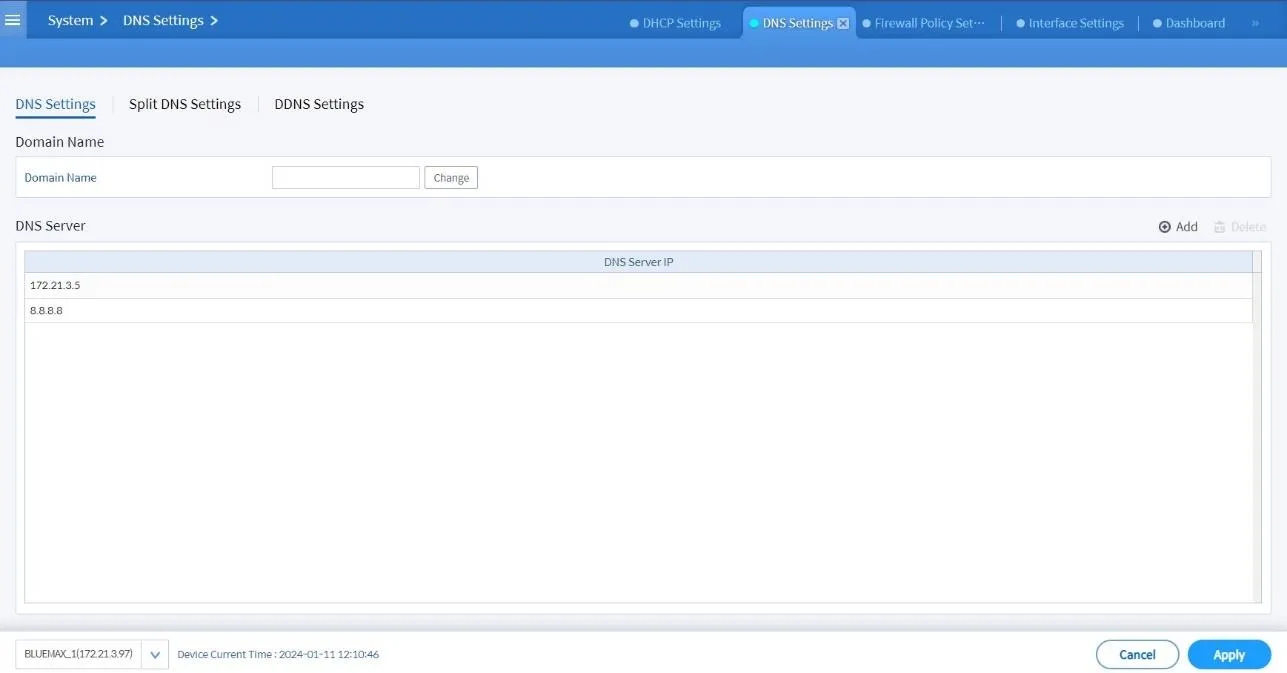
Figure 4.1 Apply DNS Configuration
5. Test DNS Connectivity
To confirm the DNS is working properly, go to:
System > System Inspection Tools
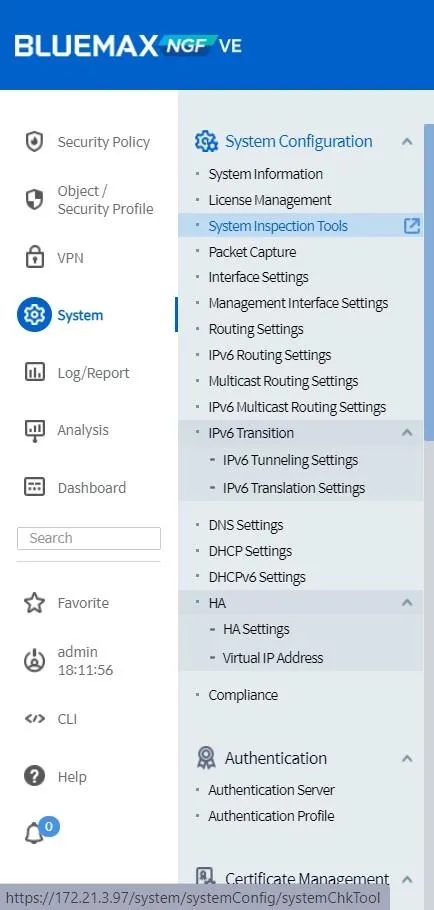
Figure 5.1 System Setting Menu
In the dashboard, under Checklist, select PING.
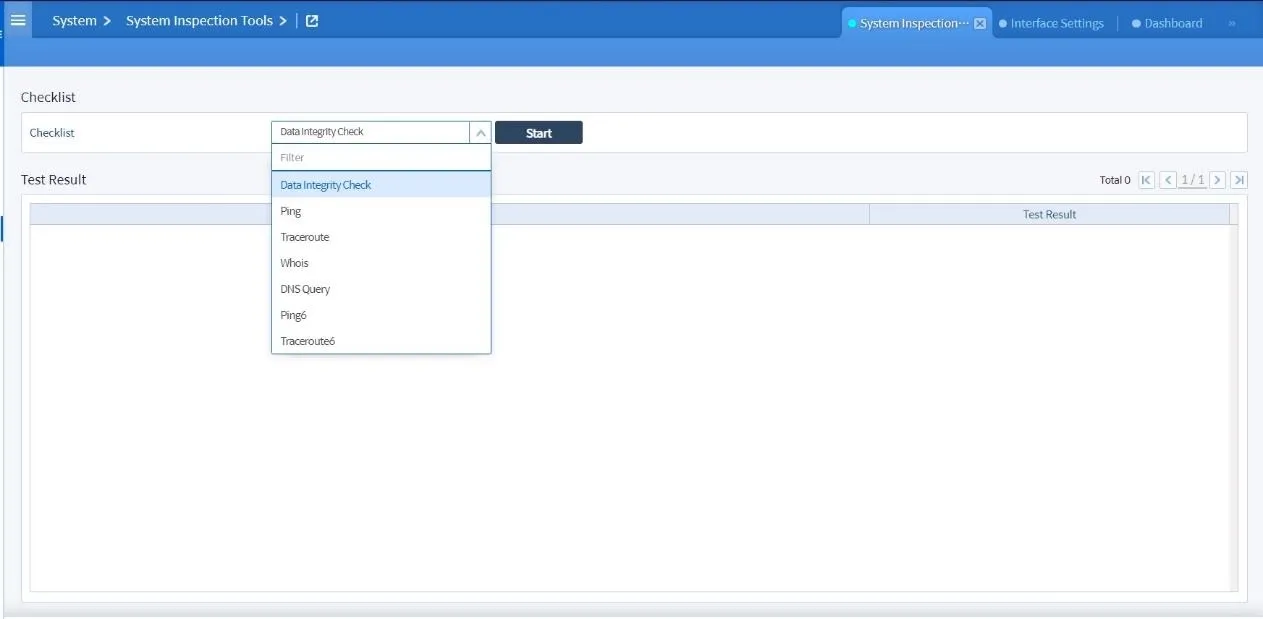
Figure 5.2 Testing DNS via PING
Enter a target domain such as google.com, then click Start.
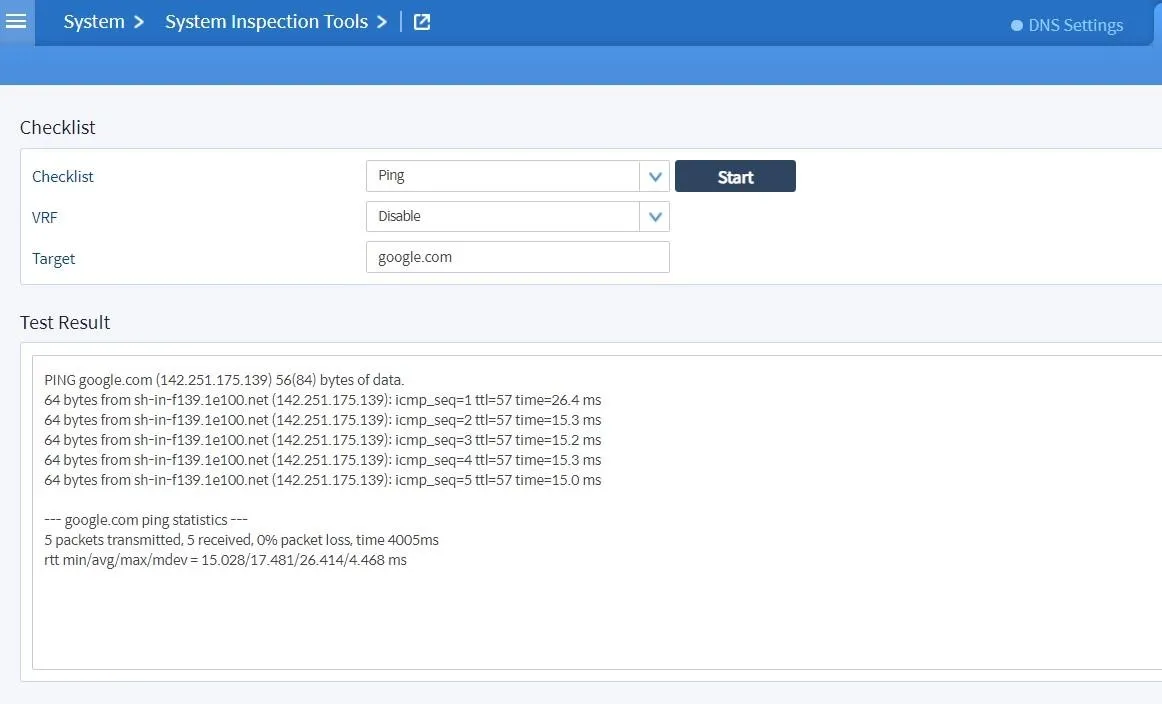
Figure 5.3 DNS PING Test Result
If the PING returns a response, it means the device can successfully reach the DNS and is properly connected to the internet.
Conclusion
Configuring DNS in SECUI Bluemax Next Generation Firewall is a simple but critical step. By following this guide, you’re not only ensuring smooth internet access but also providing a strong foundation for all firewall security features.
With the correct settings, both internal and external services will communicate without interruption, keeping your network stable and your NGFW performance optimized.
🚀 Need help setting up DNS or other network security solutions? Feel free to contact our team. We’re here to assist you!
Last Updated
September 10, 2025
Category
SECUI Configuration, Network Security
Share This
On This Page
Contact us for
Free Consultation!
Share your challenges, and we'll provide the best solutions for your business, Connecting with us is as simple as clicking a button, and let us come to you.