An Intrusion Prevention System (IPS) is a network security technology that detects and prevents cyber threats in real-time. IPS analyzes network traffic and compares it with a signature database to identify suspicious patterns, such as malware attacks, system exploits, and network scanning attempts. By implementing a proper IPS, organizations can protect their digital assets from evolving threats.
In this article, we will explain how to configure IPS on SECUI devices, from initial setup to effectiveness testing.
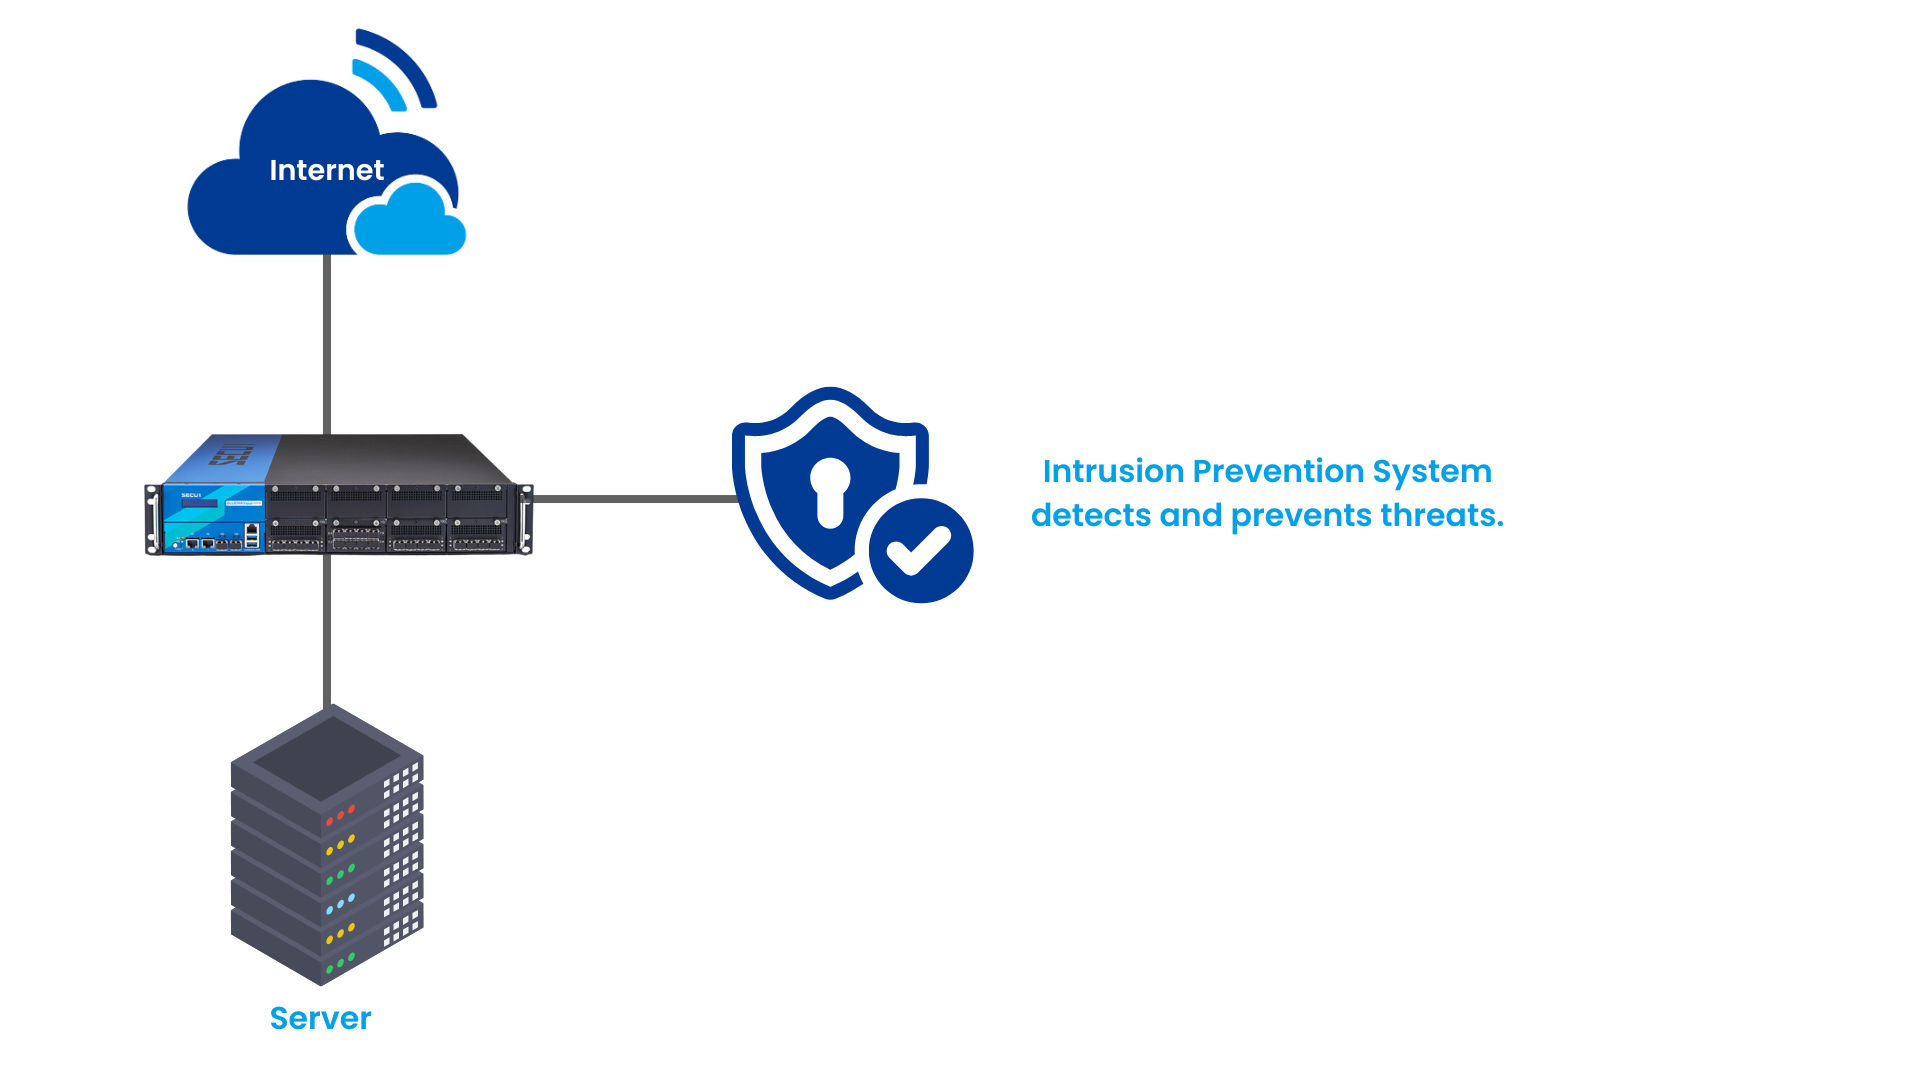 Image 0.1 Simple IPS topology using SECUI
1. Login to SECUI
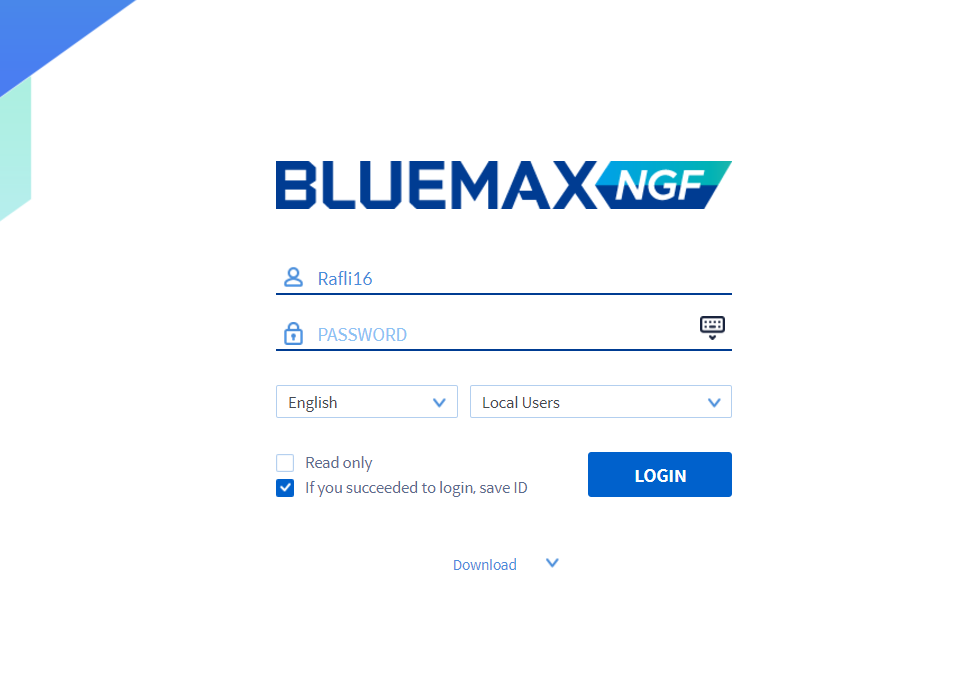 Image 1.1 SECUI login screen
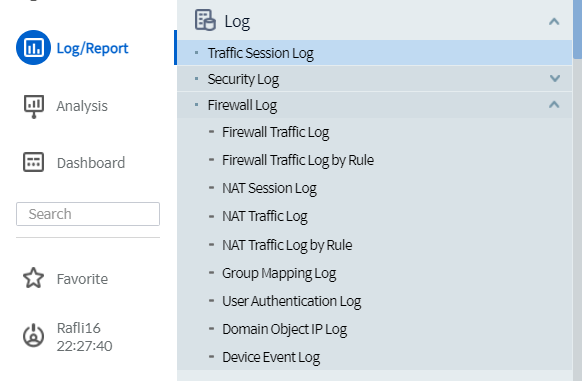
2. IPS Configuration
Before configuring IPS, make sure the IPS Database is updated to the latest version. This is essential because an updated database contains the latest threat signatures, allowing IPS to recognize and prevent emerging cyber threats. If the database is not updated, IPS may fail to detect new attacks, increasing security risks on your network.
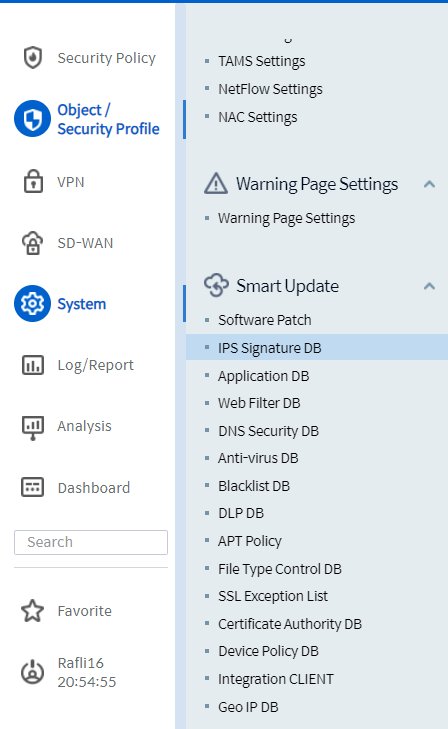
• Navigate to System > IPS Signature DB
• Select Online Update
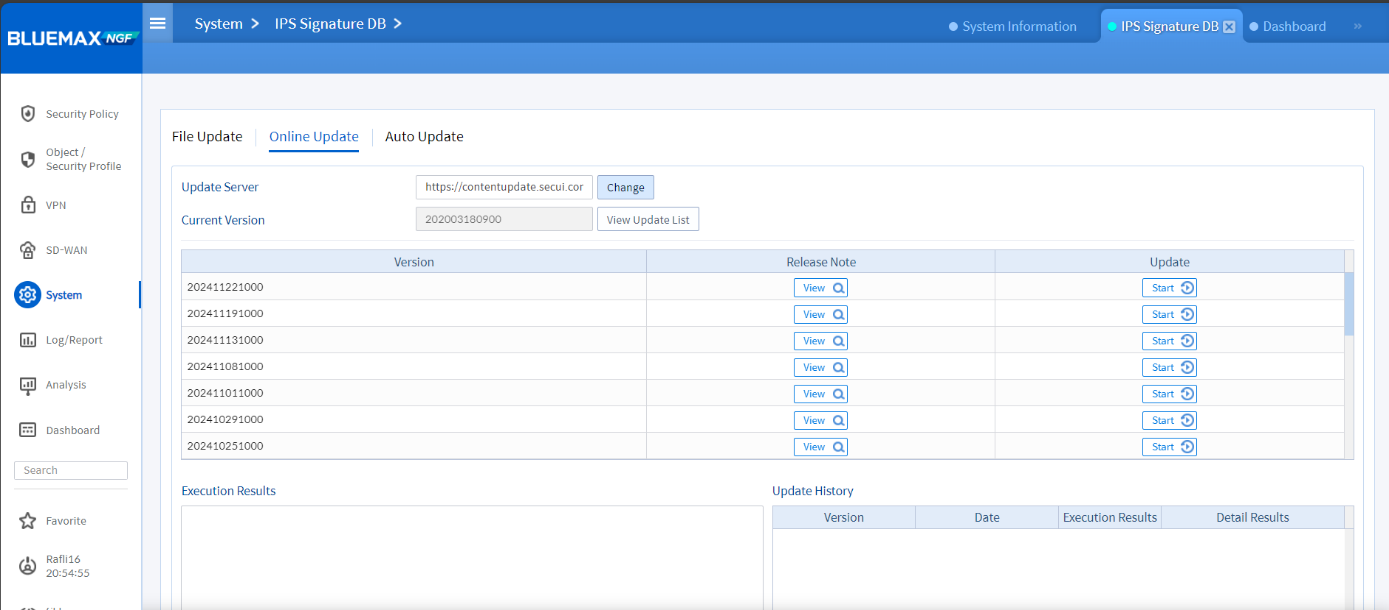 Image 2.2 Online Update Option
• Click View Update List and choose the latest patch
 Image 2.3 IPS Update List
• Perform the update
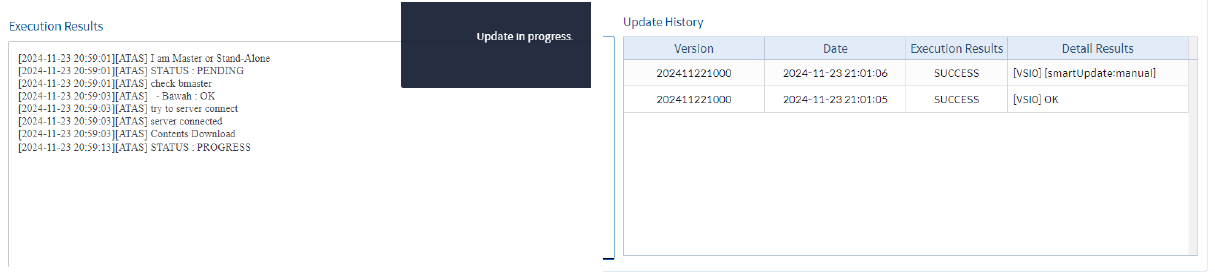 Image 2.4 IPS Database Update Process
3. Creating an IPS Profile
After updating the IPS database, the next step is to create an IPS profile to determine how the system will handle detected threats, including selecting the protection level and blocking rules.
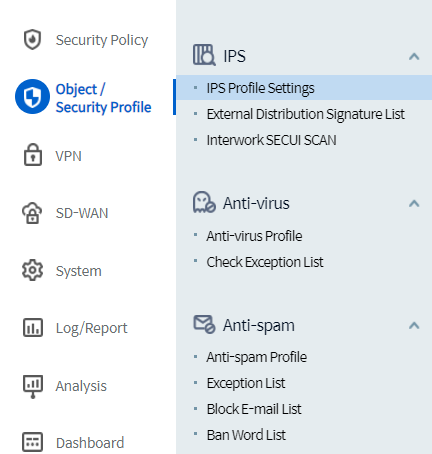
• Open Object/Security Profile > IPS Profile Settings
• Click Add and enable Enable IPS
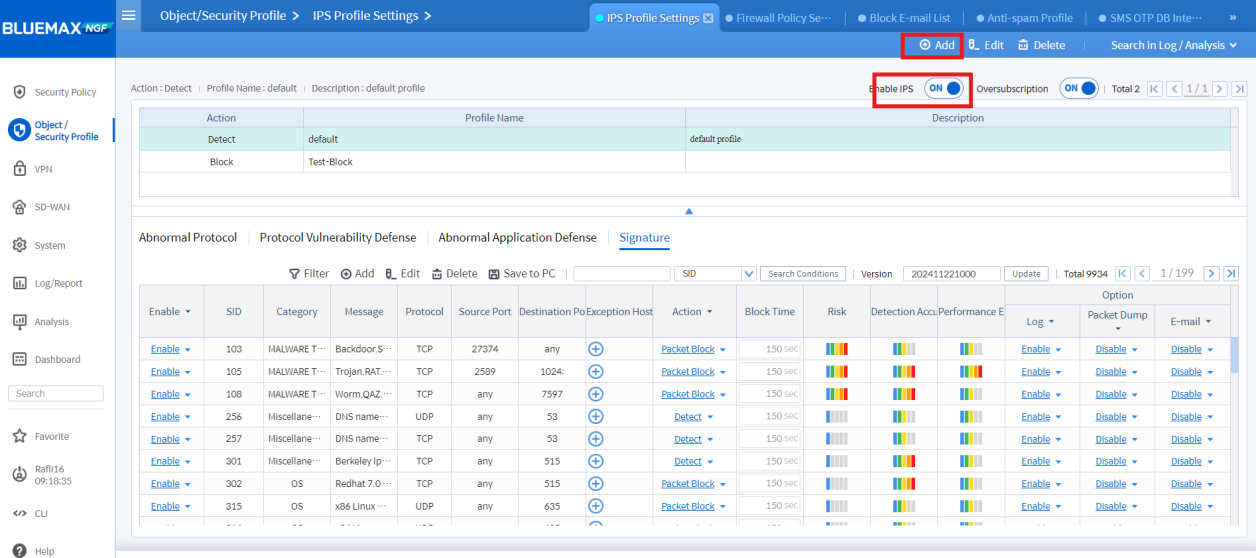 Image 3.2 Adding an IPS Profile
•Fill in the parameters:
4. Adjusting Signatures
Once the profile is created, you can customize the enabled signatures based on requirements, such as defining which signatures will be detected or blocked based on SID, message, or specific ports.
• Search by SID, Message, Source Port, Destination Port
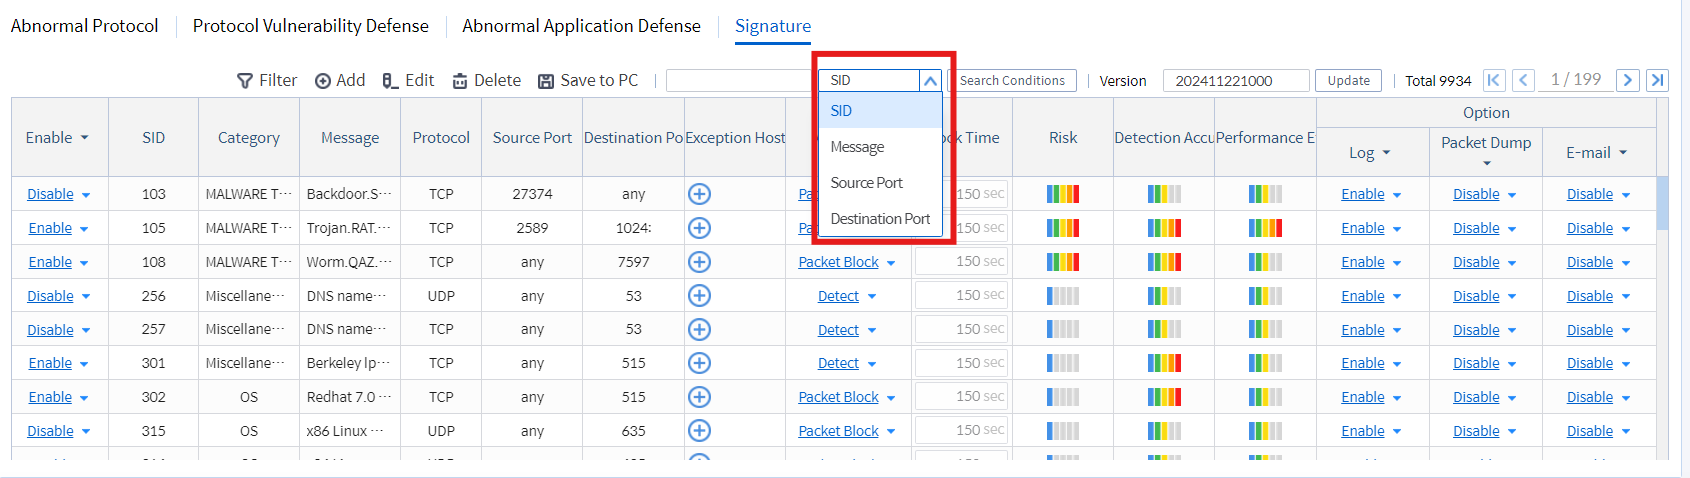 Image 4.1 Searching Signatures by SID
• Enable or disable relevant signatures
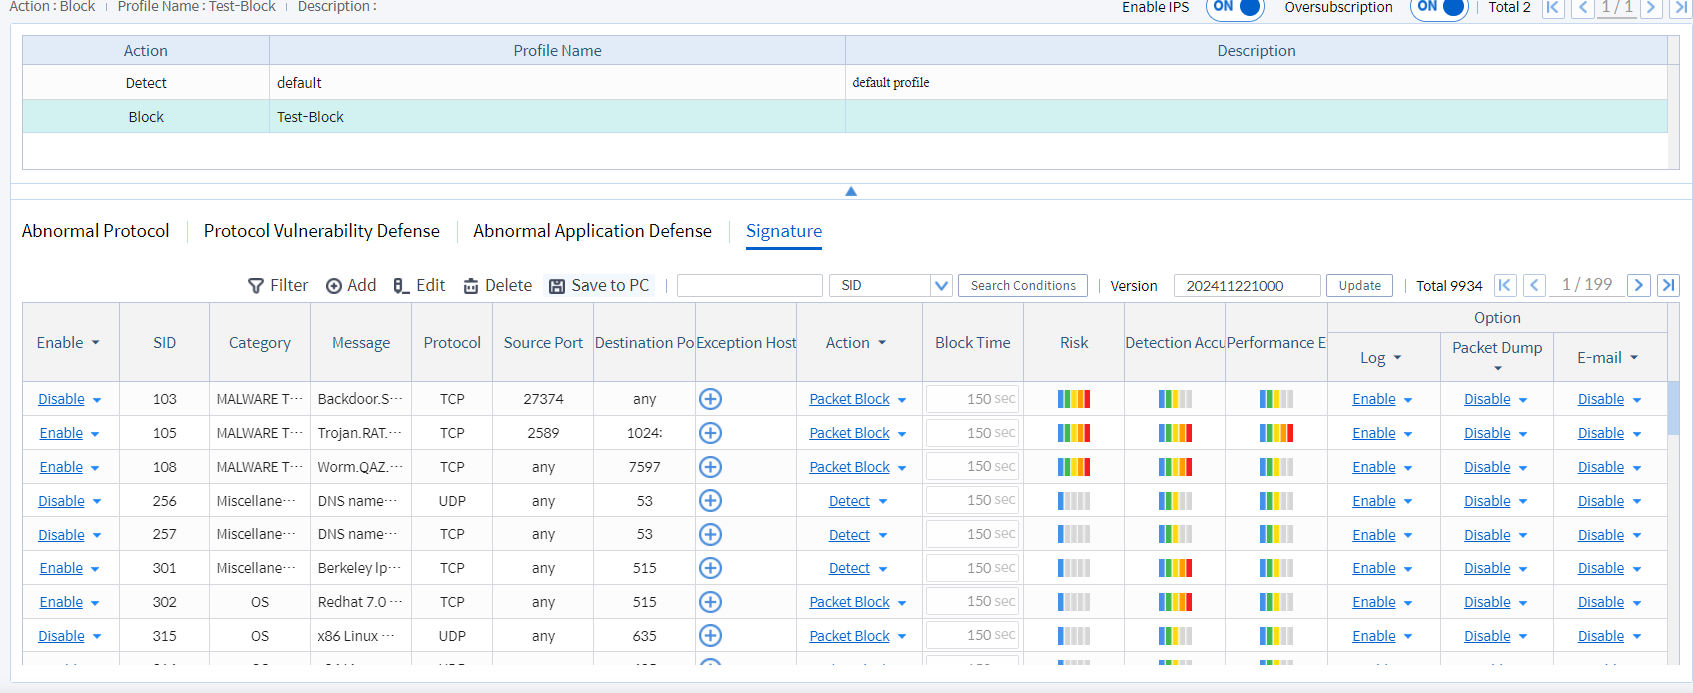 Image 4.2 IPS Signature Management
• Example: Preventing NMAP scanning attacks
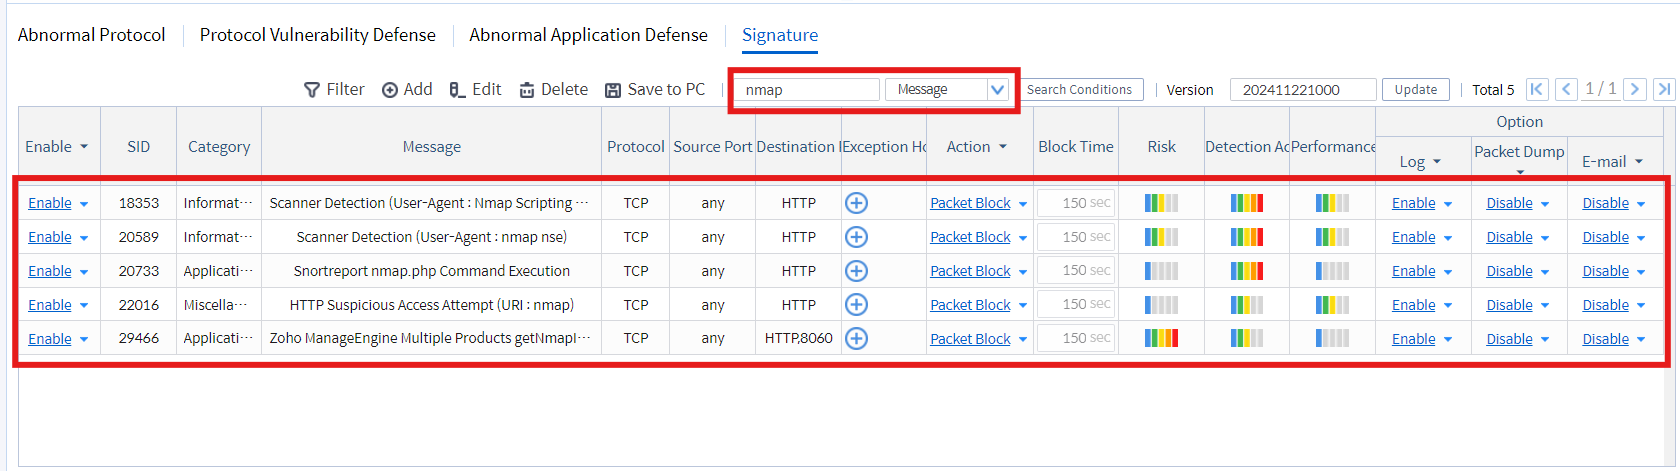 Image 4.3 Preventing NMAP Scanning Attacks
5. Configuring Firewall Policies
To make IPS effective in preventing attacks, you must attach it to a firewall policy that controls network traffic.
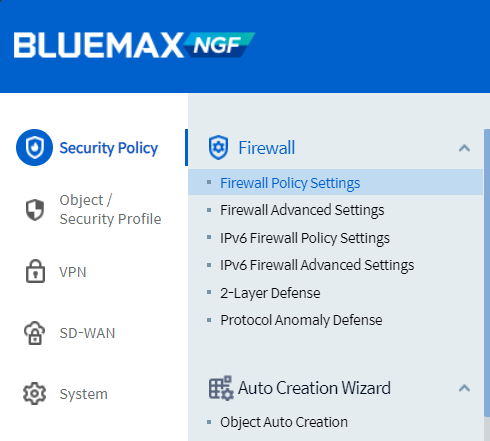
• Navigate to Security Policy > Firewall Policy Settings
• Add the IPS Profile to the firewall policy
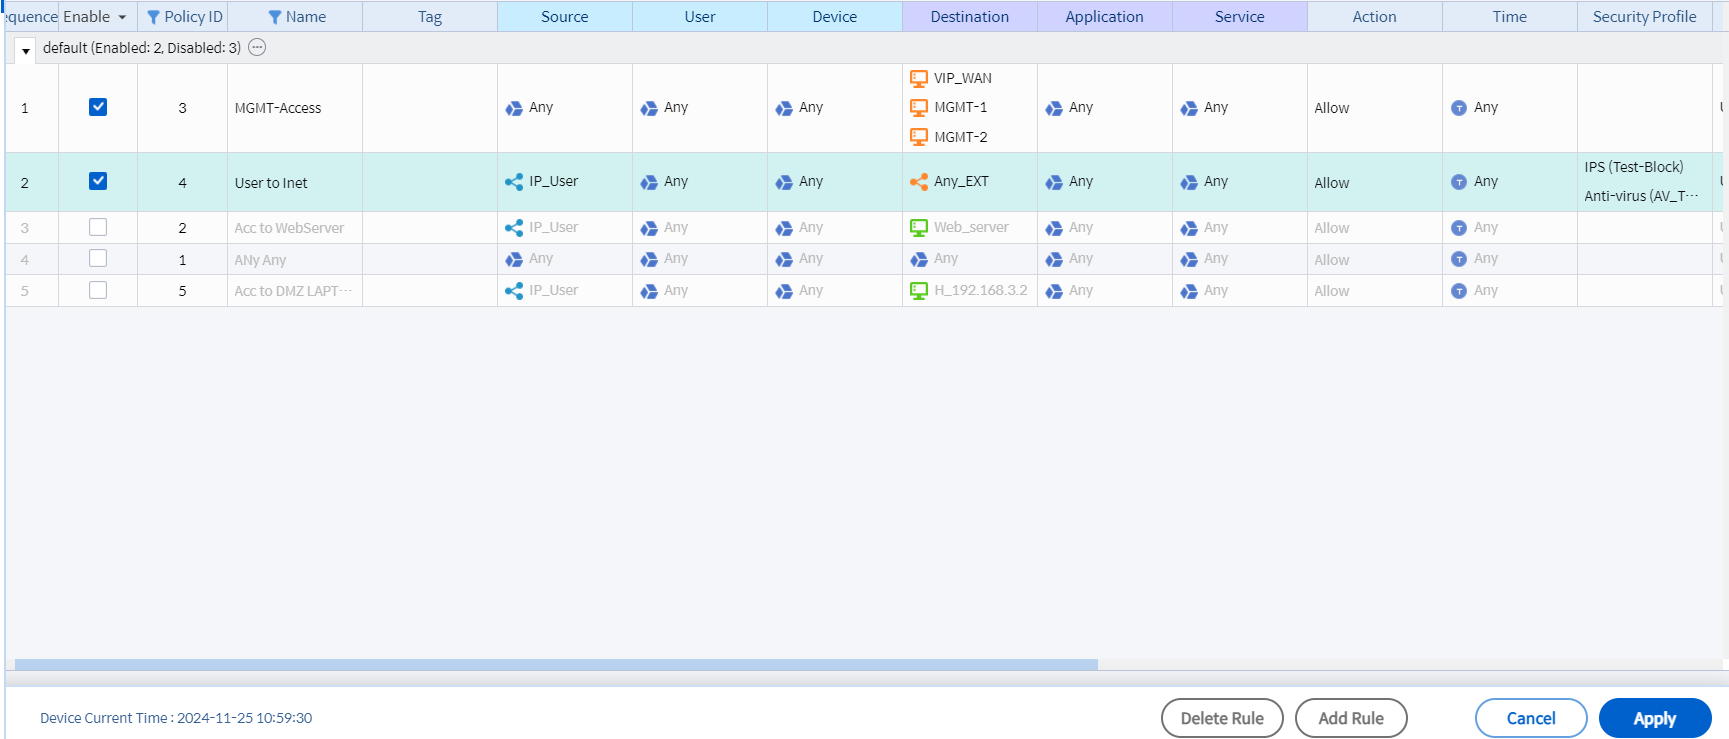
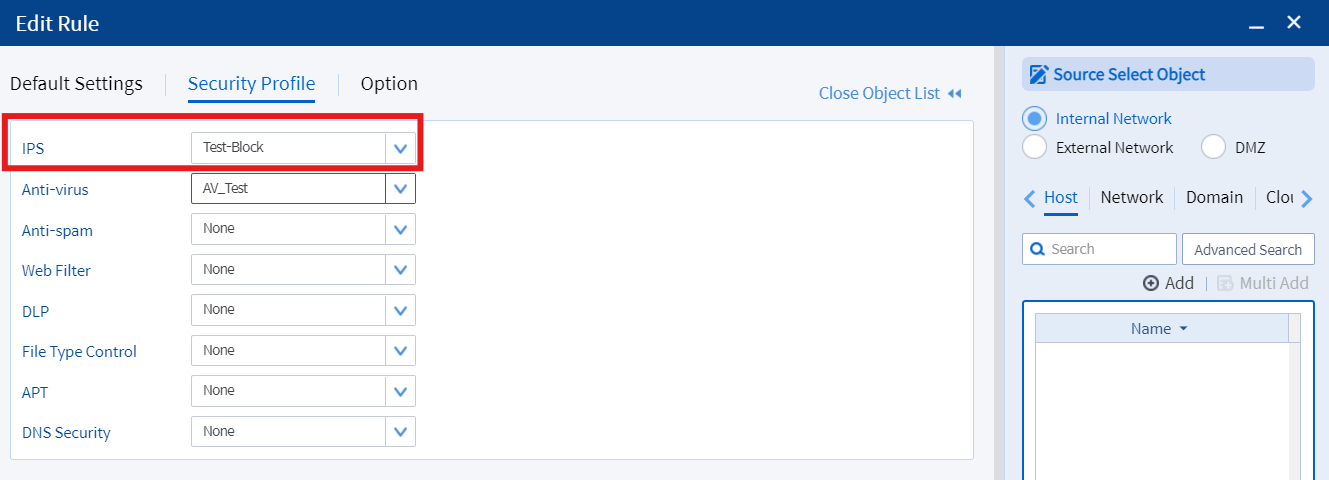 Image 5.2 Adding IPS Profile to Firewall Policy
• Click OK and then Apply
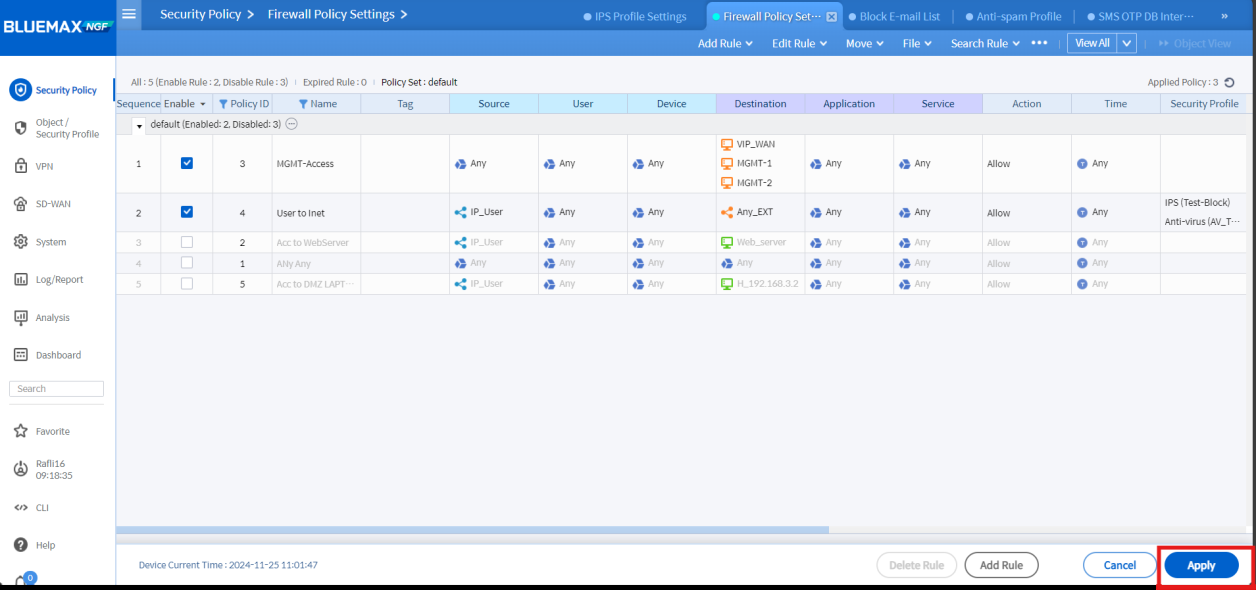 Image 5.3 Firewall Configuration Save Process
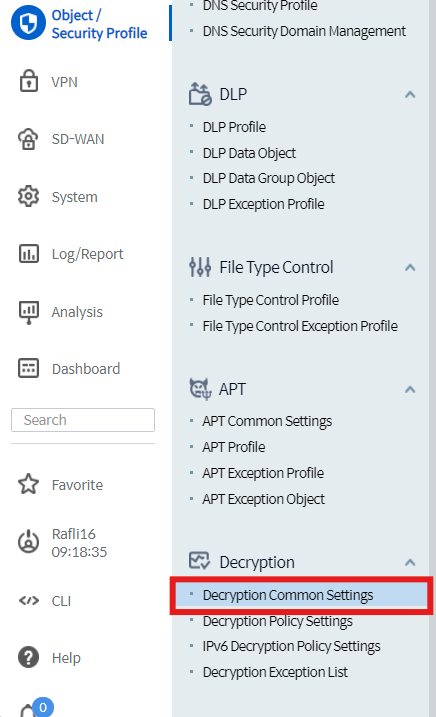
6. Enabling SSL Decryption (Optional)
To ensure HTTPS traffic can be inspected and filtered by IPS, enable SSL decryption. This allows the system to detect hidden threats within encrypted connections.
• Open Object/Security Profile > Decryption > Decryption Common Settings
• Configure settings as needed
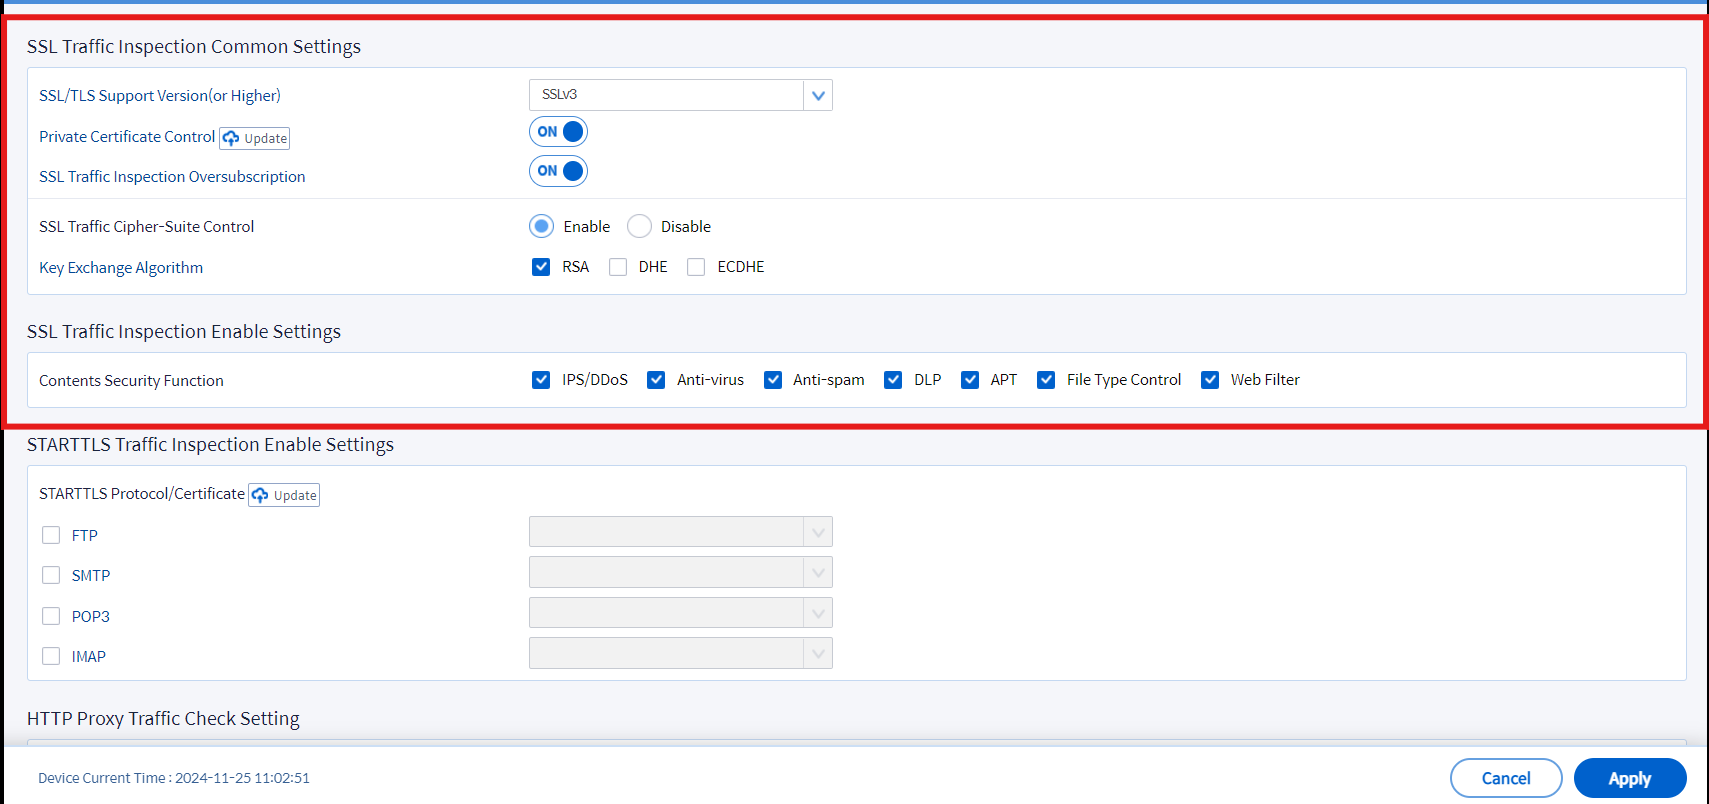 Image 6.2 SSL Decryption Settings
7. IPS Testing
Conduct testing to ensure IPS functions properly by simulating attacks such as NMAP scanning and verifying that the system successfully detects and logs the threats.
• Run NMAP scanning on the target server

• If the attack is blocked, check the Threat Log:
• Ensure logs indicate IPS is working
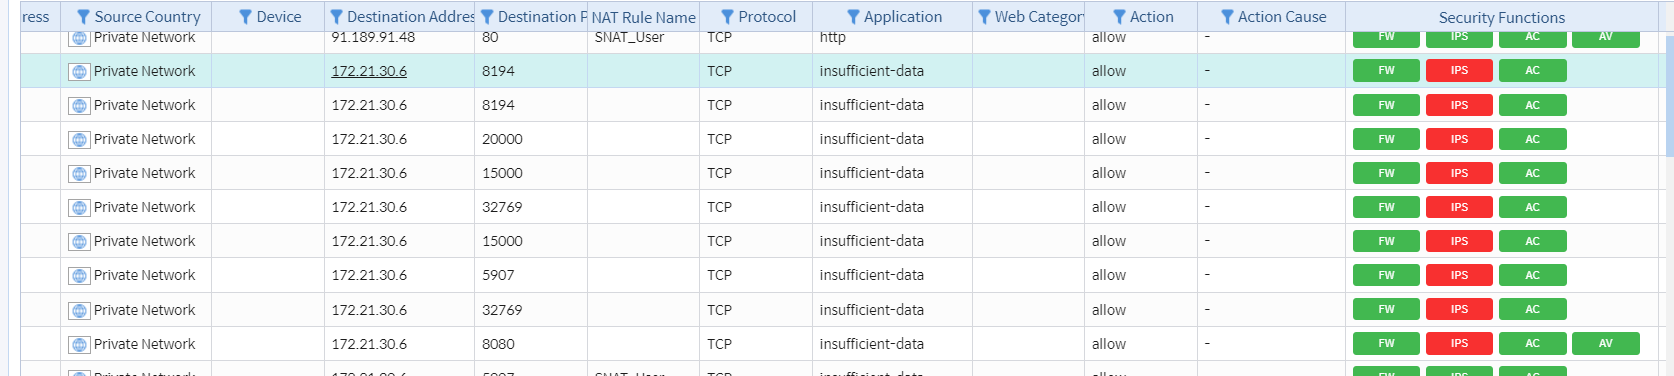
 Image 7.3 Attack Log Analysis
• For further analysis, open Analysis > Security Analysis
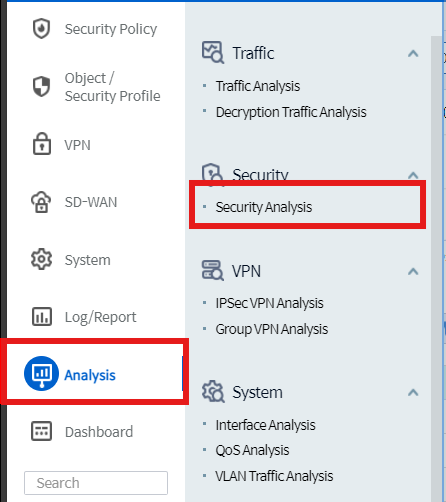
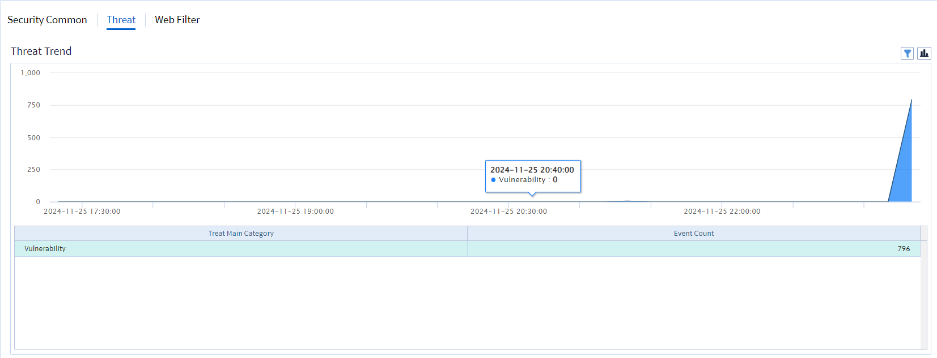 Image 7.4 Viewing the Security Analysis Diagram
• The diagram shows details of the attacker and the victim
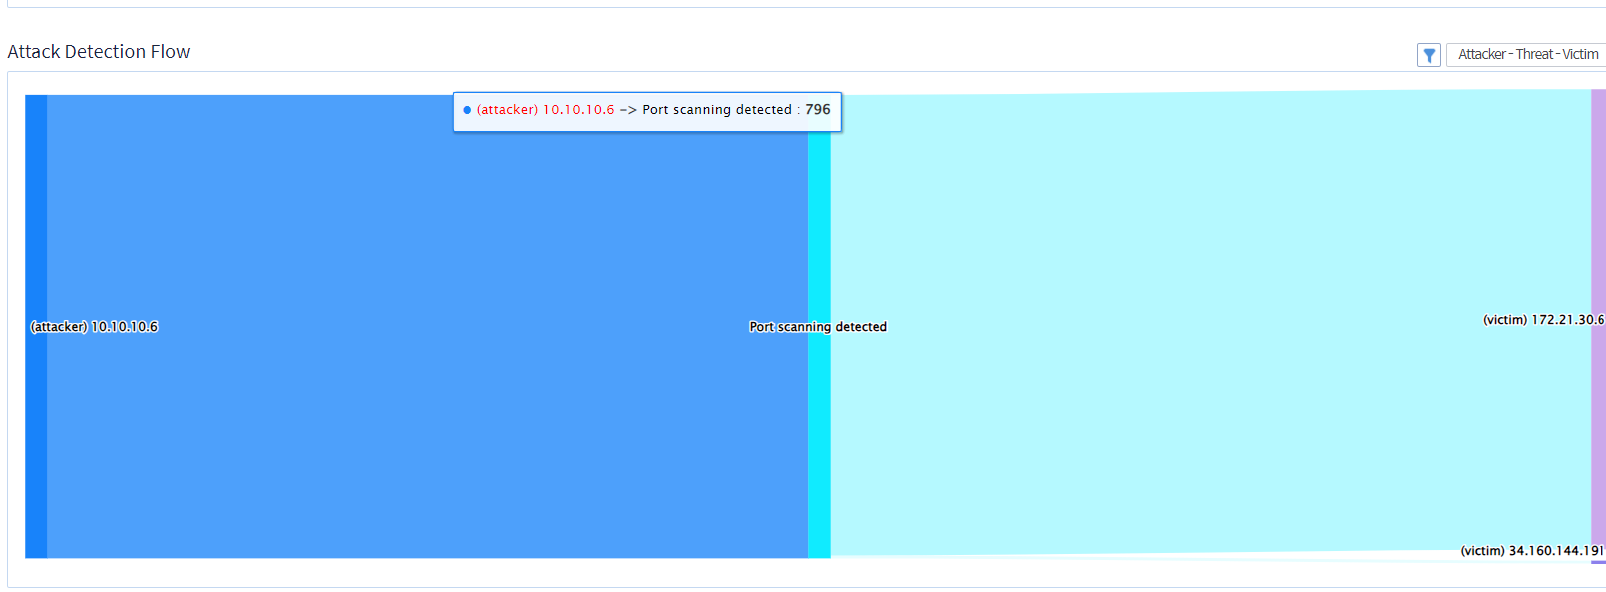 Image 7.5 Security Attack Diagram
Conclusion
Configuring IPS on SECUI is crucial to maintaining network security against cyber threats. By following the steps above, you can optimize system protection against various attacks. Always keep the IPS database updated and monitor logs regularly to enhance security effectiveness.
We hope this article helps you secure your network using SECUI IPS. Happy configuring!
If you need further information or technical assistance regarding SECUI, feel free to contact us now
Last Updated
September 25, 2025
Category
Network Security
Share This
On This Page
Contact us for
Free Consultation!
Share your challenges, and we'll provide the best solutions for your business, Connecting with us is as simple as clicking a button, and let us come to you.