How to Configure VLAN on SECUI Bluemax NGF
In the world of networking, VLAN (Virtual Local Area Network) works like walls inside a building. Even though all devices are connected to the same physical switch, VLANs make them feel like they’re in separate rooms (or networks). Bluemax NGF supports VLAN features too, and this guide will walk you through the full configuration process.
Figure 0.1 Topology
1. Login to Bluemax NGF
Open your browser and log in to the Bluemax Next Generation Firewall web interface as usual. Make sure you’re using an account with admin privileges.

Figure 1.1 Bluemax NGF Login Page
2. Go to Interface Settings
Once you're in, navigate to:
System > System Configuration > Interface Settings
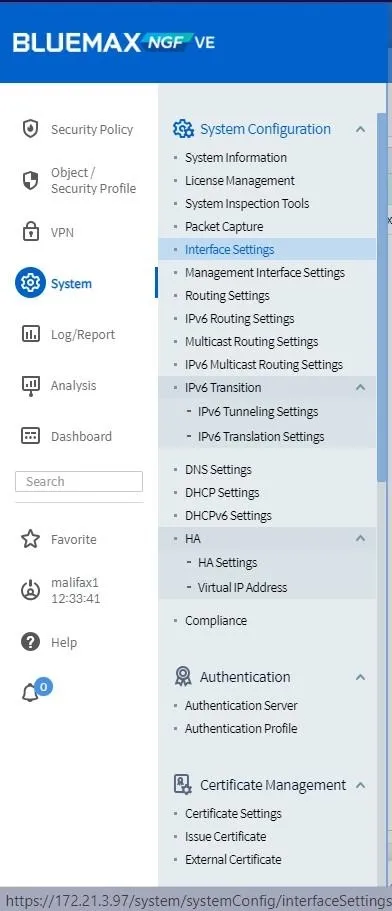
Figure 2.1 System Configuration Menu
On the Interface Settings dashboard, you’ll see a list of available ports. Pick one port to assign the VLAN.
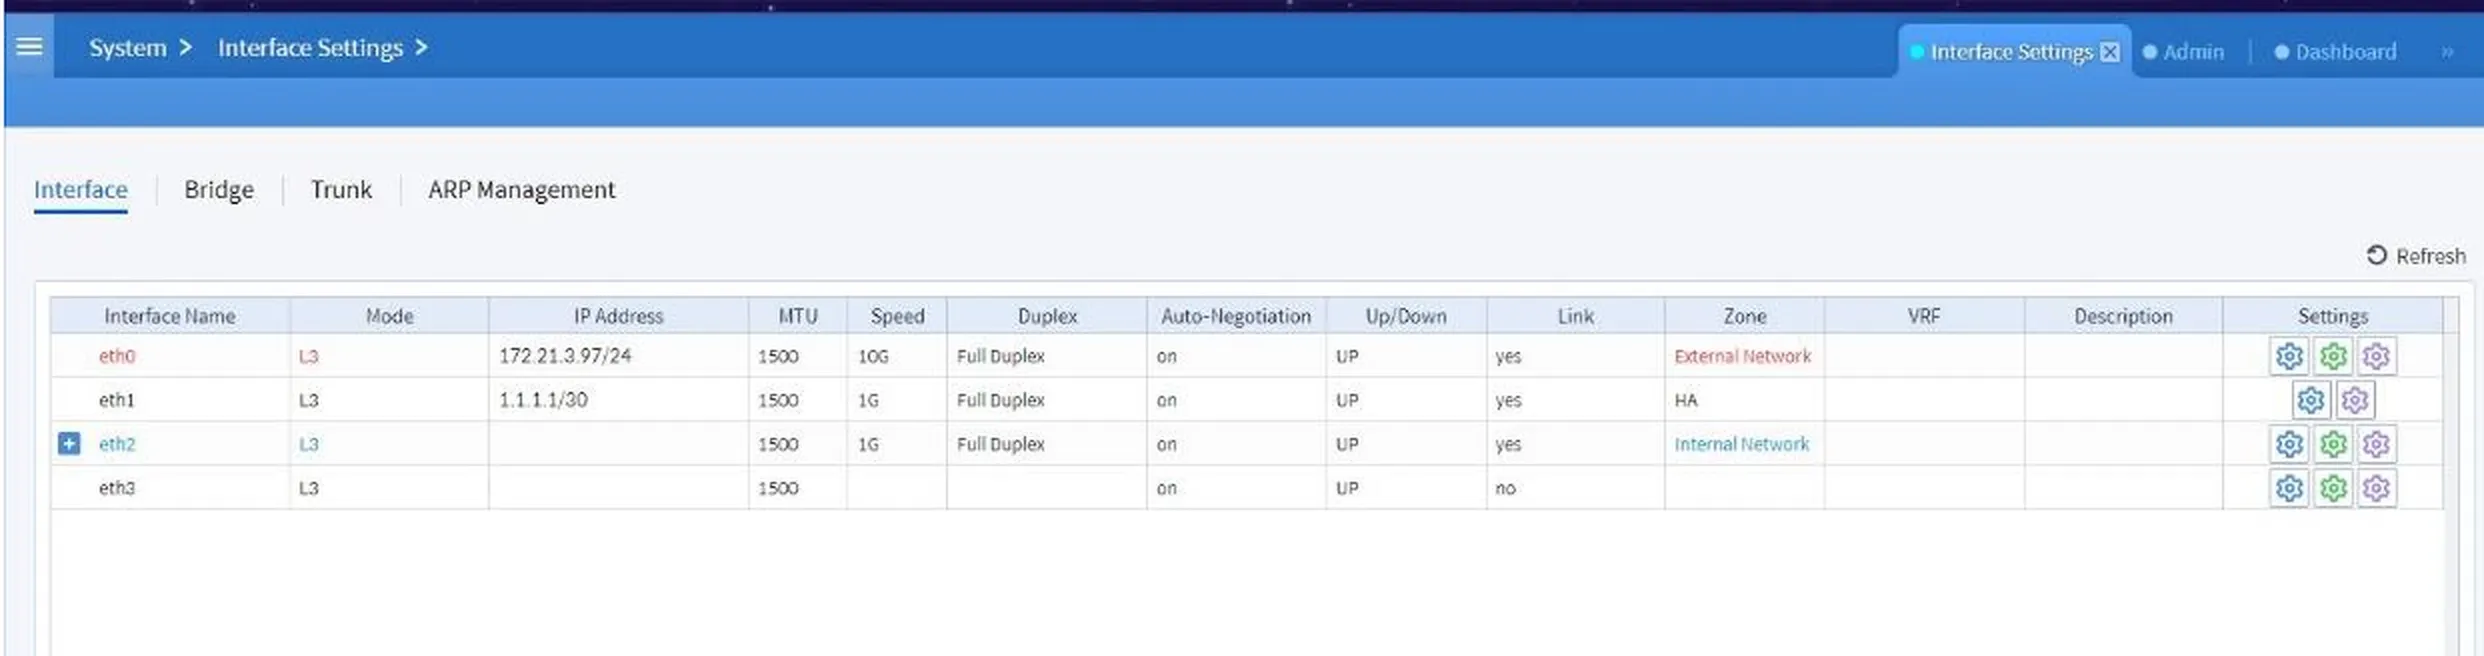
Figure 2.2 System Interface Setting
Under the selected port, click Settings and choose Advanced Interface Settings
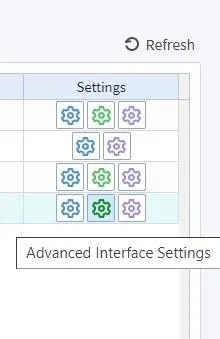
Figure 2.3 Settings
3. Add a New VLAN
Inside the Advanced Interface Settings page:
- Click the VLAN tab, then click
Add.
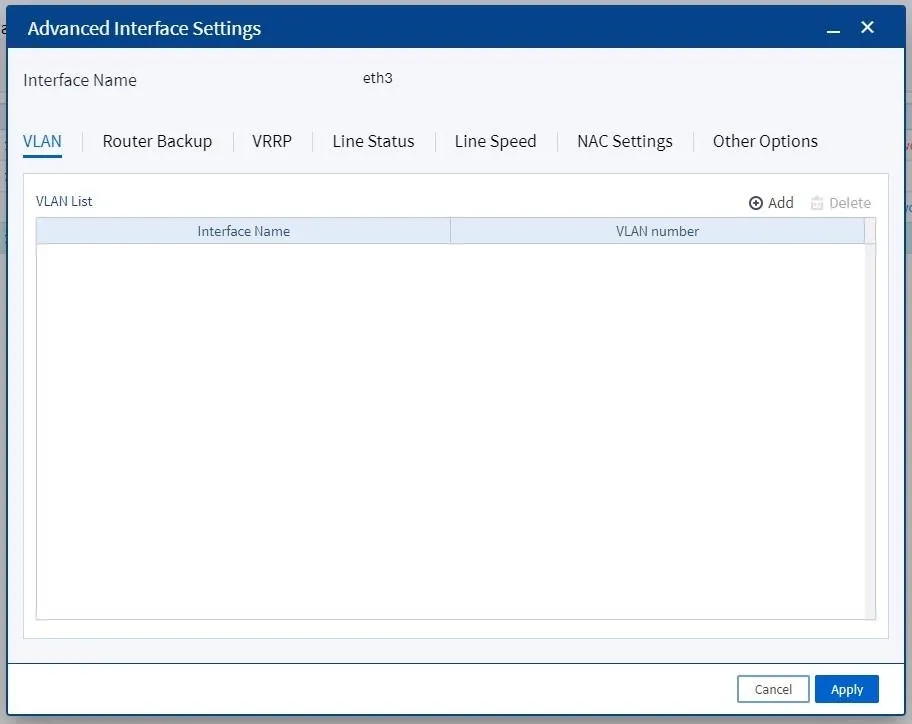
Figure 3.1 Advanced Interface Settings
- Enter the VLAN ID or number you want to use, then click
OKandApply.
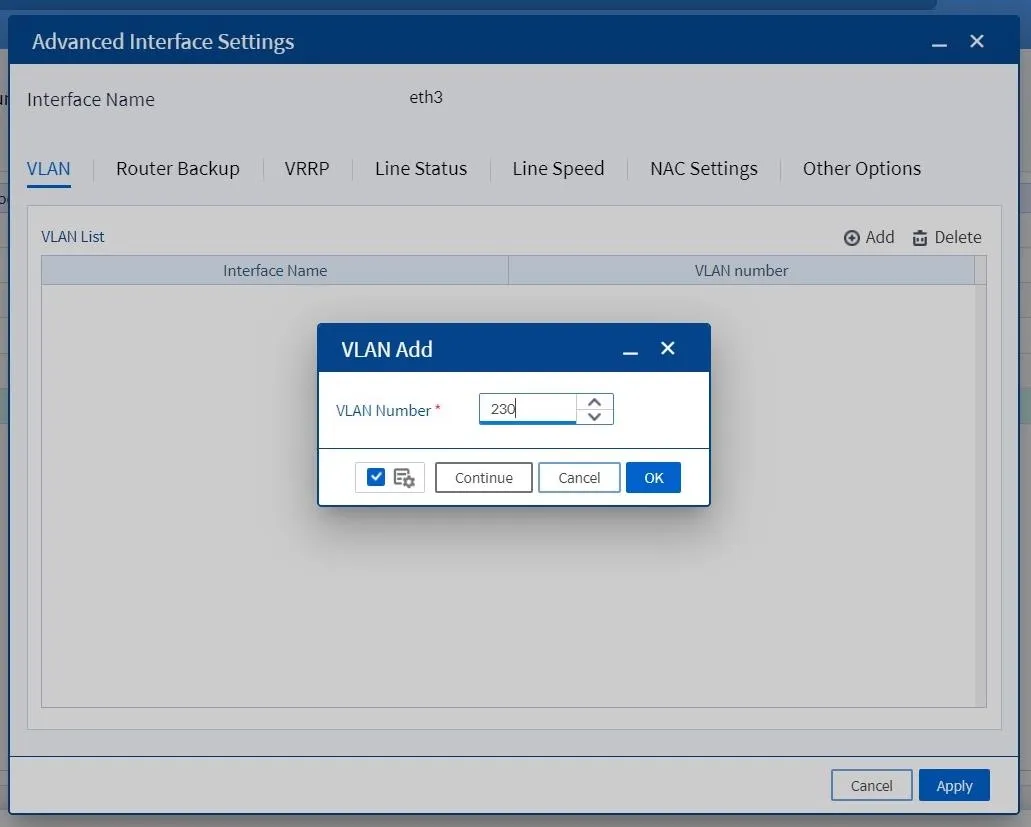
Figure 3.2 VLAN Add
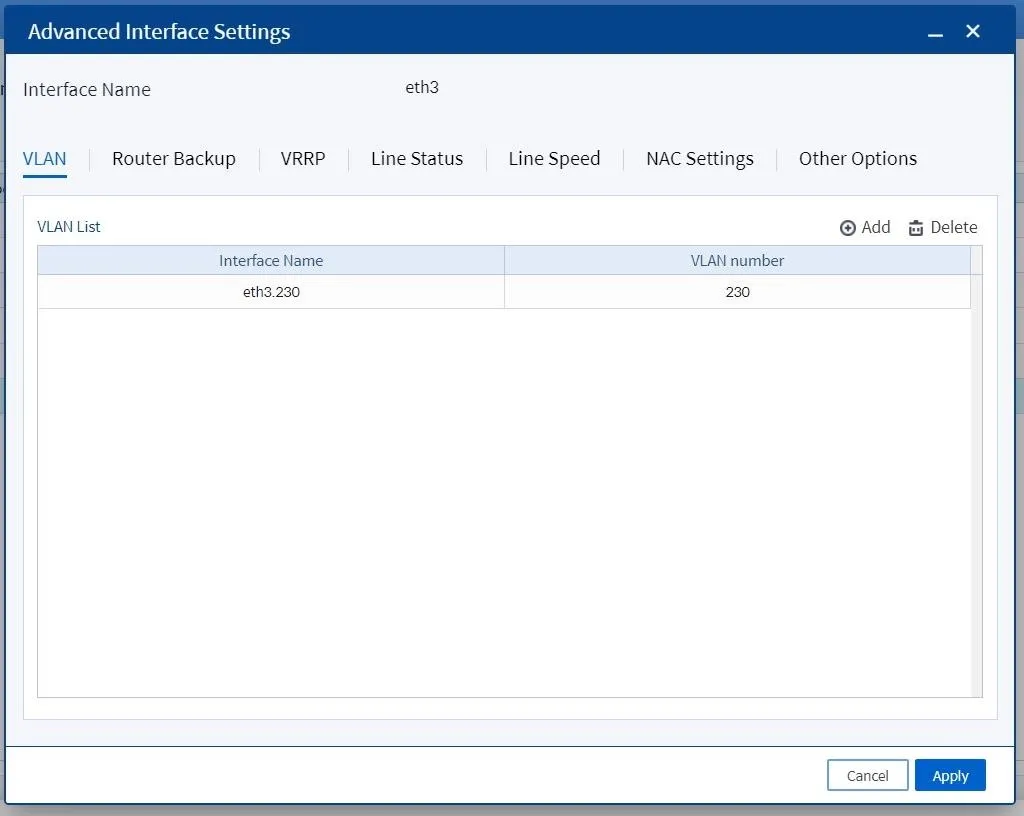
Figure 3.3 Apply VLAN
4. Assign an IP Address to the VLAN
Once the VLAN is added, switch to the Basic Interface Settings tab.
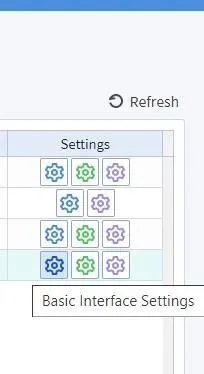
Figure 4.1 Basic Interface Settings
Choose the Zone (e.g., LAN or DMZ) and set the Interface Mode.
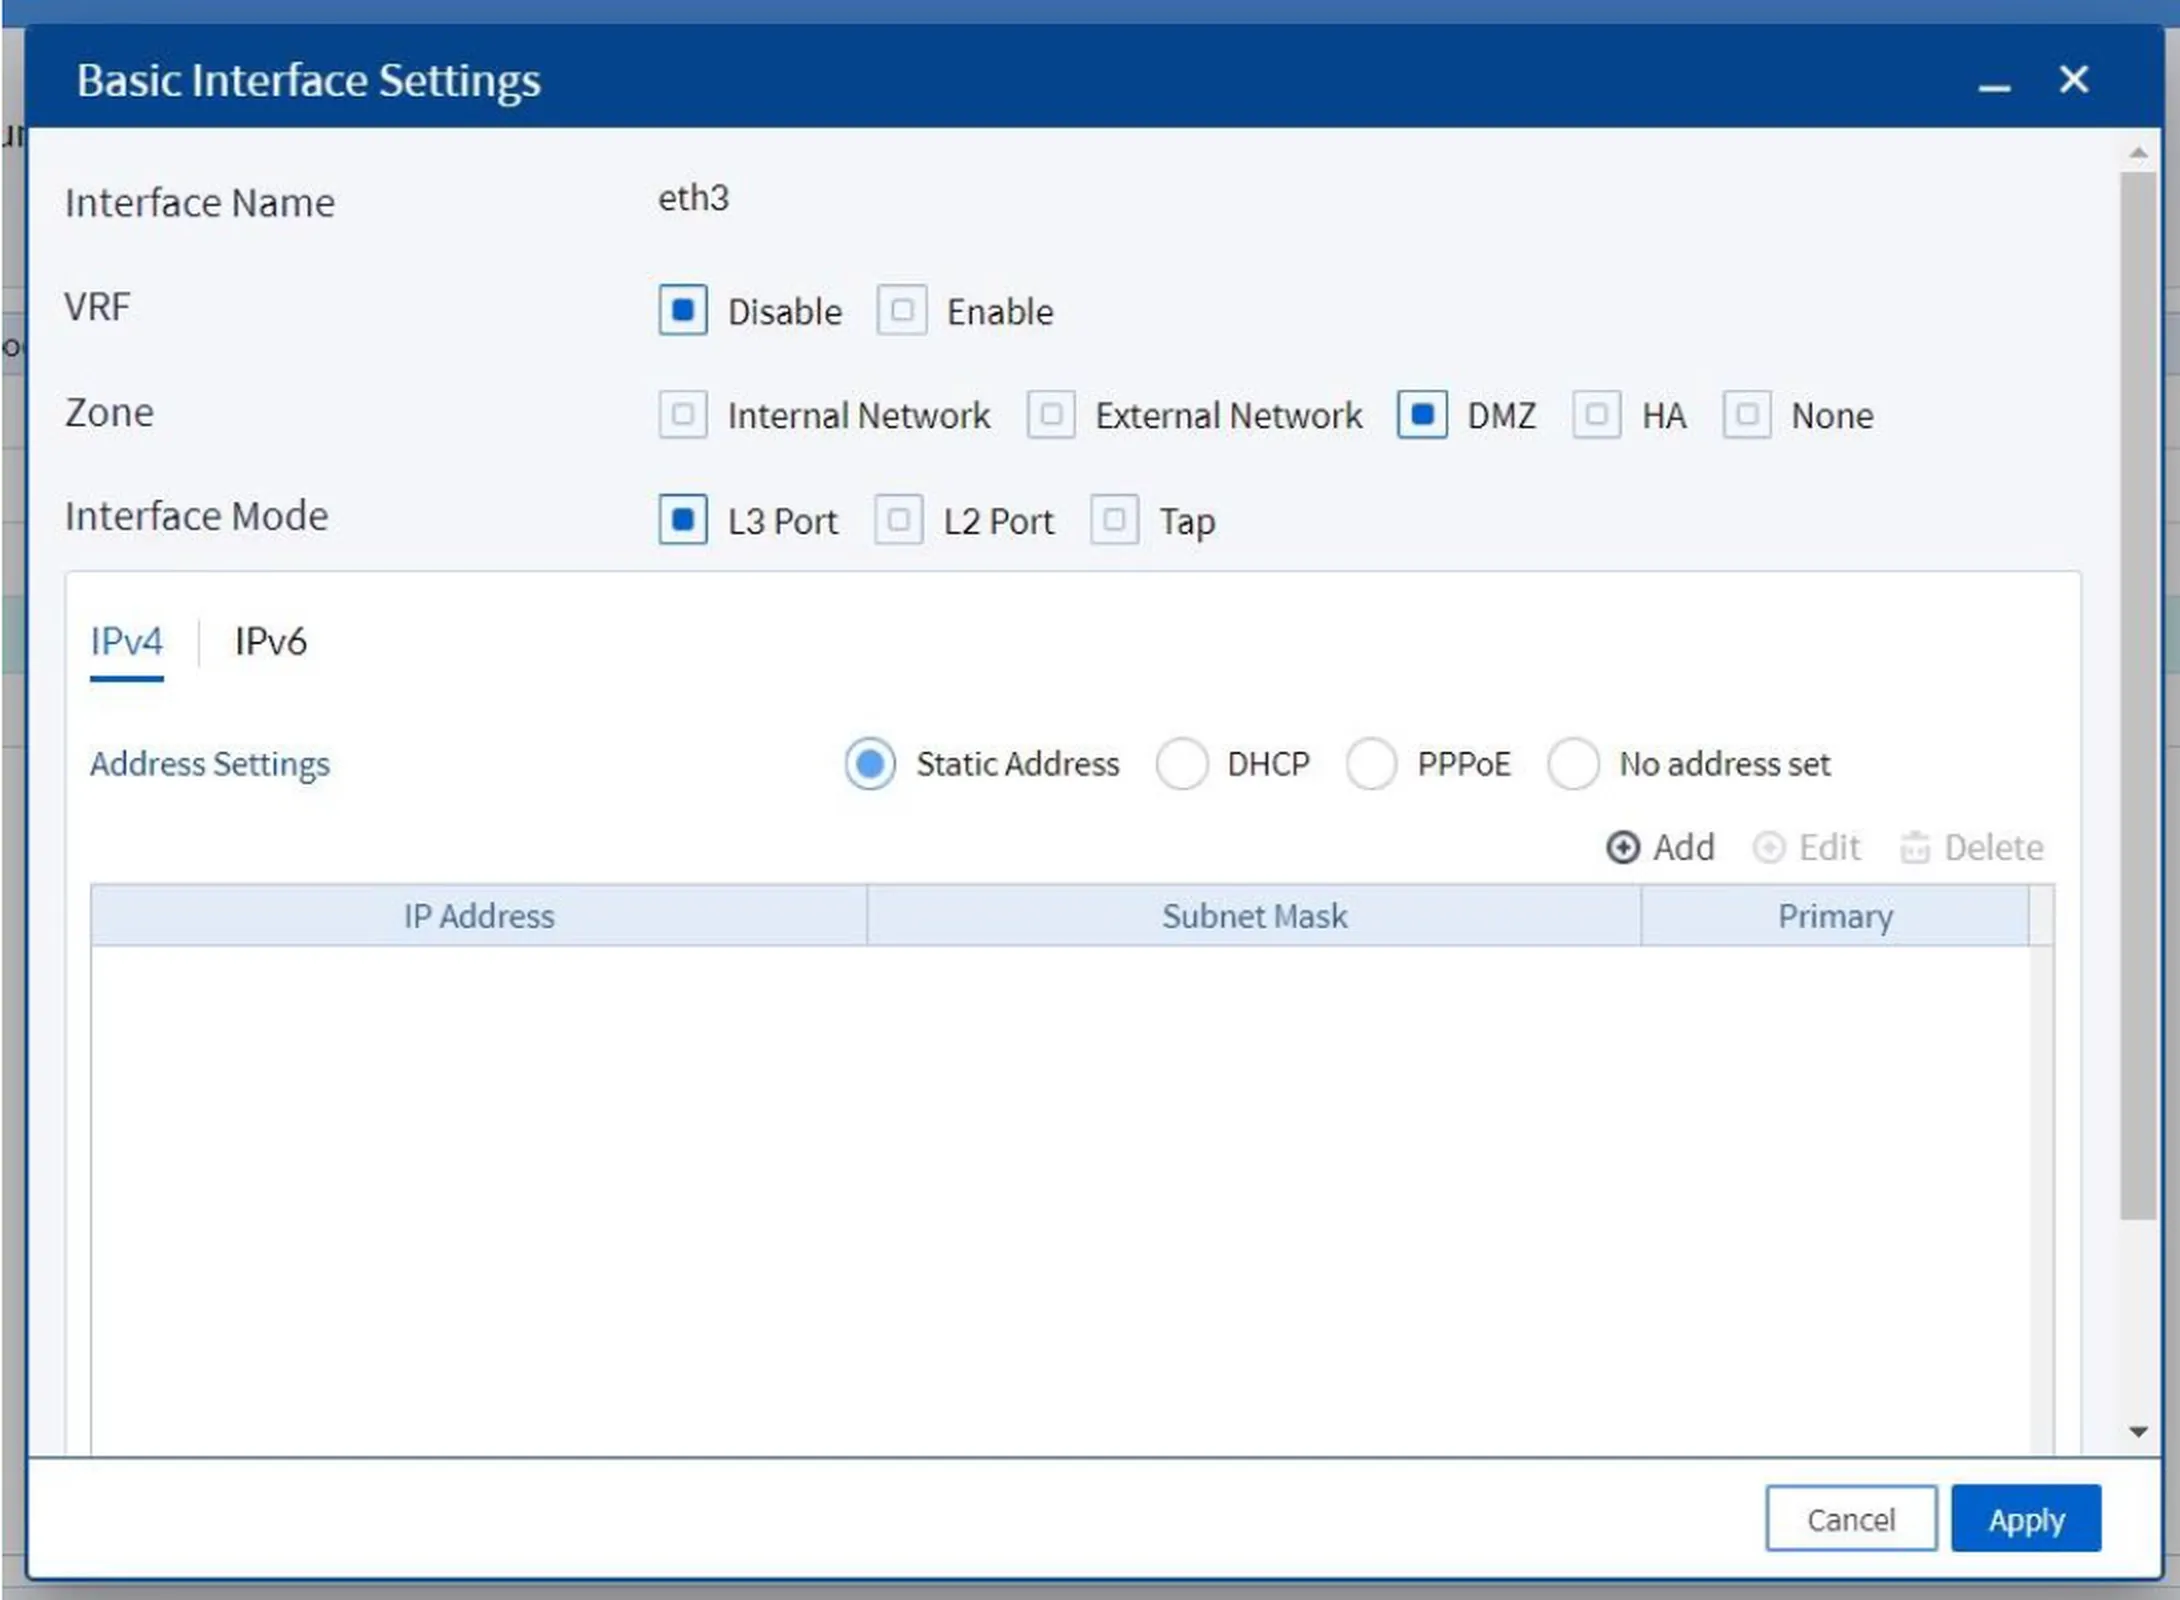
Figure 4.2 Set Basic Interface SettingsIn the Address Settings section, click
Add. Enter the IP address for the VLAN. (Do not check “Primary”)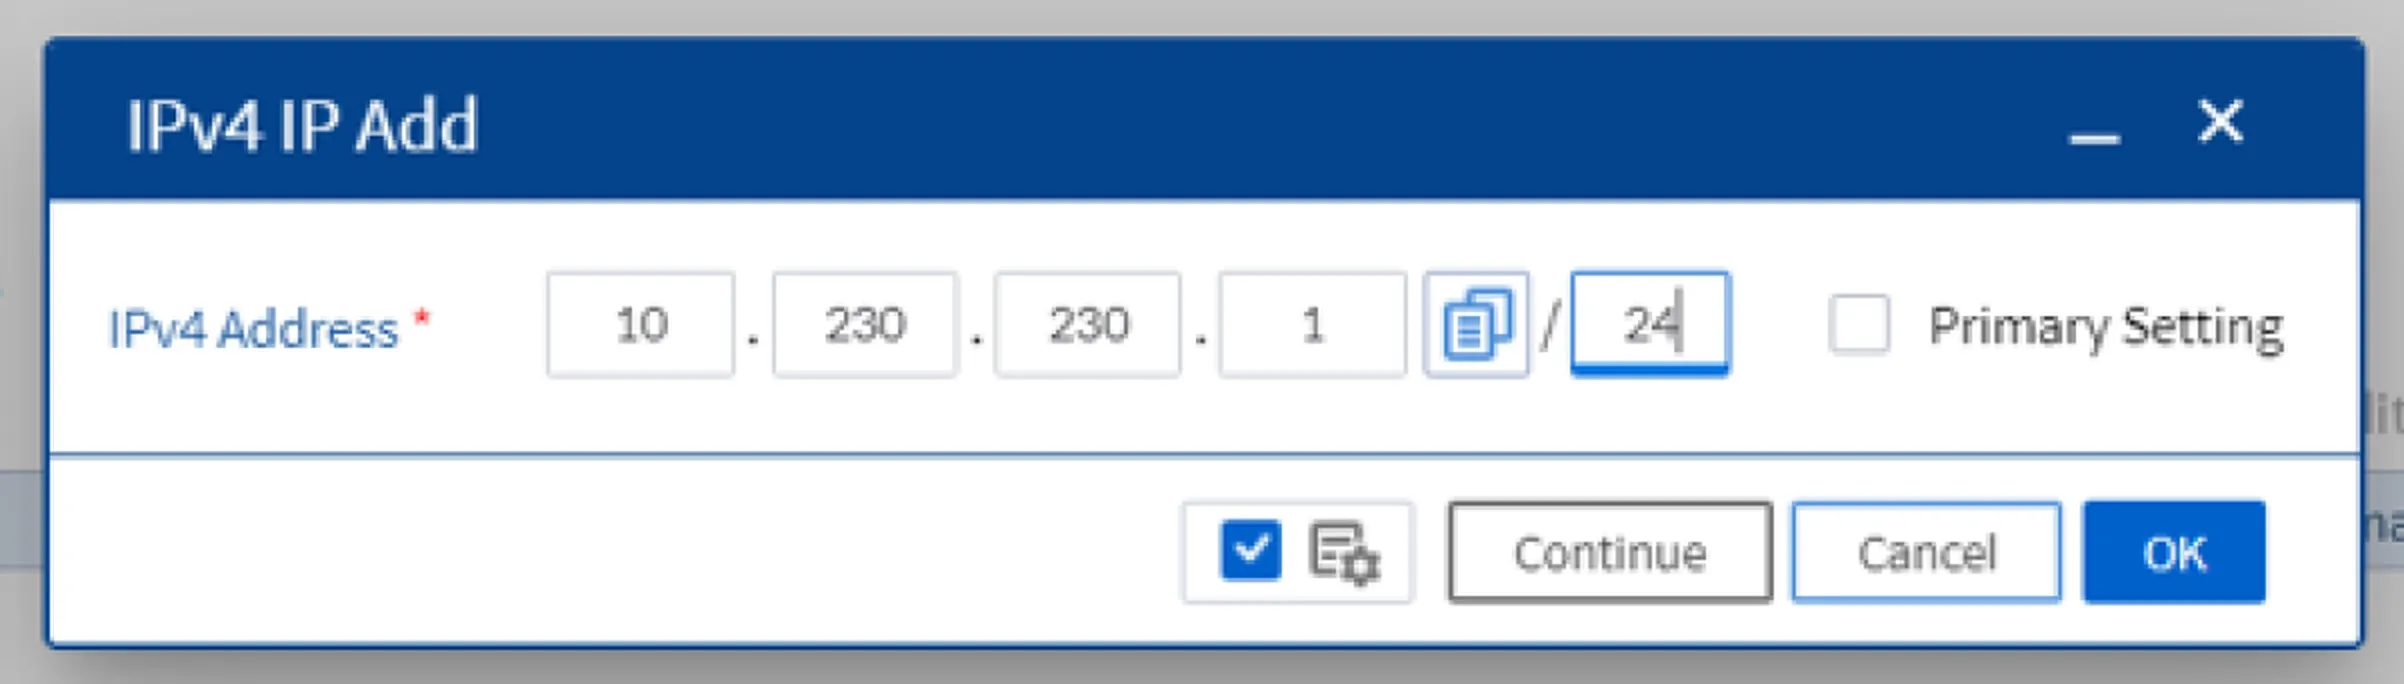
Figure 4.3 IPv4 IP AddClick
OK, thenApplyto save the configuration.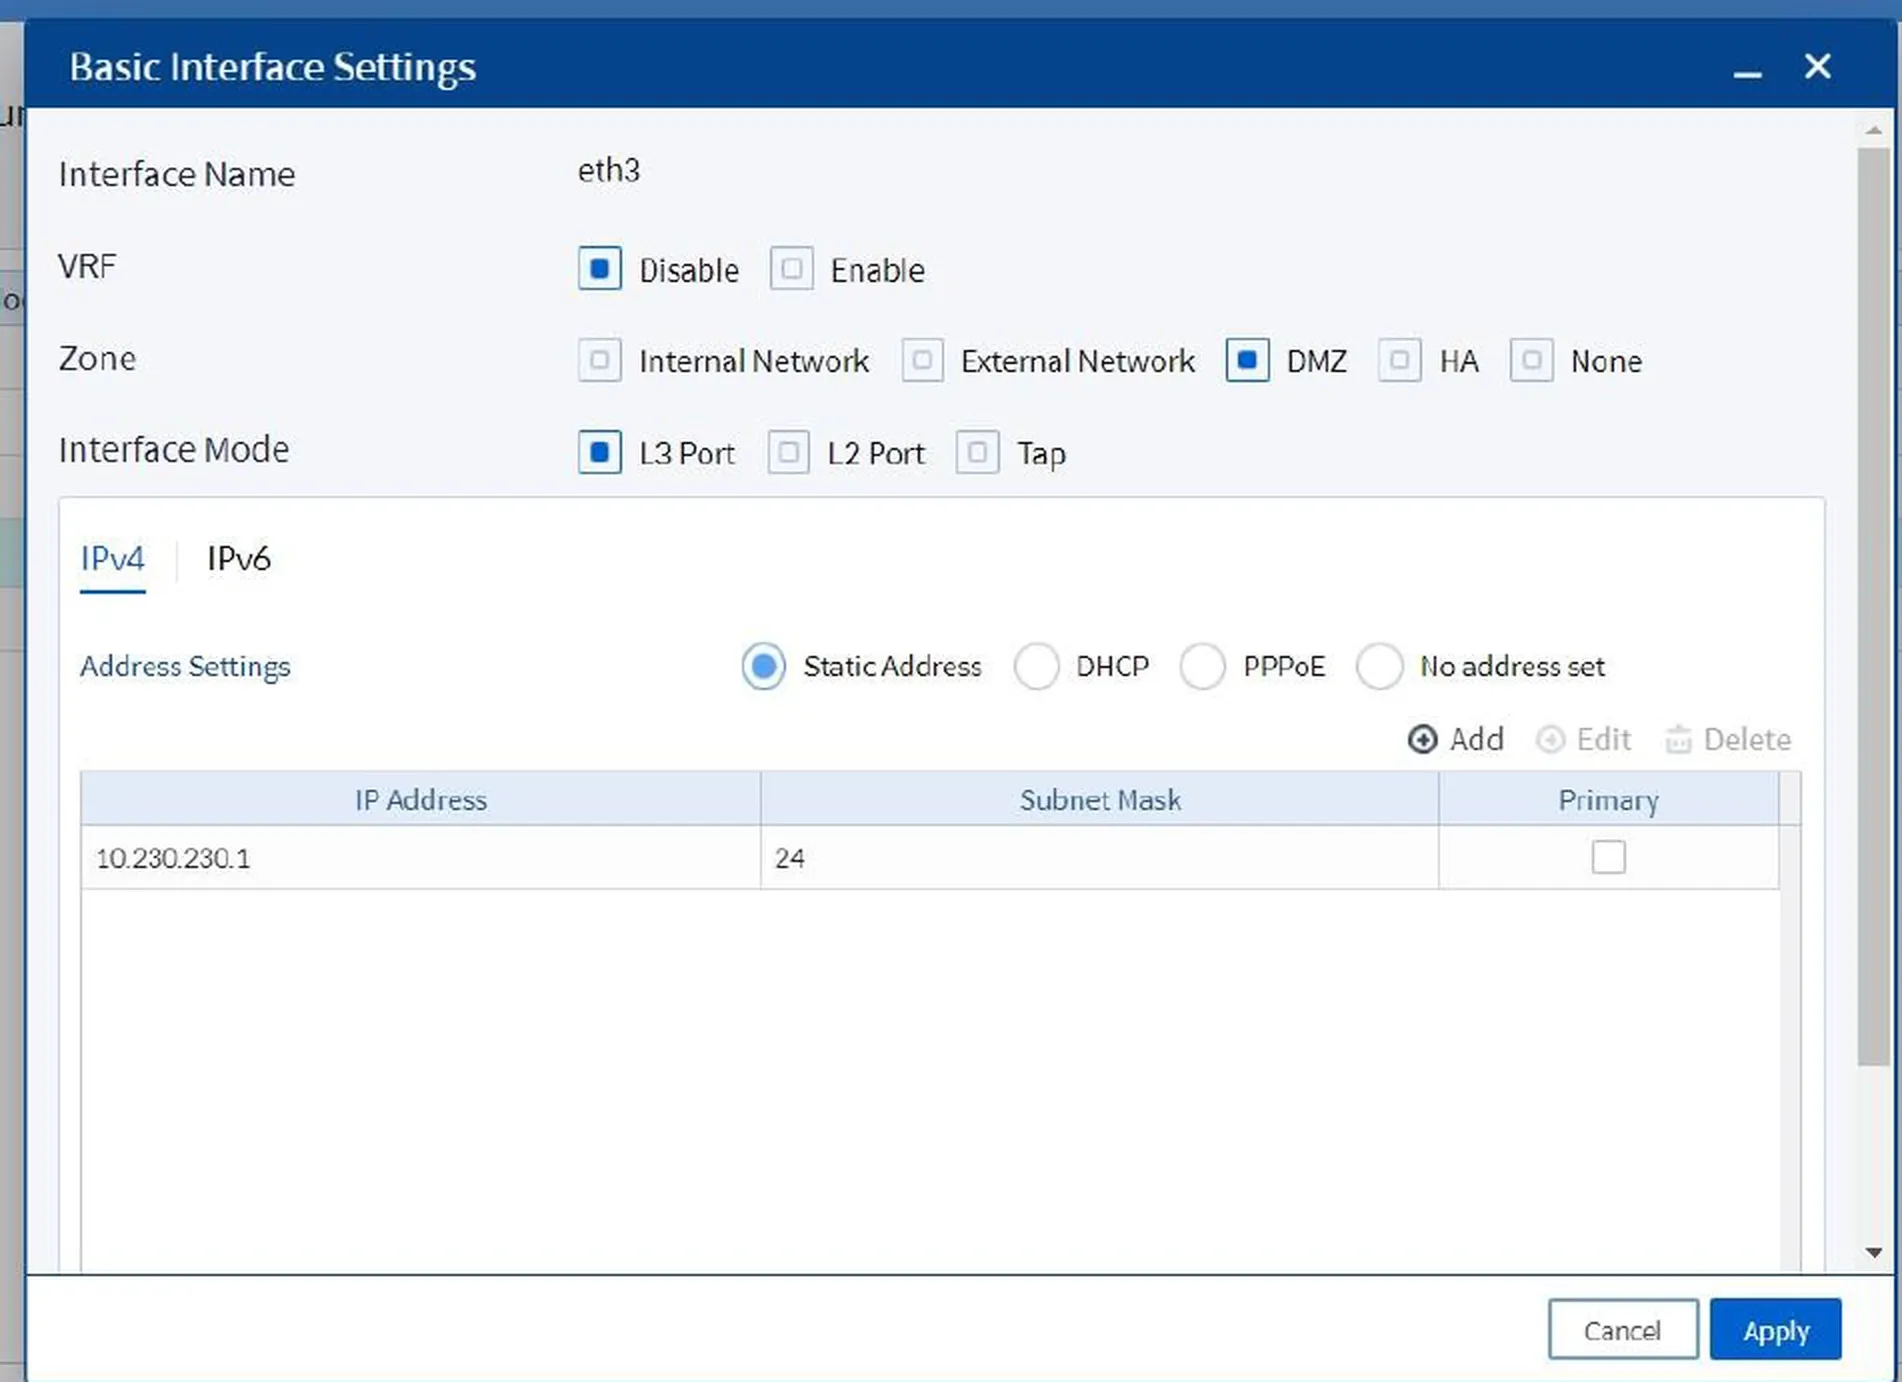
Figure 4.4 Apply Configuration
5. Configuration Result
If everything went well, the new VLAN ID and its associated IP address will now appear in the Interface Settings screen.
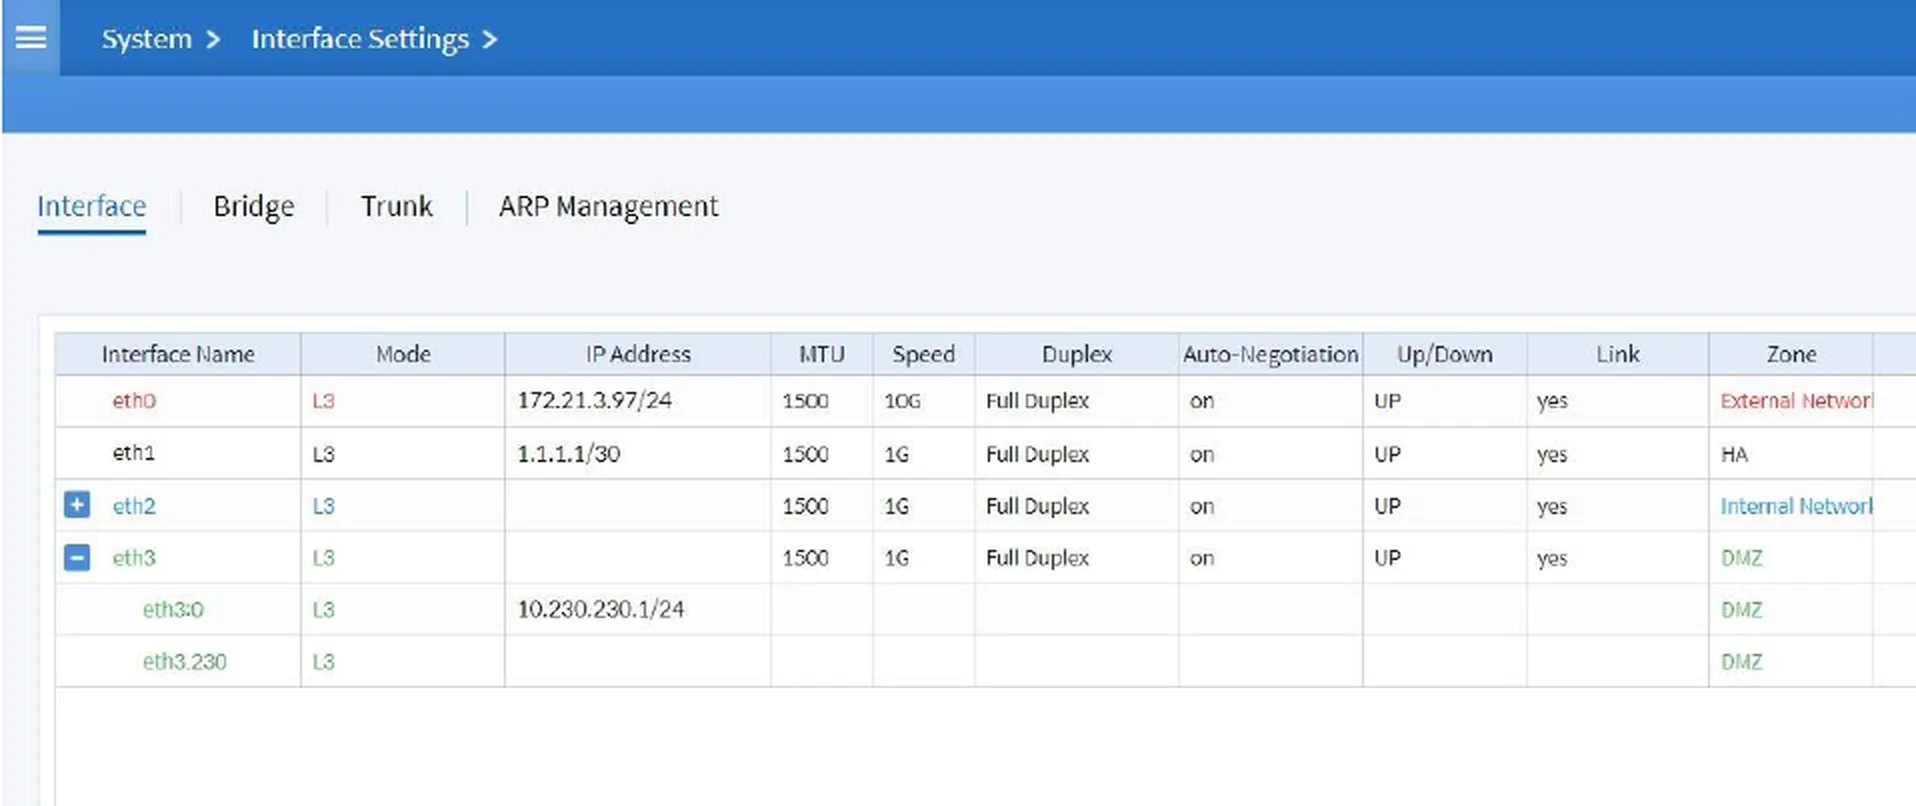
Figure 5.1 Configuration Result
Conclusion
Configuring VLANs on the SECUI Bluemax NGF Next Generation Firewall effectively separates network traffic, allowing each division or service to have its own secure and controlled communication path. Proper VLAN setup enhances internal security, prevents unauthorized access between segments, and optimizes overall network performance.
Ensure each VLAN has the correct IP address, is assigned to the appropriate zone, and is tested for connectivity to function optimally.
Need help with advanced network segmentation? Contact our team.
Last Updated
August 10, 2025
Category
SECUI Configuration, Network Security
Share This
On This Page
Contact us for
Free Consultation!
Share your challenges, and we'll provide the best solutions for your business, Connecting with us is as simple as clicking a button, and let us come to you.