Enhancing Network Security with Active Directory Integration on SECUI Bluemax Next Generation Firewall
Managing multiple users in an enterprise can be a real challenge, especially when authentication is still handled manually. This is where Active Directory (AD) and Bluemax Next Generation Firewall complement each other to simplify user management, strengthen security, and ensure network access follows company policies.
Active Directory (AD) is Microsoft’s directory service that centrally stores user, computer, and network resource data. Meanwhile, Bluemax NGF comes as a next-generation firewall that protects IT infrastructure, both wired and wireless with smarter threat detection.
By integrating Active Directory SECUI Bluemax NGF, administrators can centralize user authentication, enable activity logging, and easily synchronize groups.
In this article, you will learn step by step how to integrate Active Directory with Bluemax NGF.
Let’s dive in!
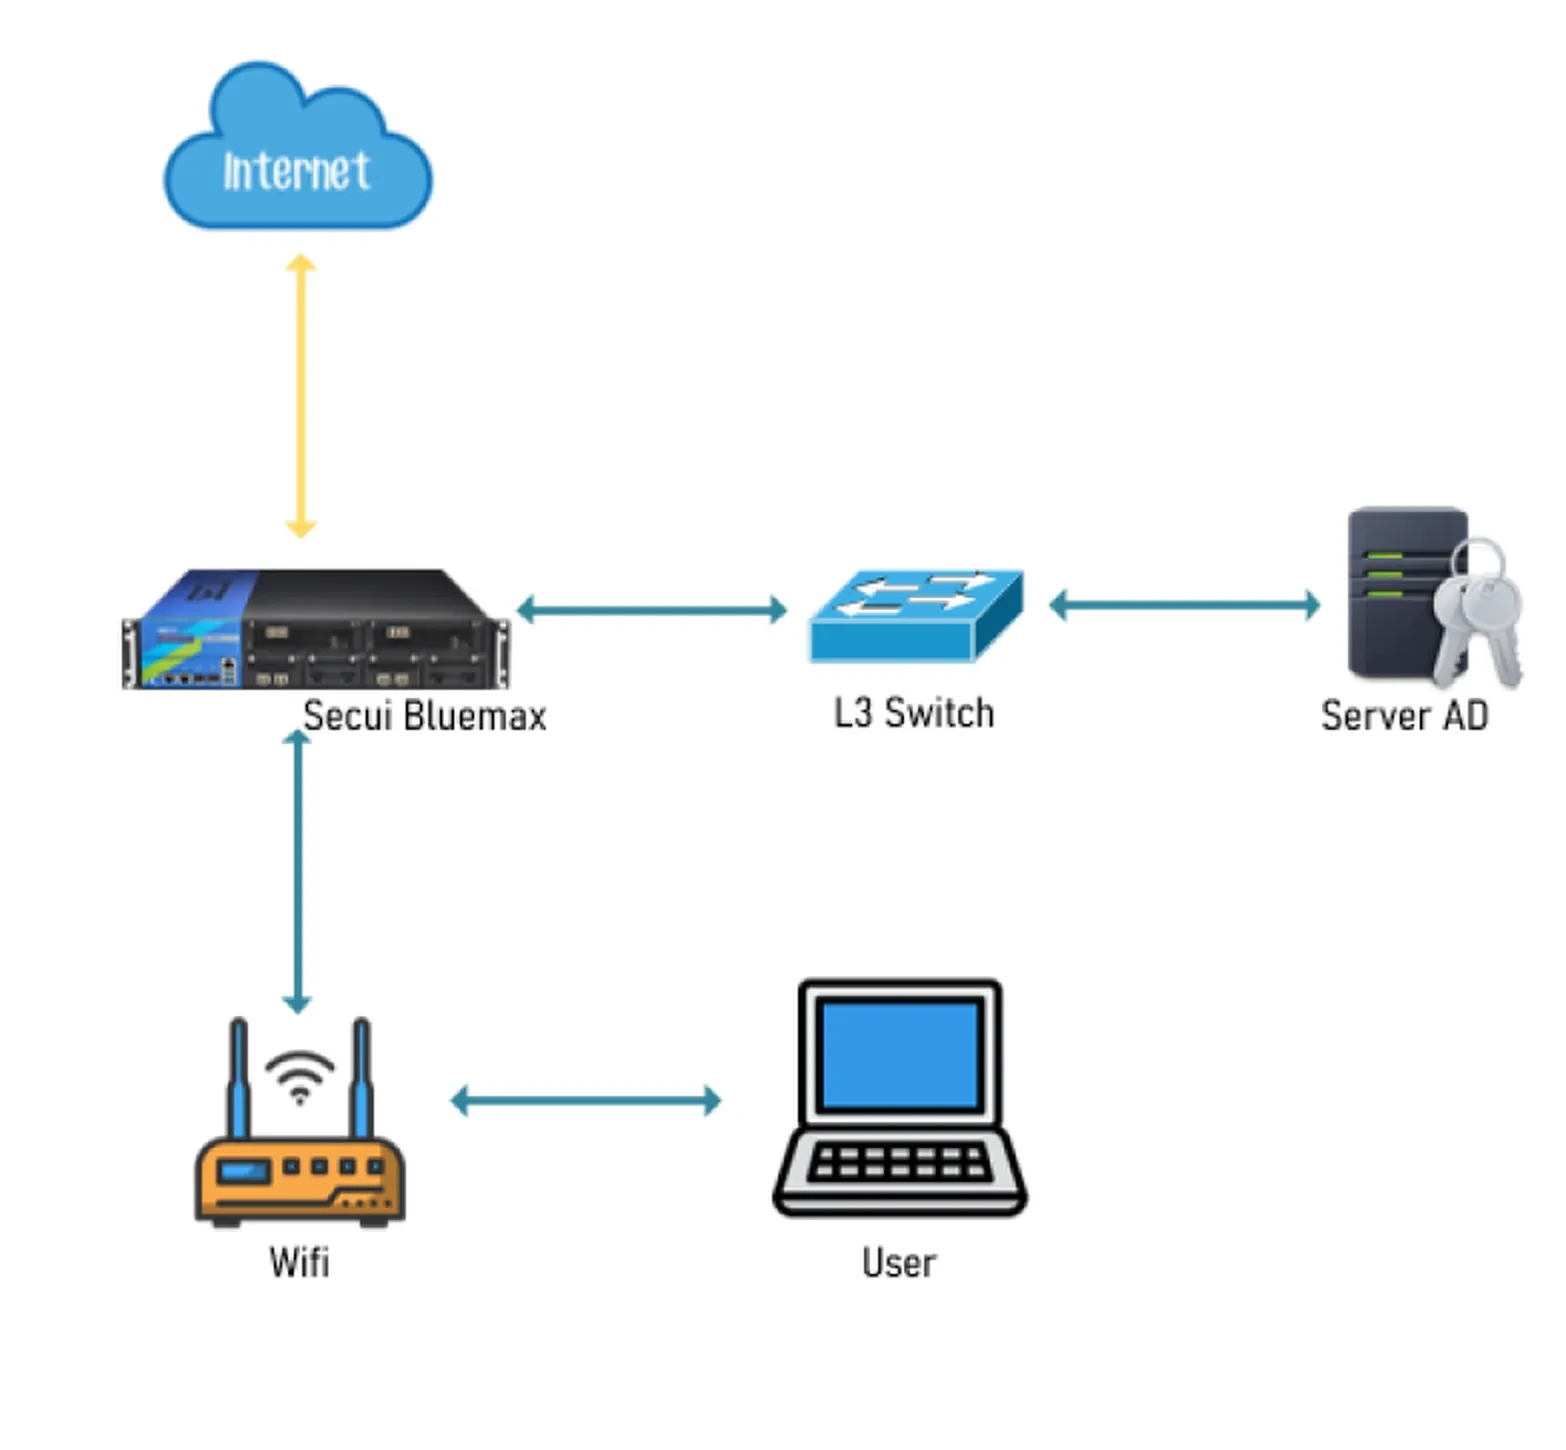
Figure 0.1 Active Directory Topology
Steps to Configure Active Directory
1. Login to the Bluemax NGF Dashboard
First, open your browser and access the Bluemax NGF dashboard using its IP Address, then log in with Administrator credentials.
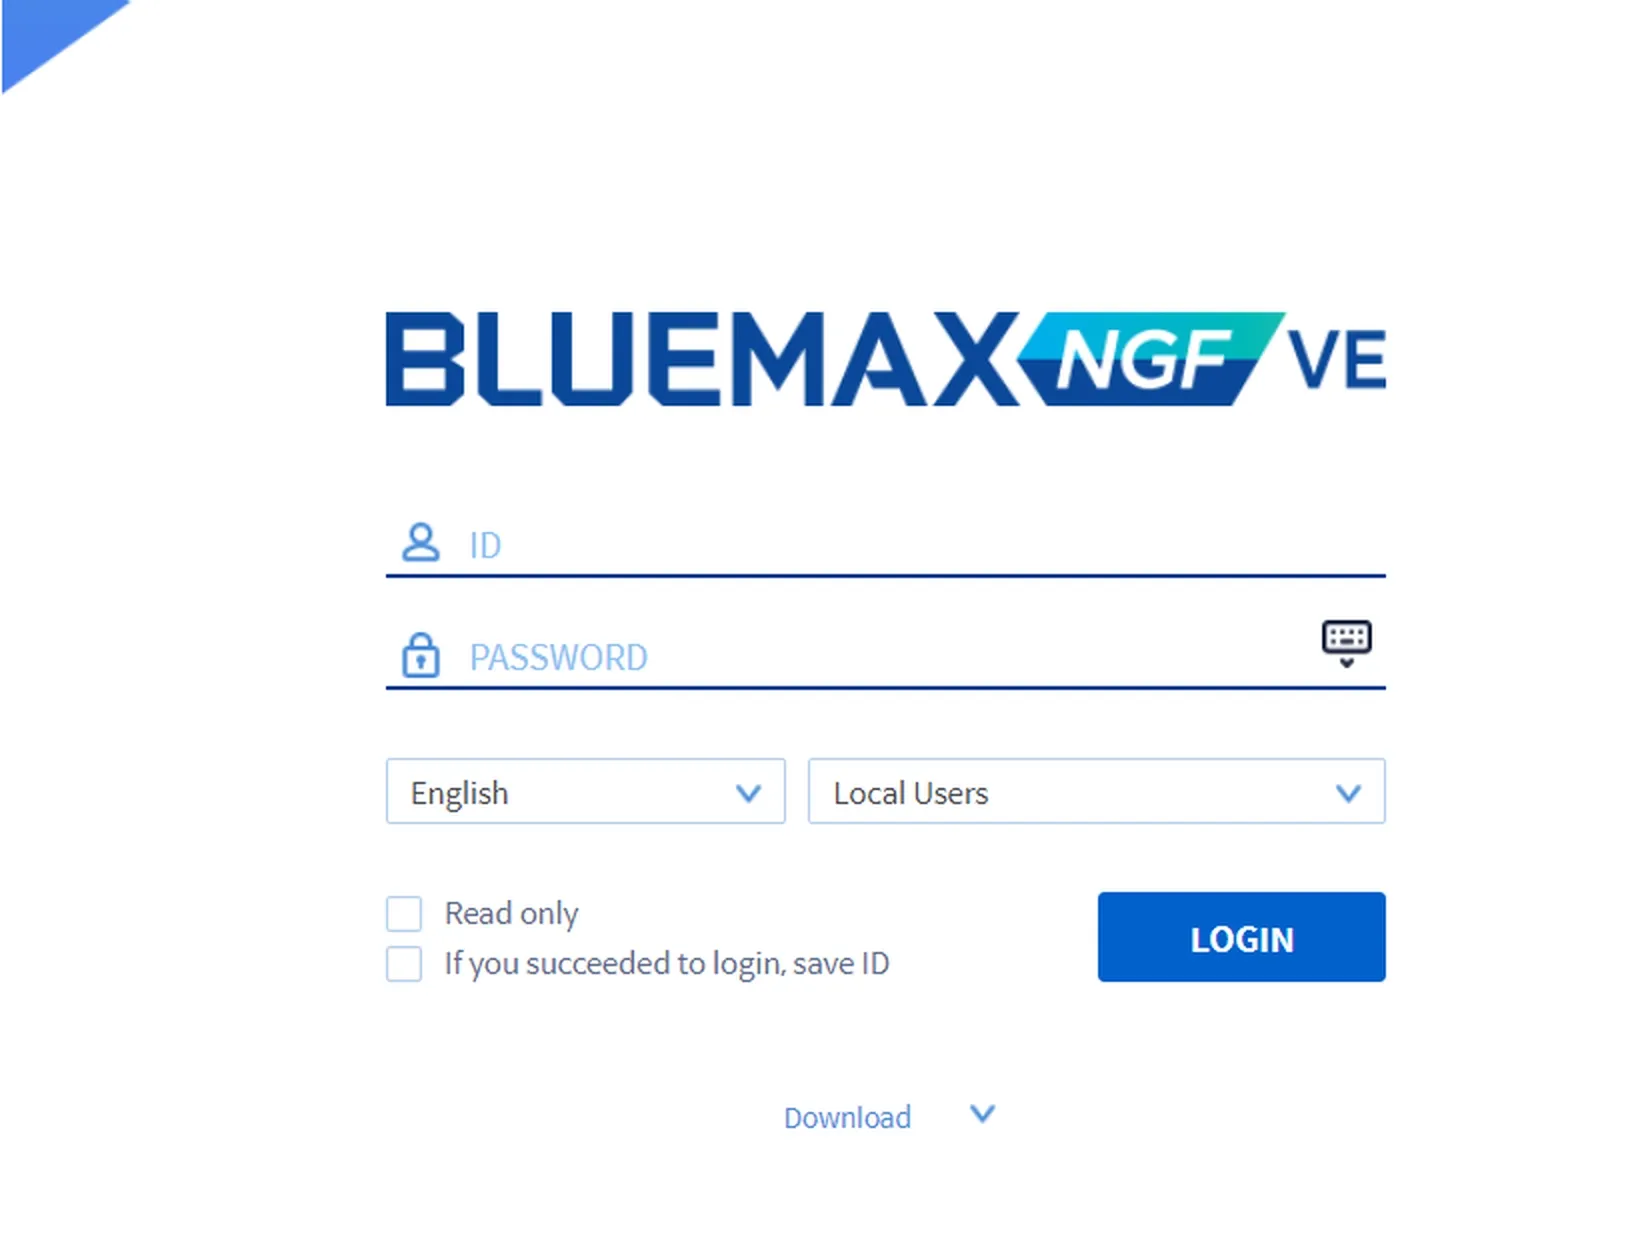
Figure 1.1 Bluemax NGF Login Page
2. Add Active Directory Server
Once logged in, navigate to:
System > Authentication > Authentication Server
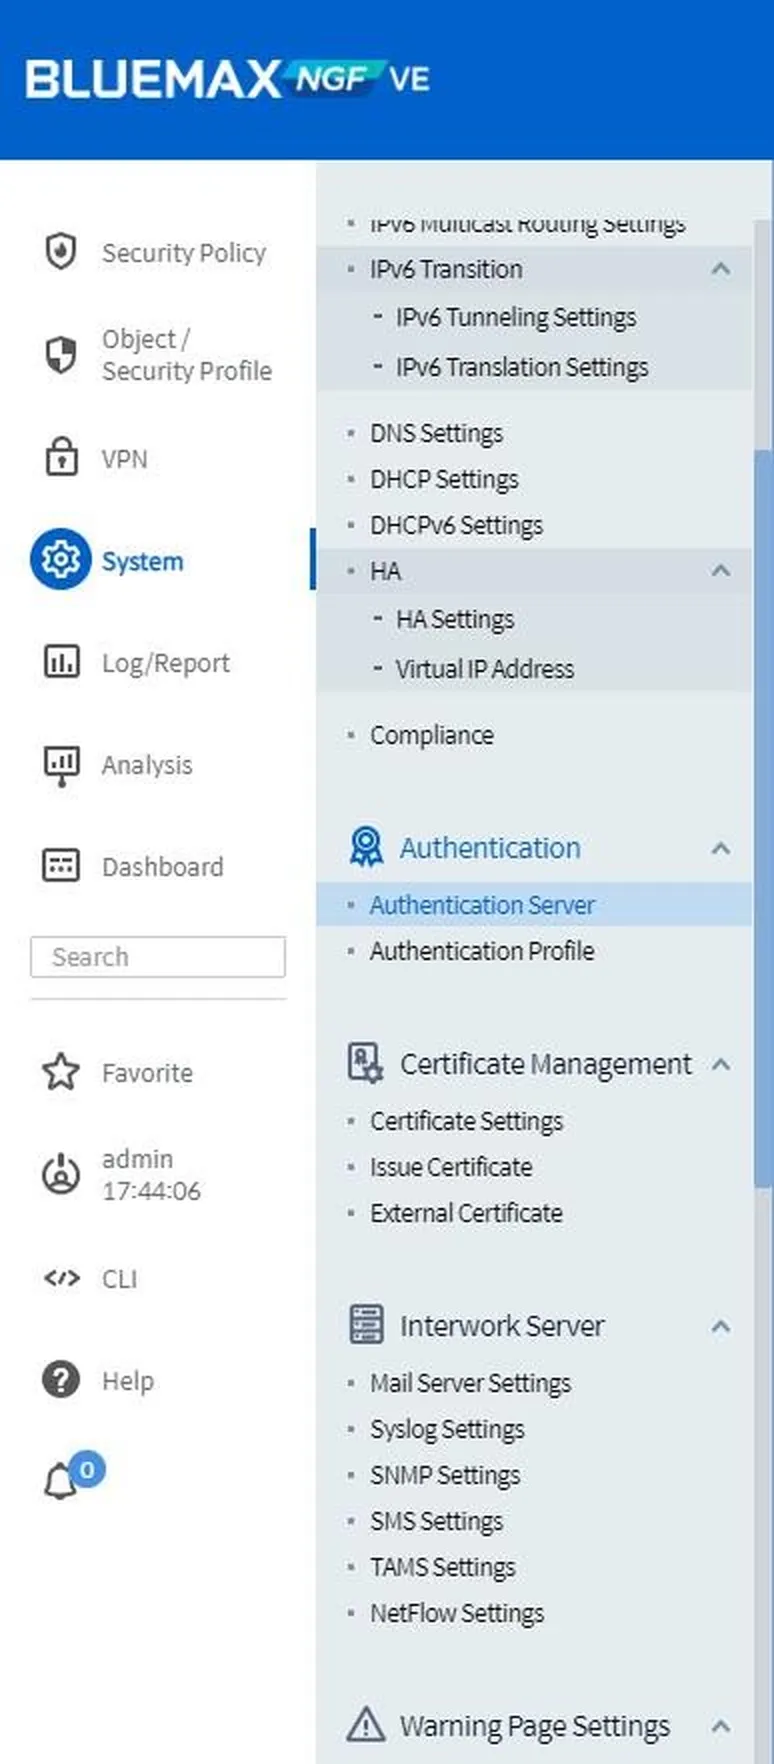
Figure 2.1 System Menu
On the Authentication Server page, click ADD to add your Active Directory server.
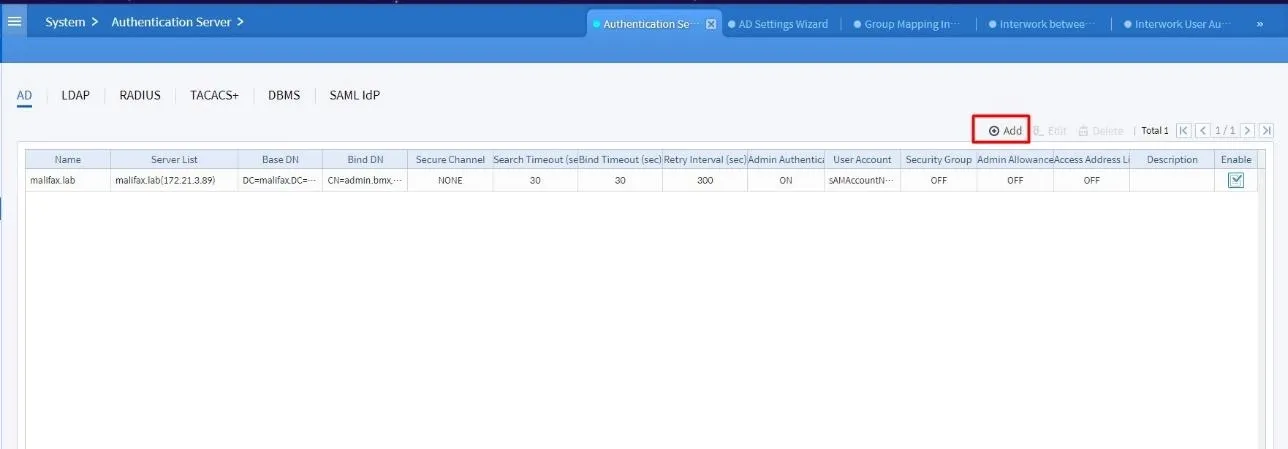
Figure 2.2 Authentication Server Page
After clicking Add, the Edit AD Server page will appear. Fill in the following parameters:
- Name: AD server name
- Server List: AD server IP
- Base DN & Bind DN
- Password & Confirm Password
- Adjust based on your AD server setup
Make sure all parameters marked with * are filled.
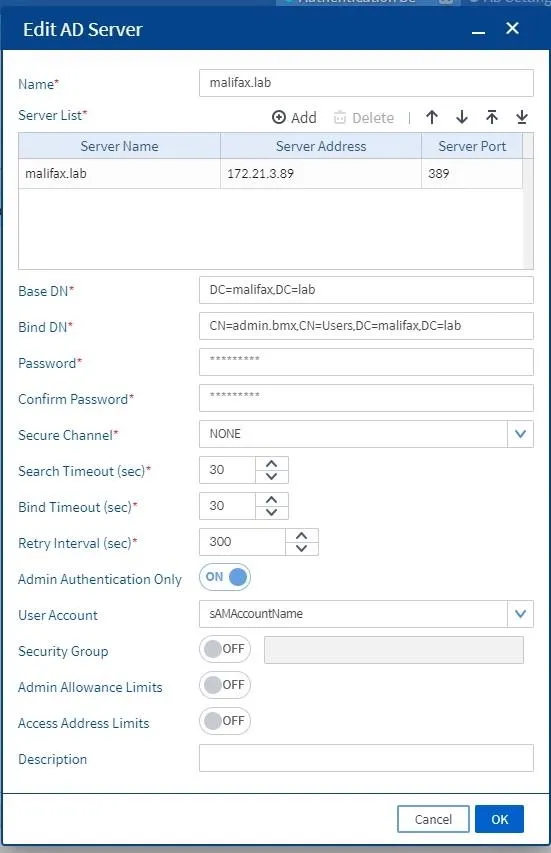
Figure 2.3 Add AD Server
For the Server List parameter, click ADD to add Server Name, Server Address, and Server Port. Once done, click OK to save the configuration.
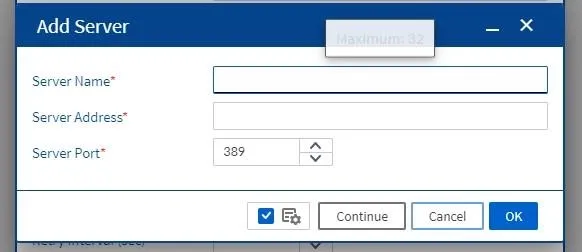
Figure 2.4 Add AD Server List
3. Configure AD Settings Wizard
Next, configure the AD Settings Wizard by navigating to:
Security Policy > User Authentication > AD Settings Wizard

Figure 3.1 Security Policy Menu
After selecting AD Settings Wizard, the “About the AD Settings Wizard” page will appear. Click Next.
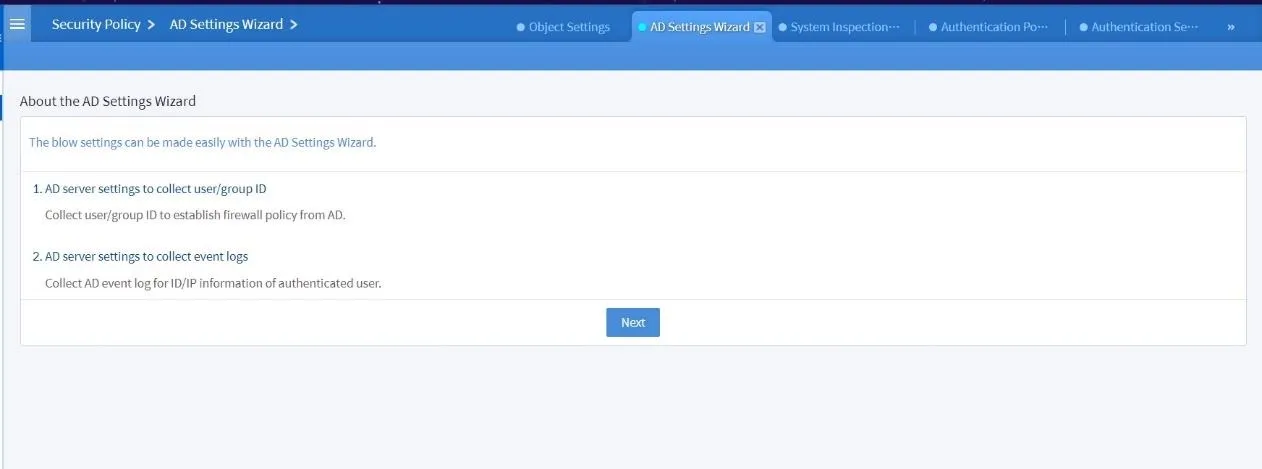
Figure 3.2 About the AD Settings Wizard Page
Then enter the AD Server you added earlier in the AD Server field.

Figure 3.3 AD Settings Wizard
Click Test in Connection Test to verify the AD Server configuration. If successful, click Next.
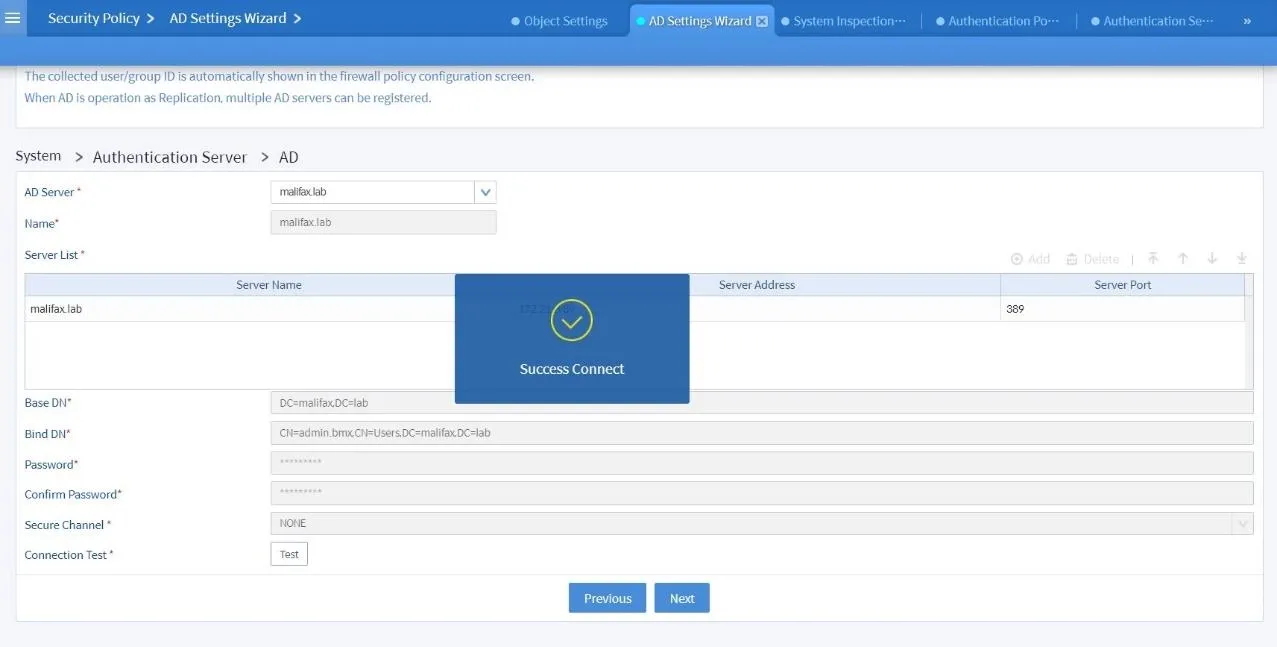
Figure 3.4 Connection Test
Next, the AD Group Mapping page will appear. Adjust the configuration as needed. Ensure all fields marked with * are filled.
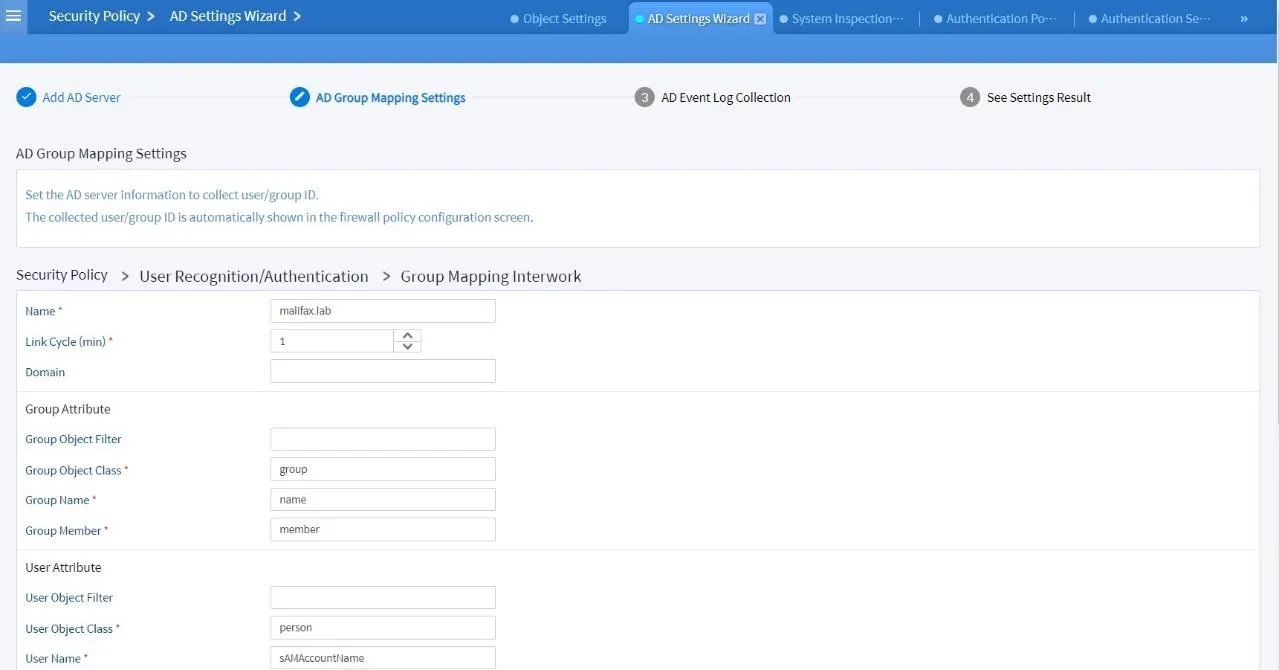
Figure 3.5 AD Group Mapping
Now, choose the AD groups or OUs to be synchronized with Bluemax NGF.
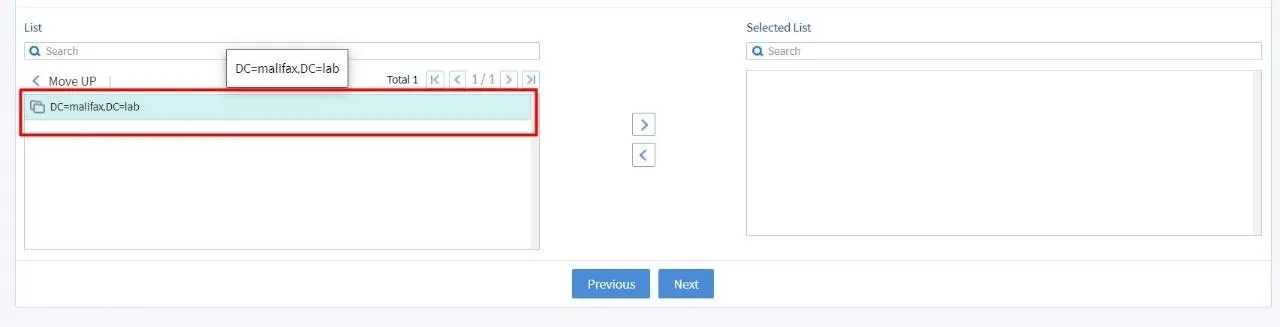
Figure 3.6 Select Groups to be Synced
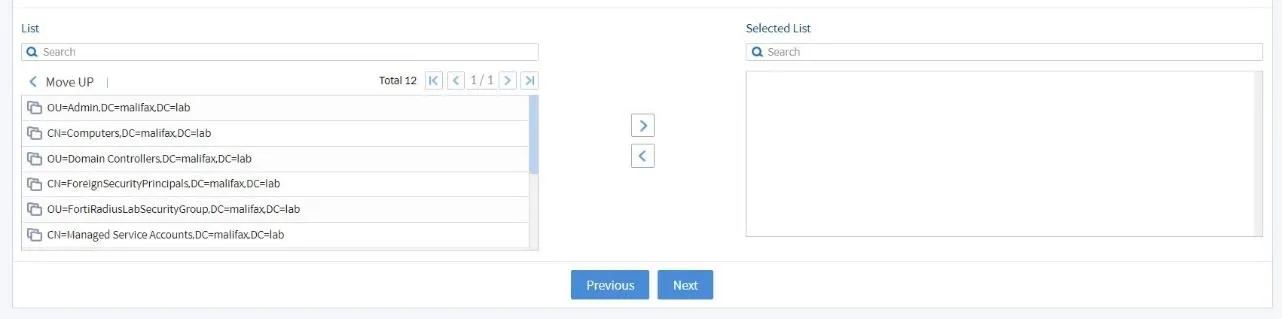
Figure 3.7 Select Groups to be Synced (1)
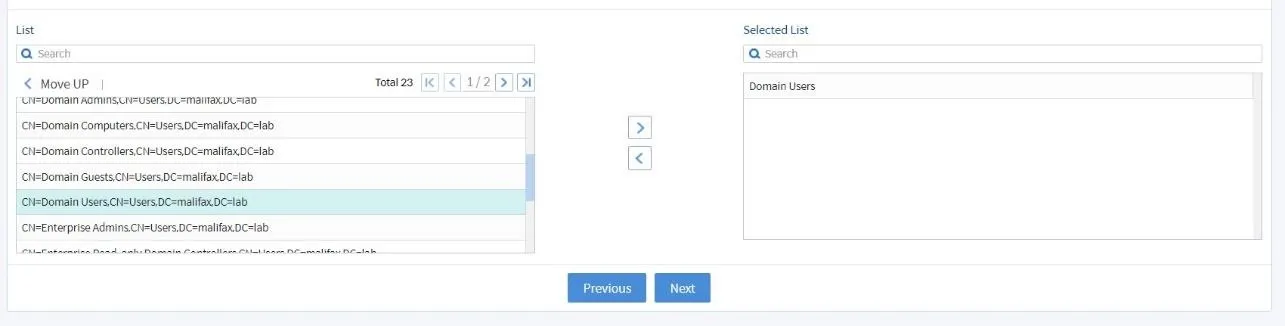
Figure 3.8 Select Groups to be Synced (2)
Proceed to AD Event Log Collection, enter your AD Server Address, adjust the configuration, and click Next.
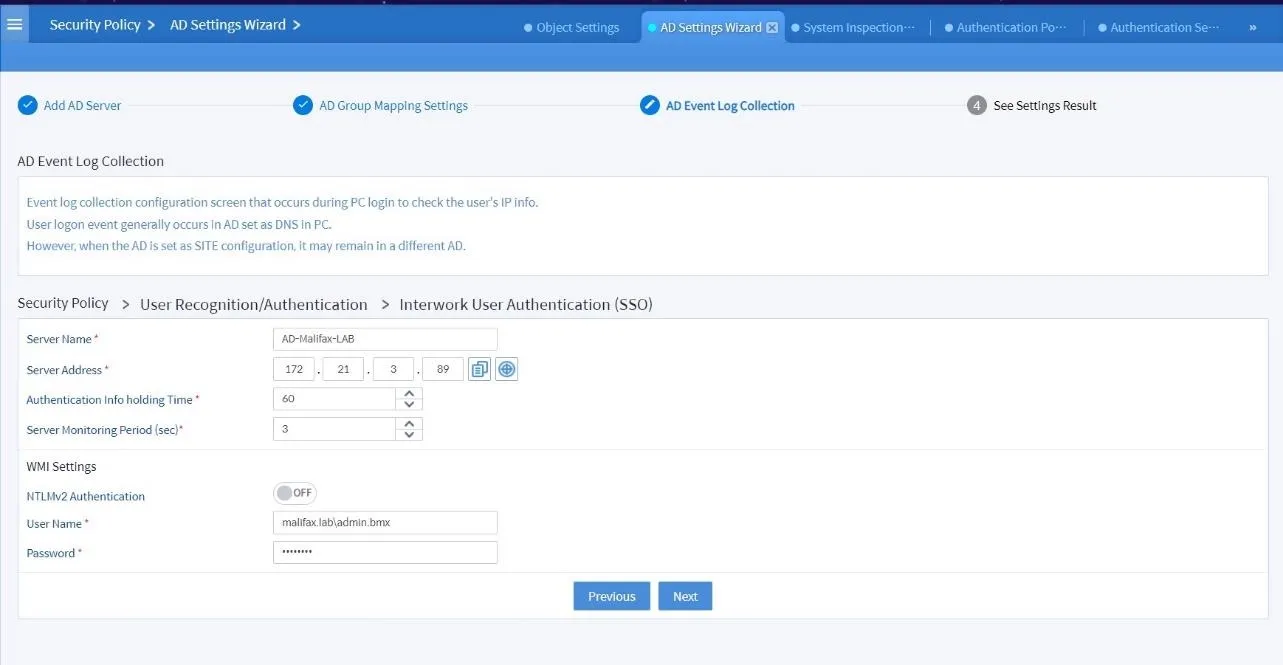
Figure 3.9 AD Event Log Configuration
Finally, the “See Settings Result” page will appear. Review all configurations and click Apply to implement.
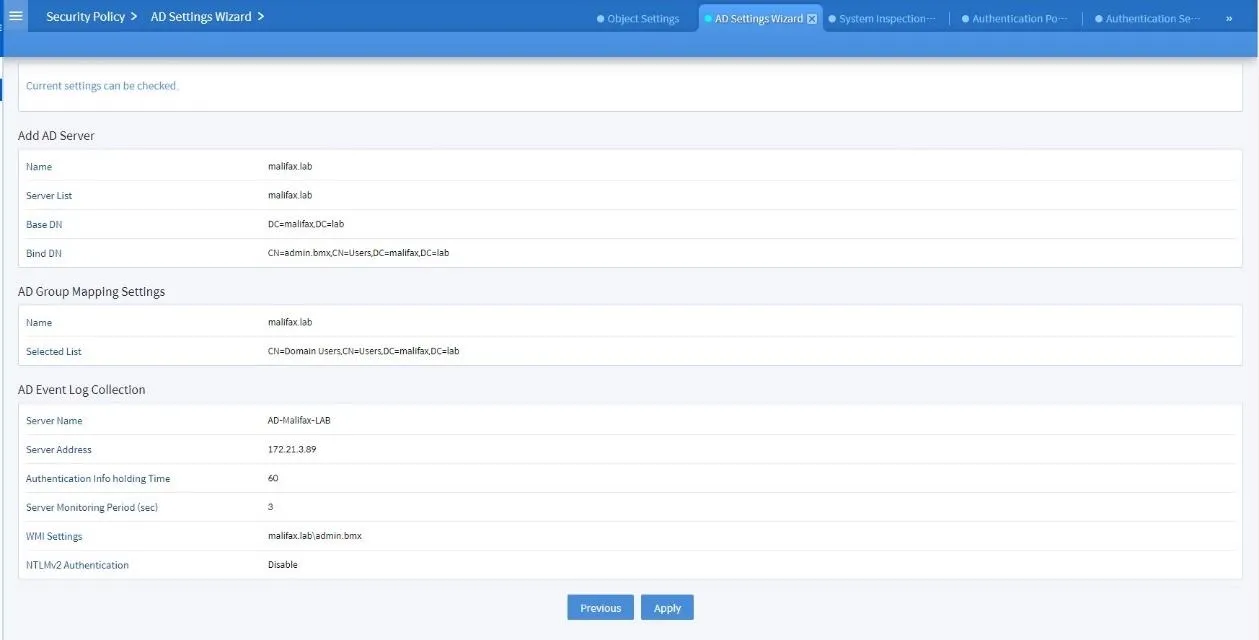
Figure 3.10 AD Settings Summary
4. Configure Group Mapping Interwork
After applying all configurations in AD Settings Wizard, continue with Group Mapping Interwork. Navigate to:
Security Profile > User Authentication > Group Mapping Interwork
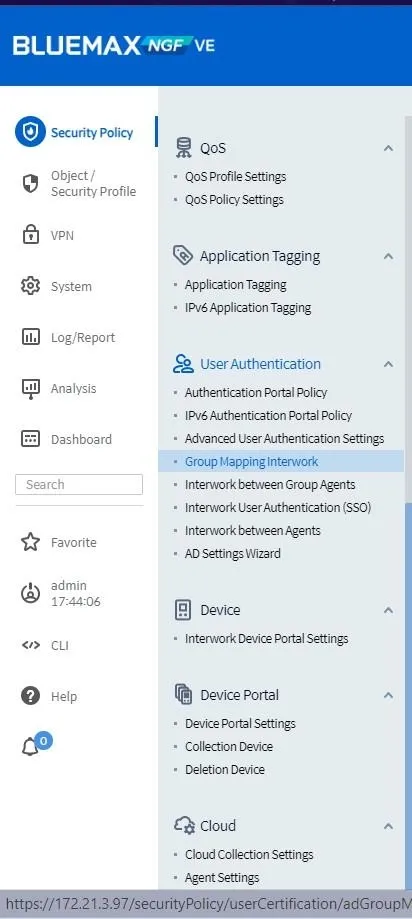
Figure 4.1 User Authentication Menu
You will see the Group Mapping Interwork dashboard listing the AD server you added. Click on it to view synchronized users.
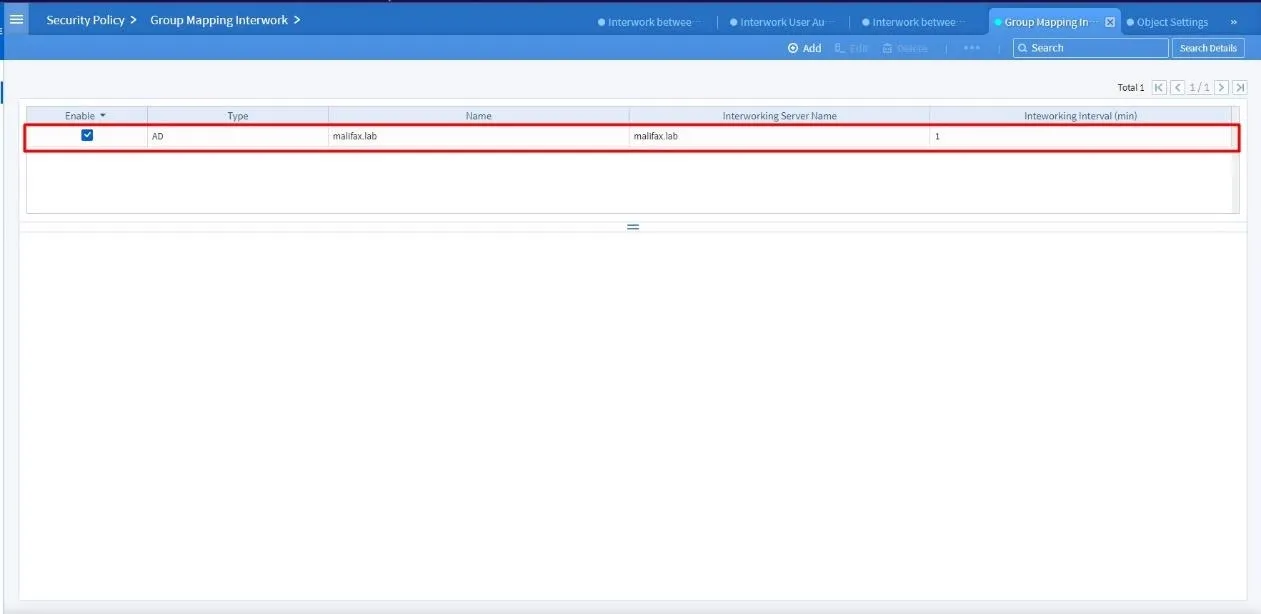
Figure 4.2 Group Mapping Interwork Dashboard
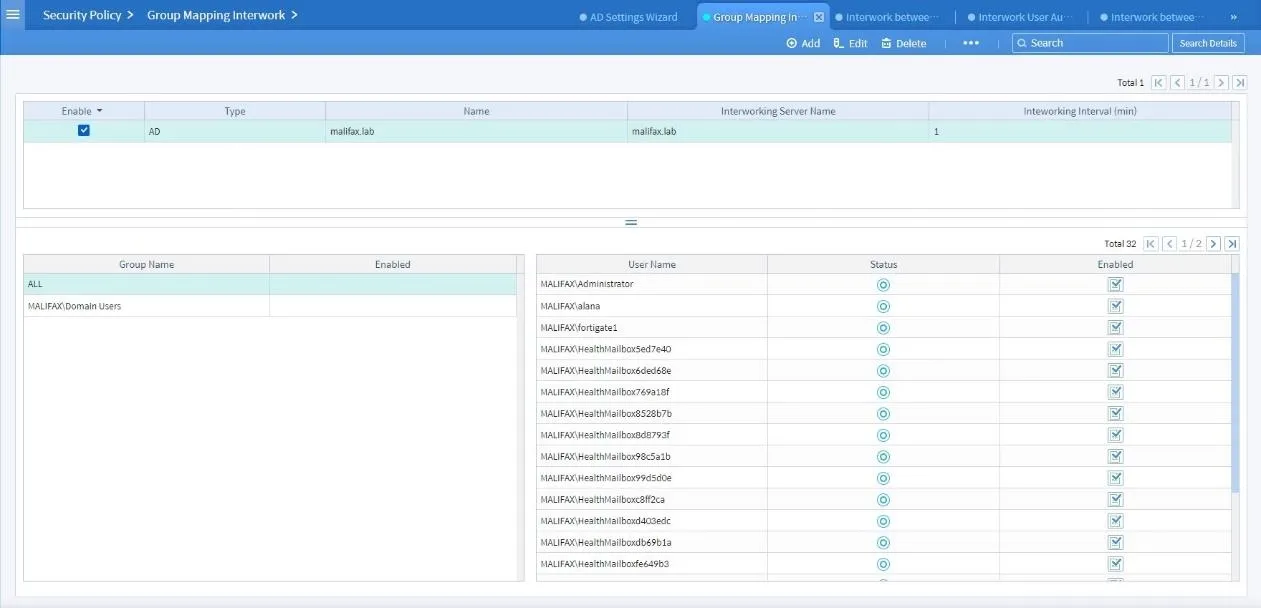
Figure 4.3 Synced AD User Information
Well done, the AD integration with SECUI Bluemax NGF is now complete!
Conclusion
Integrating Active Directory (AD) with SECUI Bluemax Next Generation Firewall gives enterprises a powerful way to simplify user authentication and improve network security. With the right configuration, administrators can centralize access control, monitor activities through logging, and automatically sync AD groups.
This approach not only streamlines IT management but also ensures every network connection follows company security policies. A solid solution for organizations seeking efficiency and stronger data protection in today’s digital era.
🚀 Still need help or looking for advanced technical guidance? Don’t hesitate to contact our team here.
Last Updated
September 30, 2025
Category
SECUI Configuration, Network Security
Share This
On This Page
Contact us for
Free Consultation!
Share your challenges, and we'll provide the best solutions for your business, Connecting with us is as simple as clicking a button, and let us come to you.