How to Configure L2TP-based VPN tunnel on SECUI Bluemax Next Generation Firewall
VPN (Virtual Private Network) is an ideal solution to securely connect users to the corporate network, especially when they work remotely. One of the most widely used VPN types due to its compatibility is L2TP (Layer 2 Tunneling Protocol).
With SECUI Bluemax Next Generation Firewall, you can enable L2TP VPN to provide secure access to your internal network. The configuration process is similar to other security appliances, making it easy to implement.
In this article, you will learn how to configure L2TP Tunnel step by step, from creating an L2TP user, setting up the IP pool, to testing the VPN connection successfully.
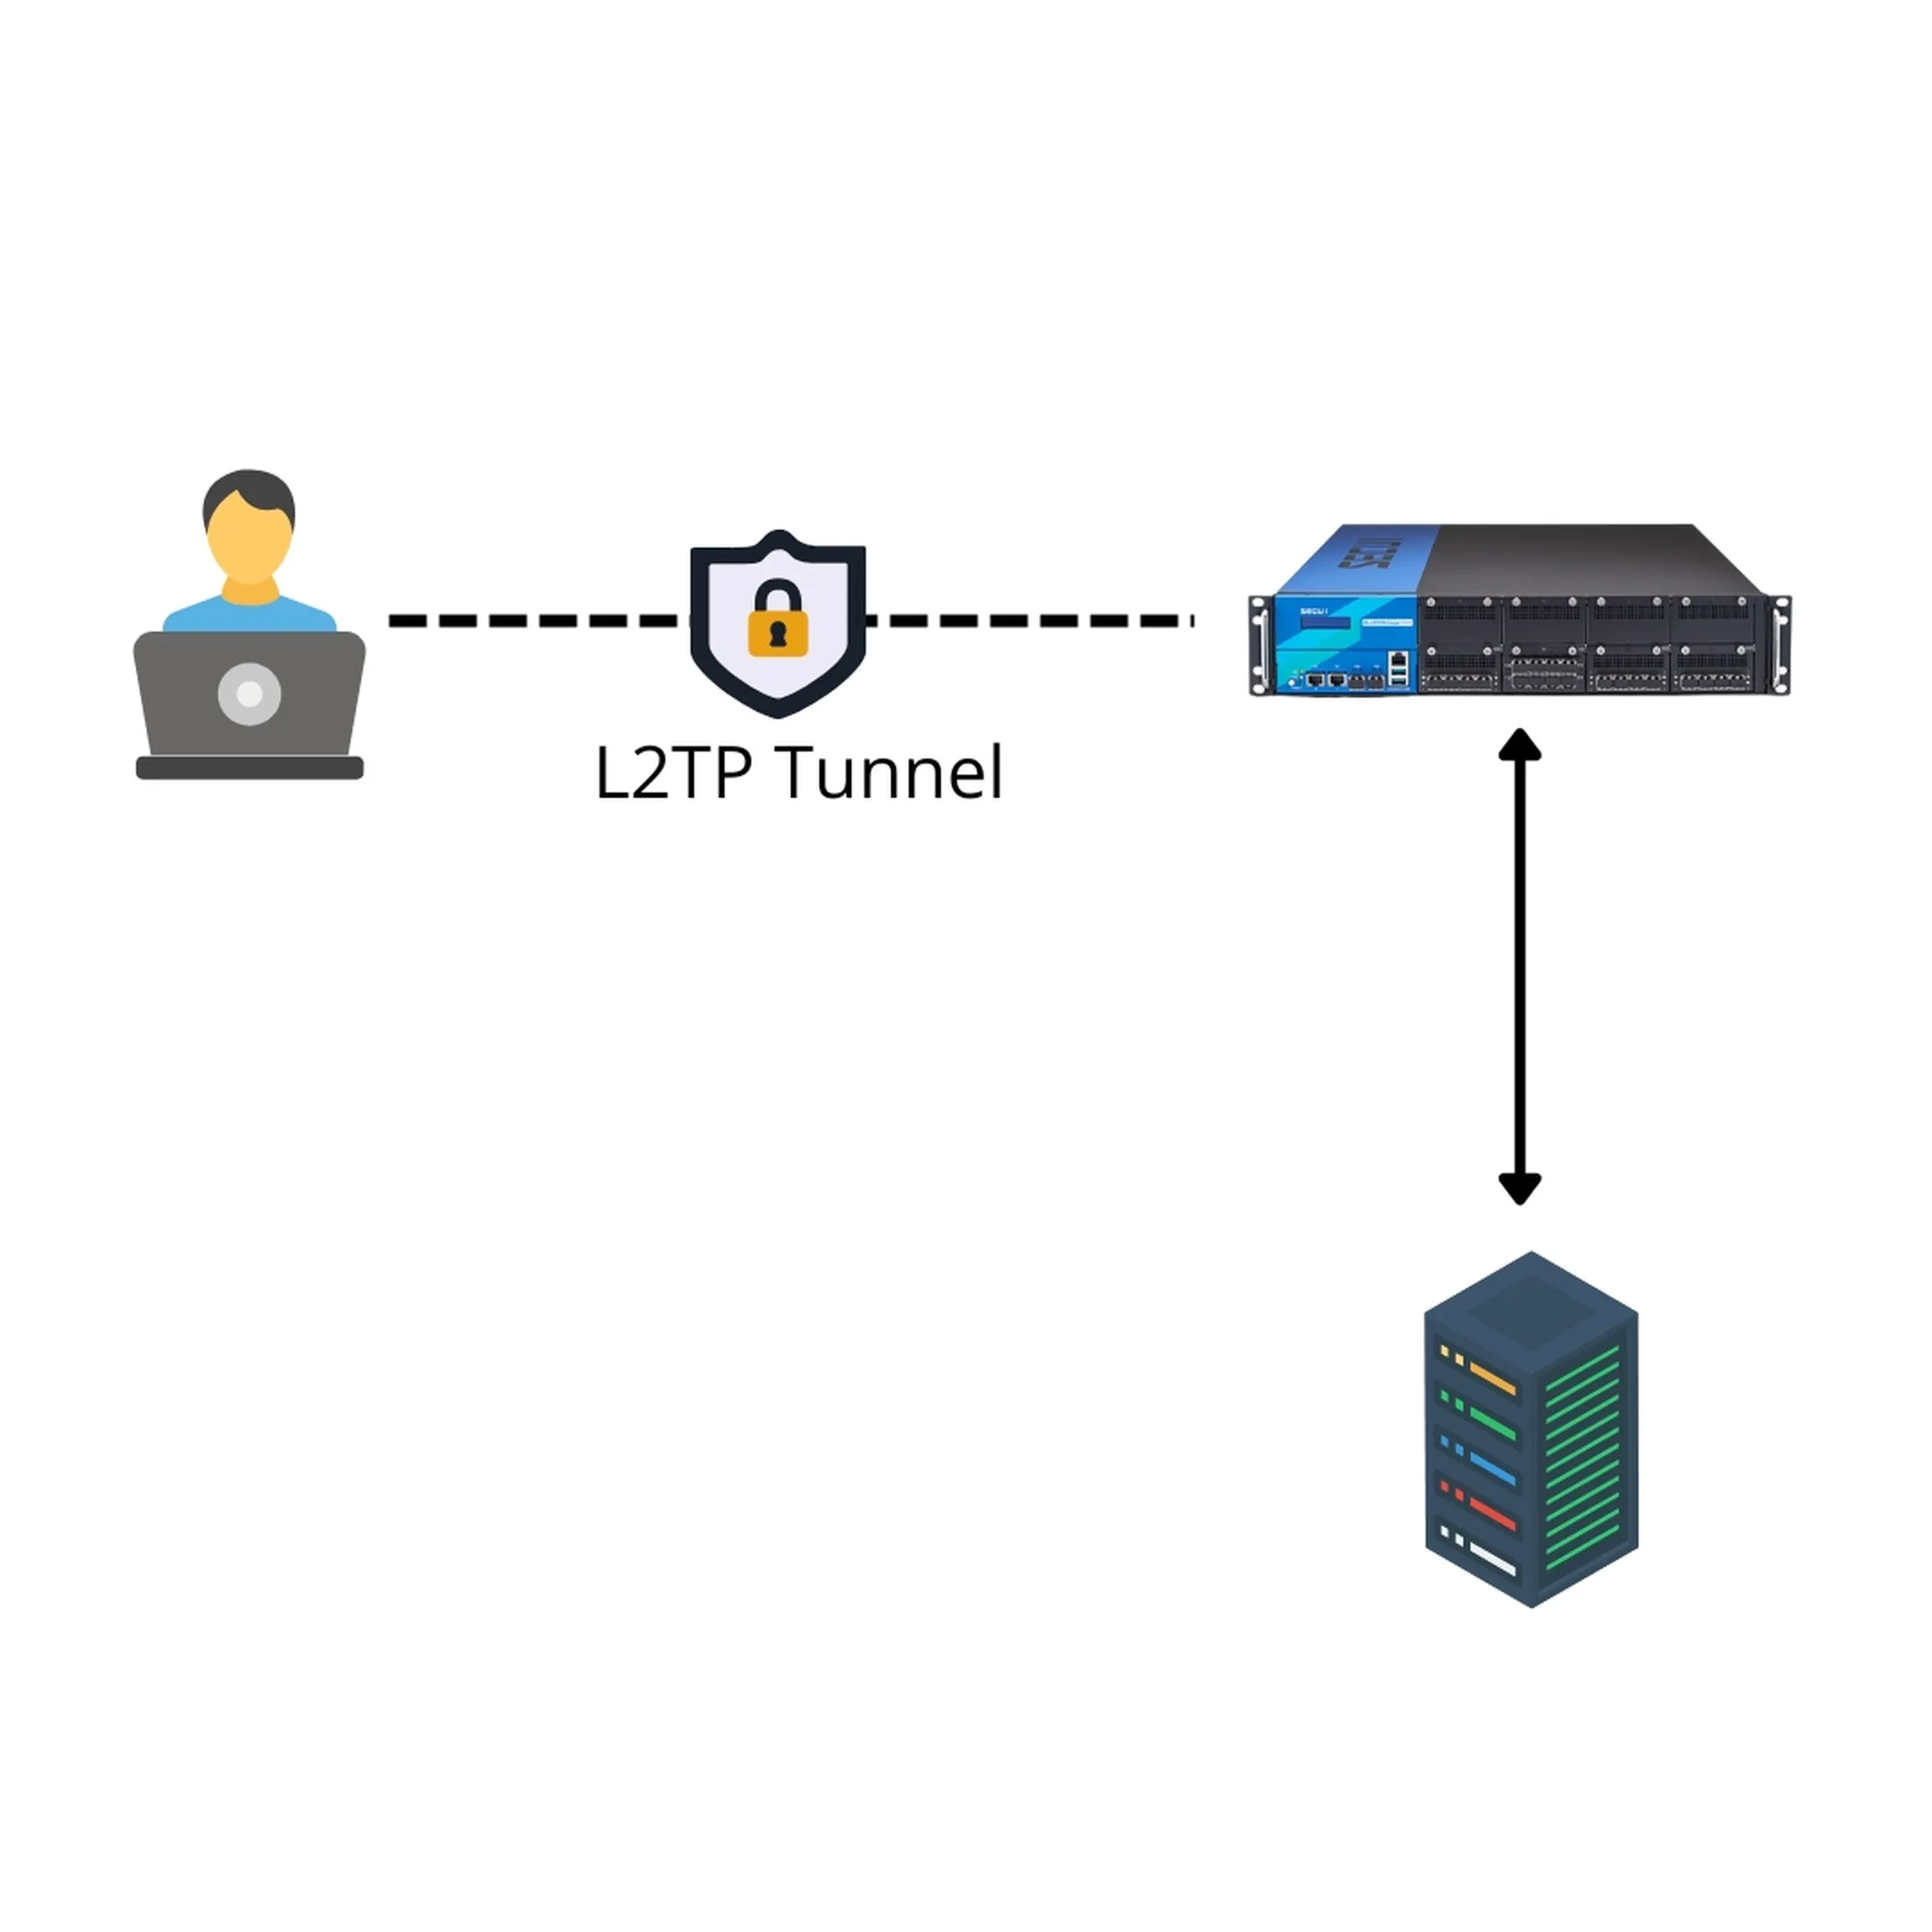
Figure 0.1 L2TP Configuration Topology
1. Log In to Bluemax NGF Interface
Open your browser and log in to Bluemax Next Generation Firewall Interface using its management IP. Make sure you have an account with admin privileges.
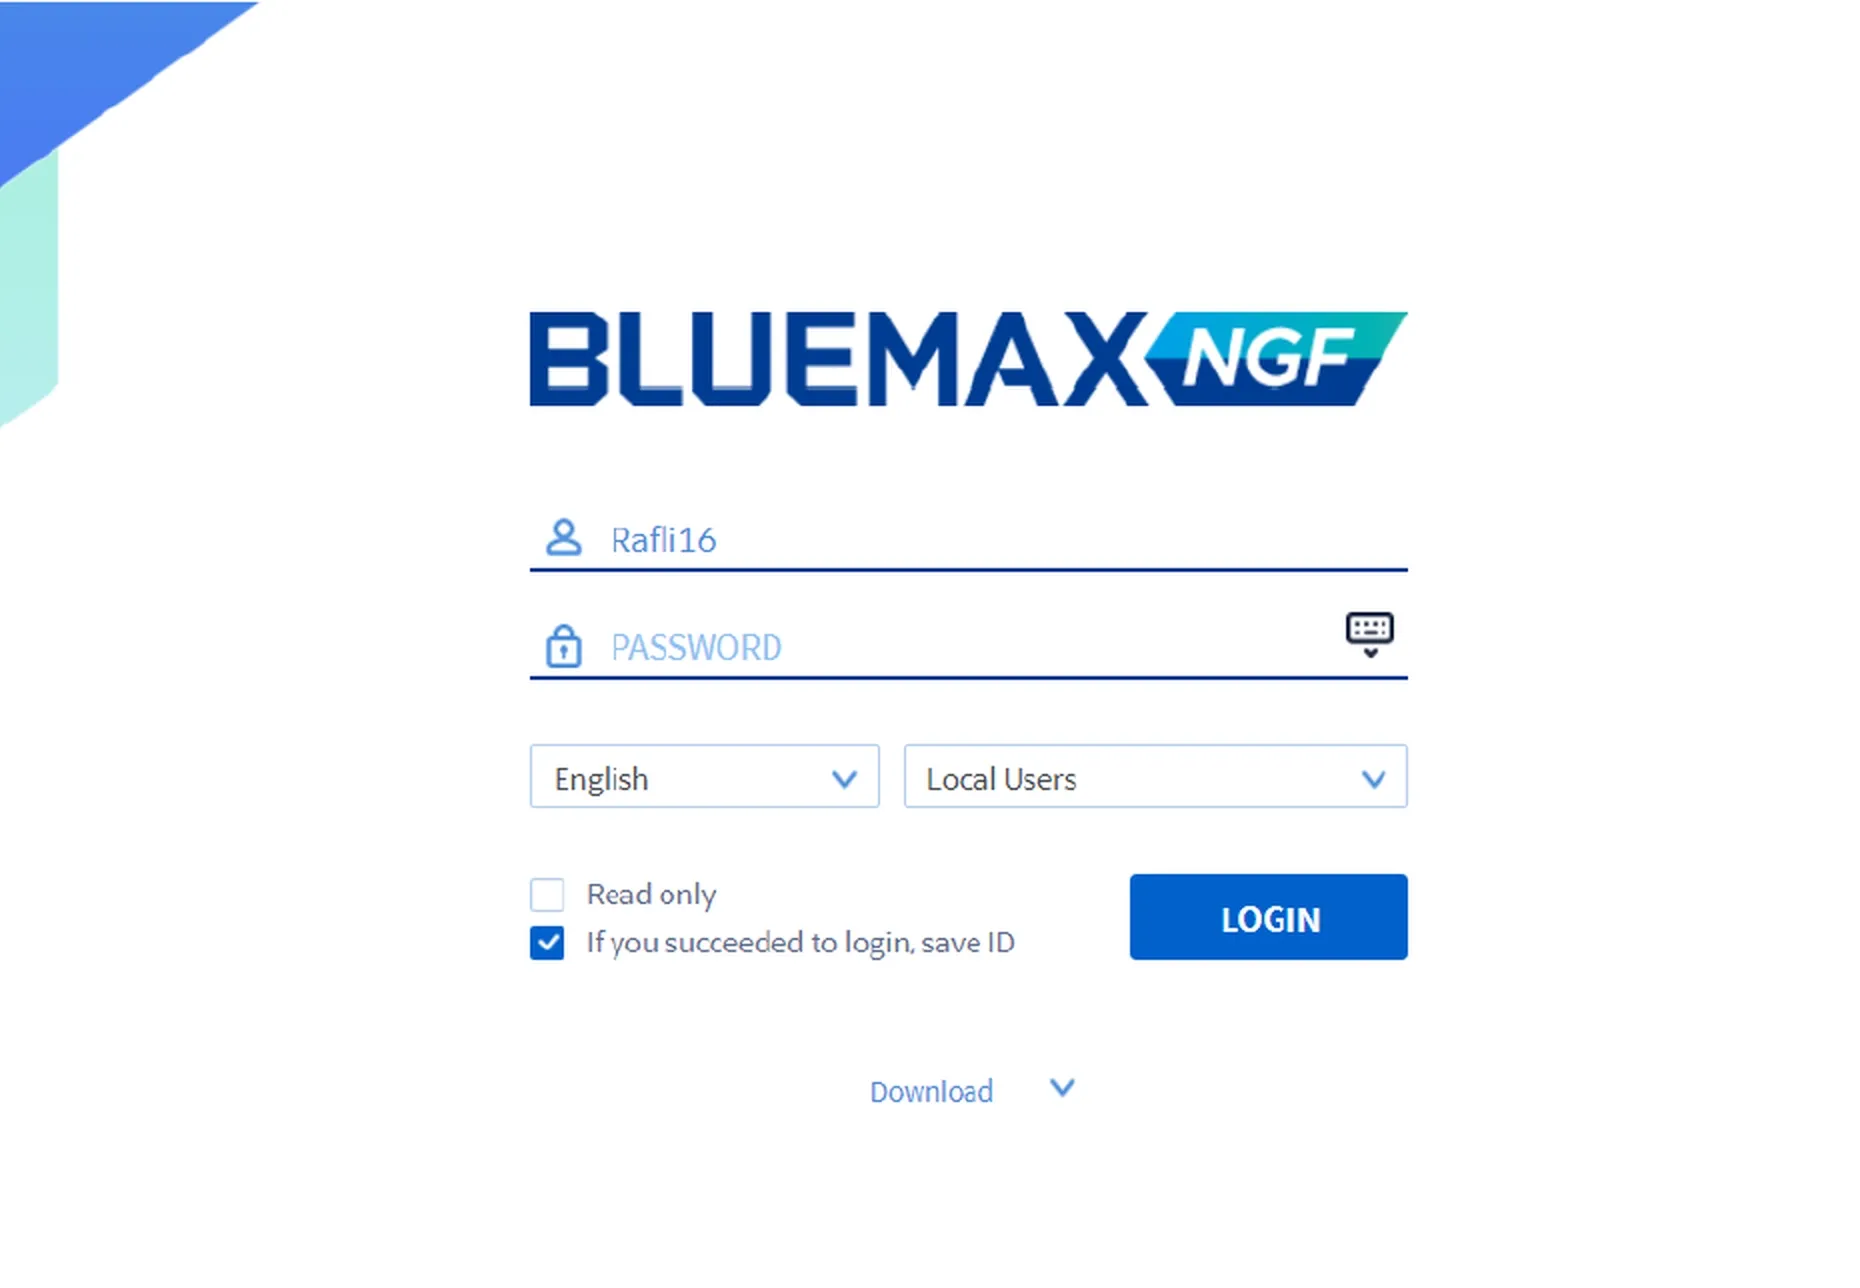
Figure 1.1 Bluemax NGF Login Page
2. Enable L2TP Tunnel
Once you're logged in, go to:
VPN > General Tunneling > PPTP/L2TP Settings
Here, enable the L2TP Tunnel feature by ticking the “Enable” checkbox.
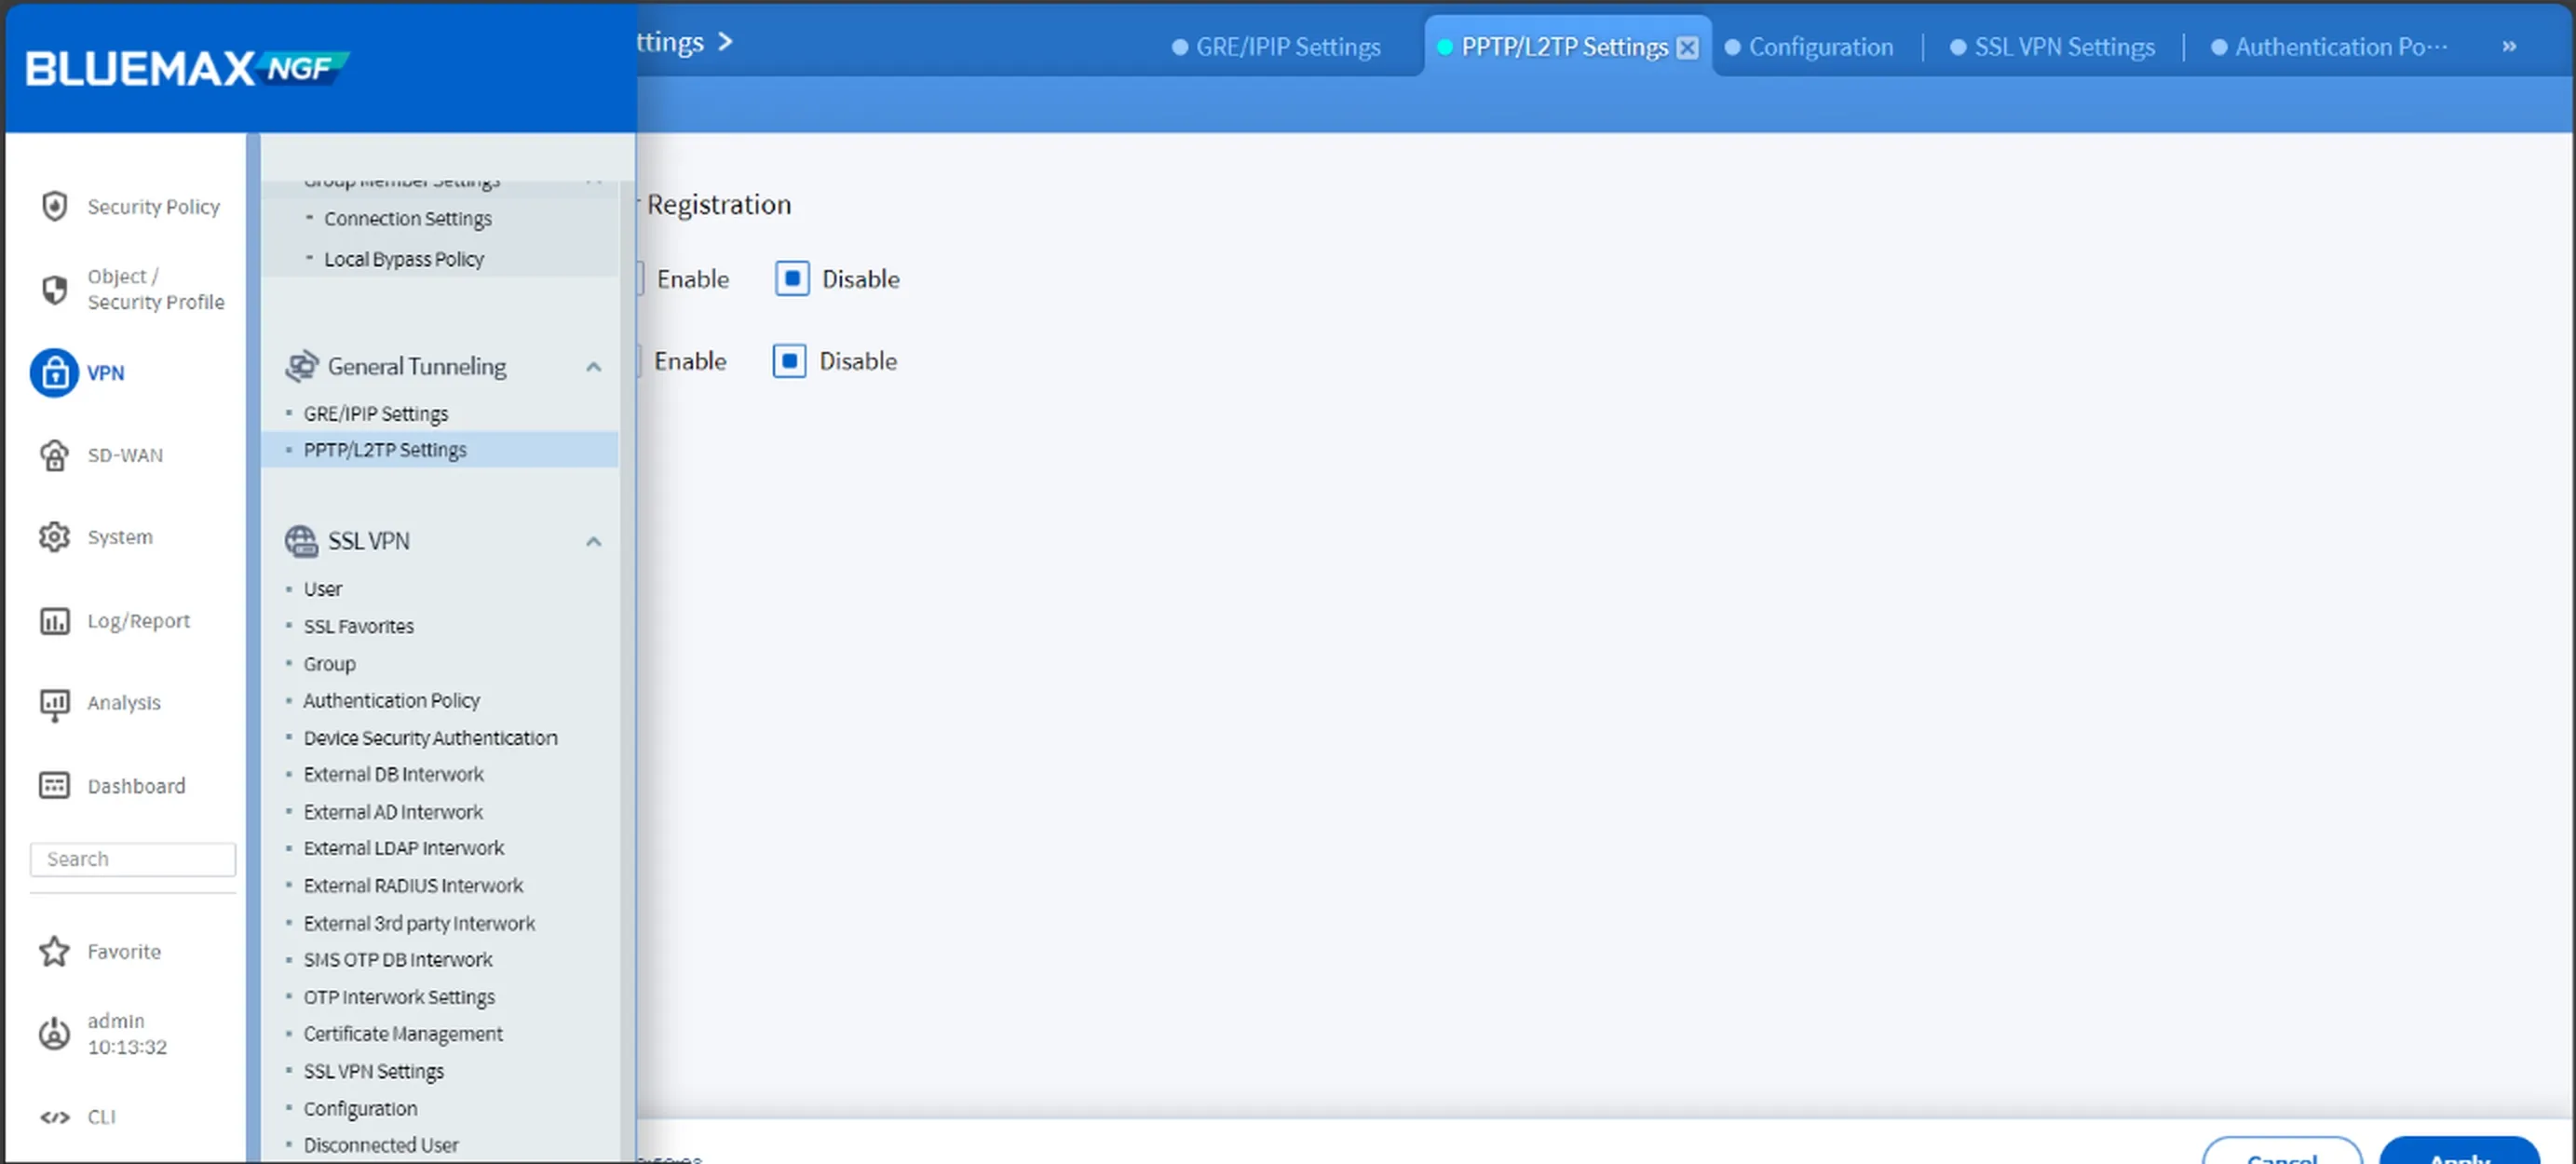
Figure 2.1 Enable L2TP Tunneling
3. Create a VPN User for L2TP
Next, you’ll need to create a user account for L2TP access:
- Add a new user under the PPTP/L2TP section.
- Decide whether this user is for L2TP only or multiple protocols.
- Assign a strong username and password.
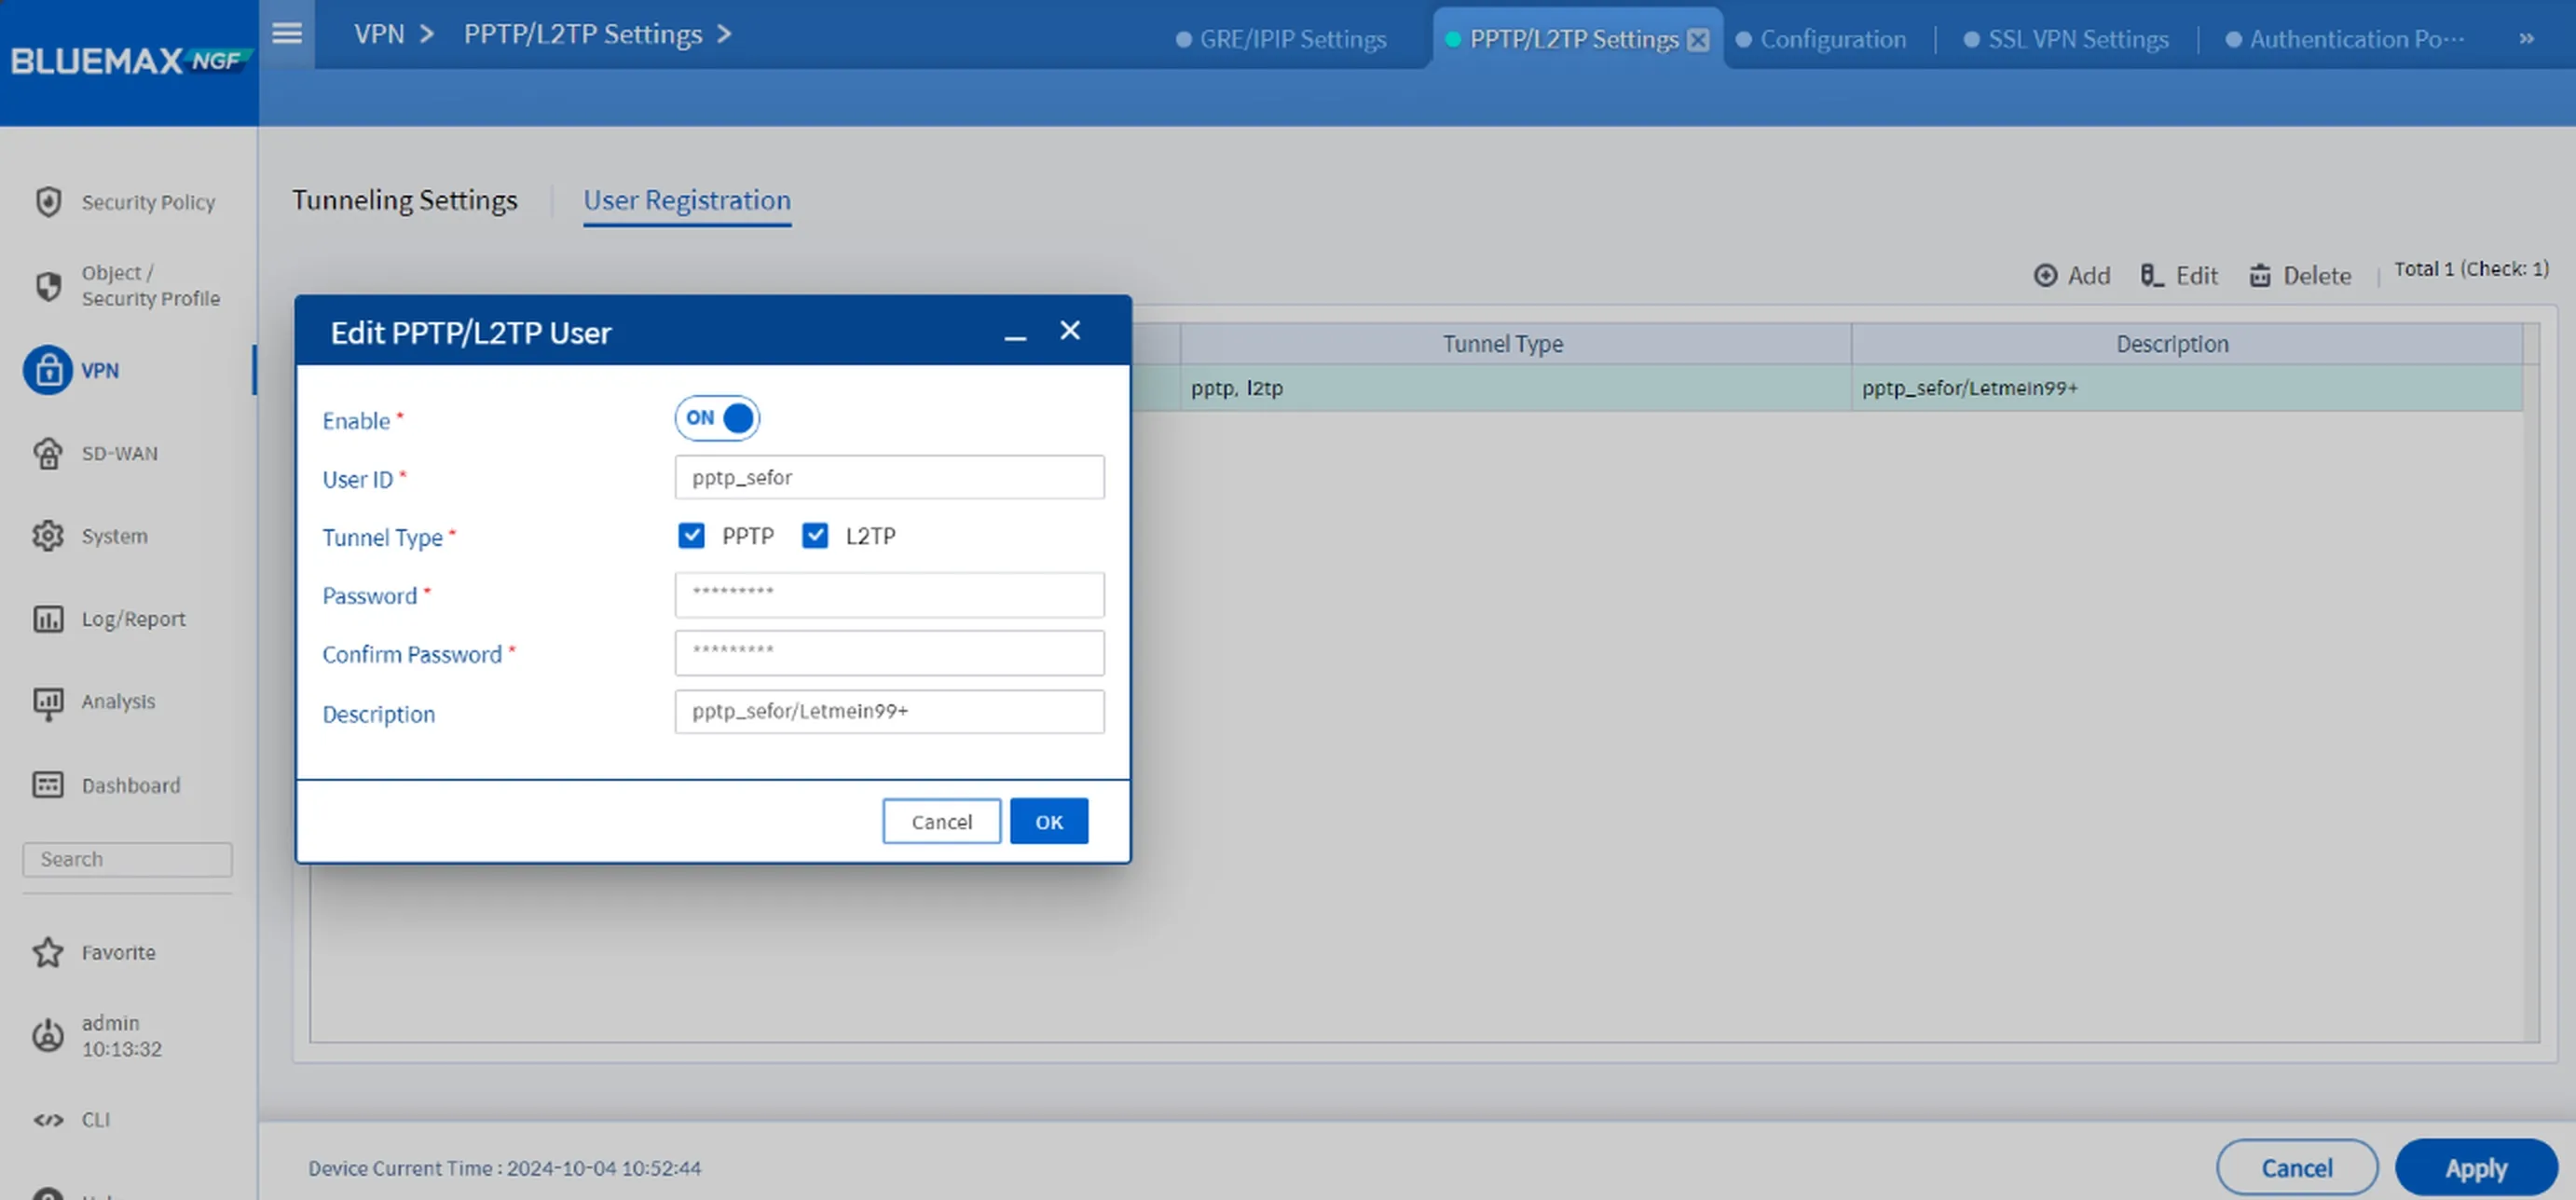
Figure 3.1 Add PPTP/L2TP User
Tip: Use a strong password especially if this access is for external or third-party users.
4. Set Up IP Pool & DNS for VPN Clients
Now define the IP range and DNS settings that L2TP clients will use once connected:
- Create a dedicated IP Pool for L2TP clients.
- Set the DNS server they’ll use while connected to the VPN.

Figure 4.1 L2TP Settings
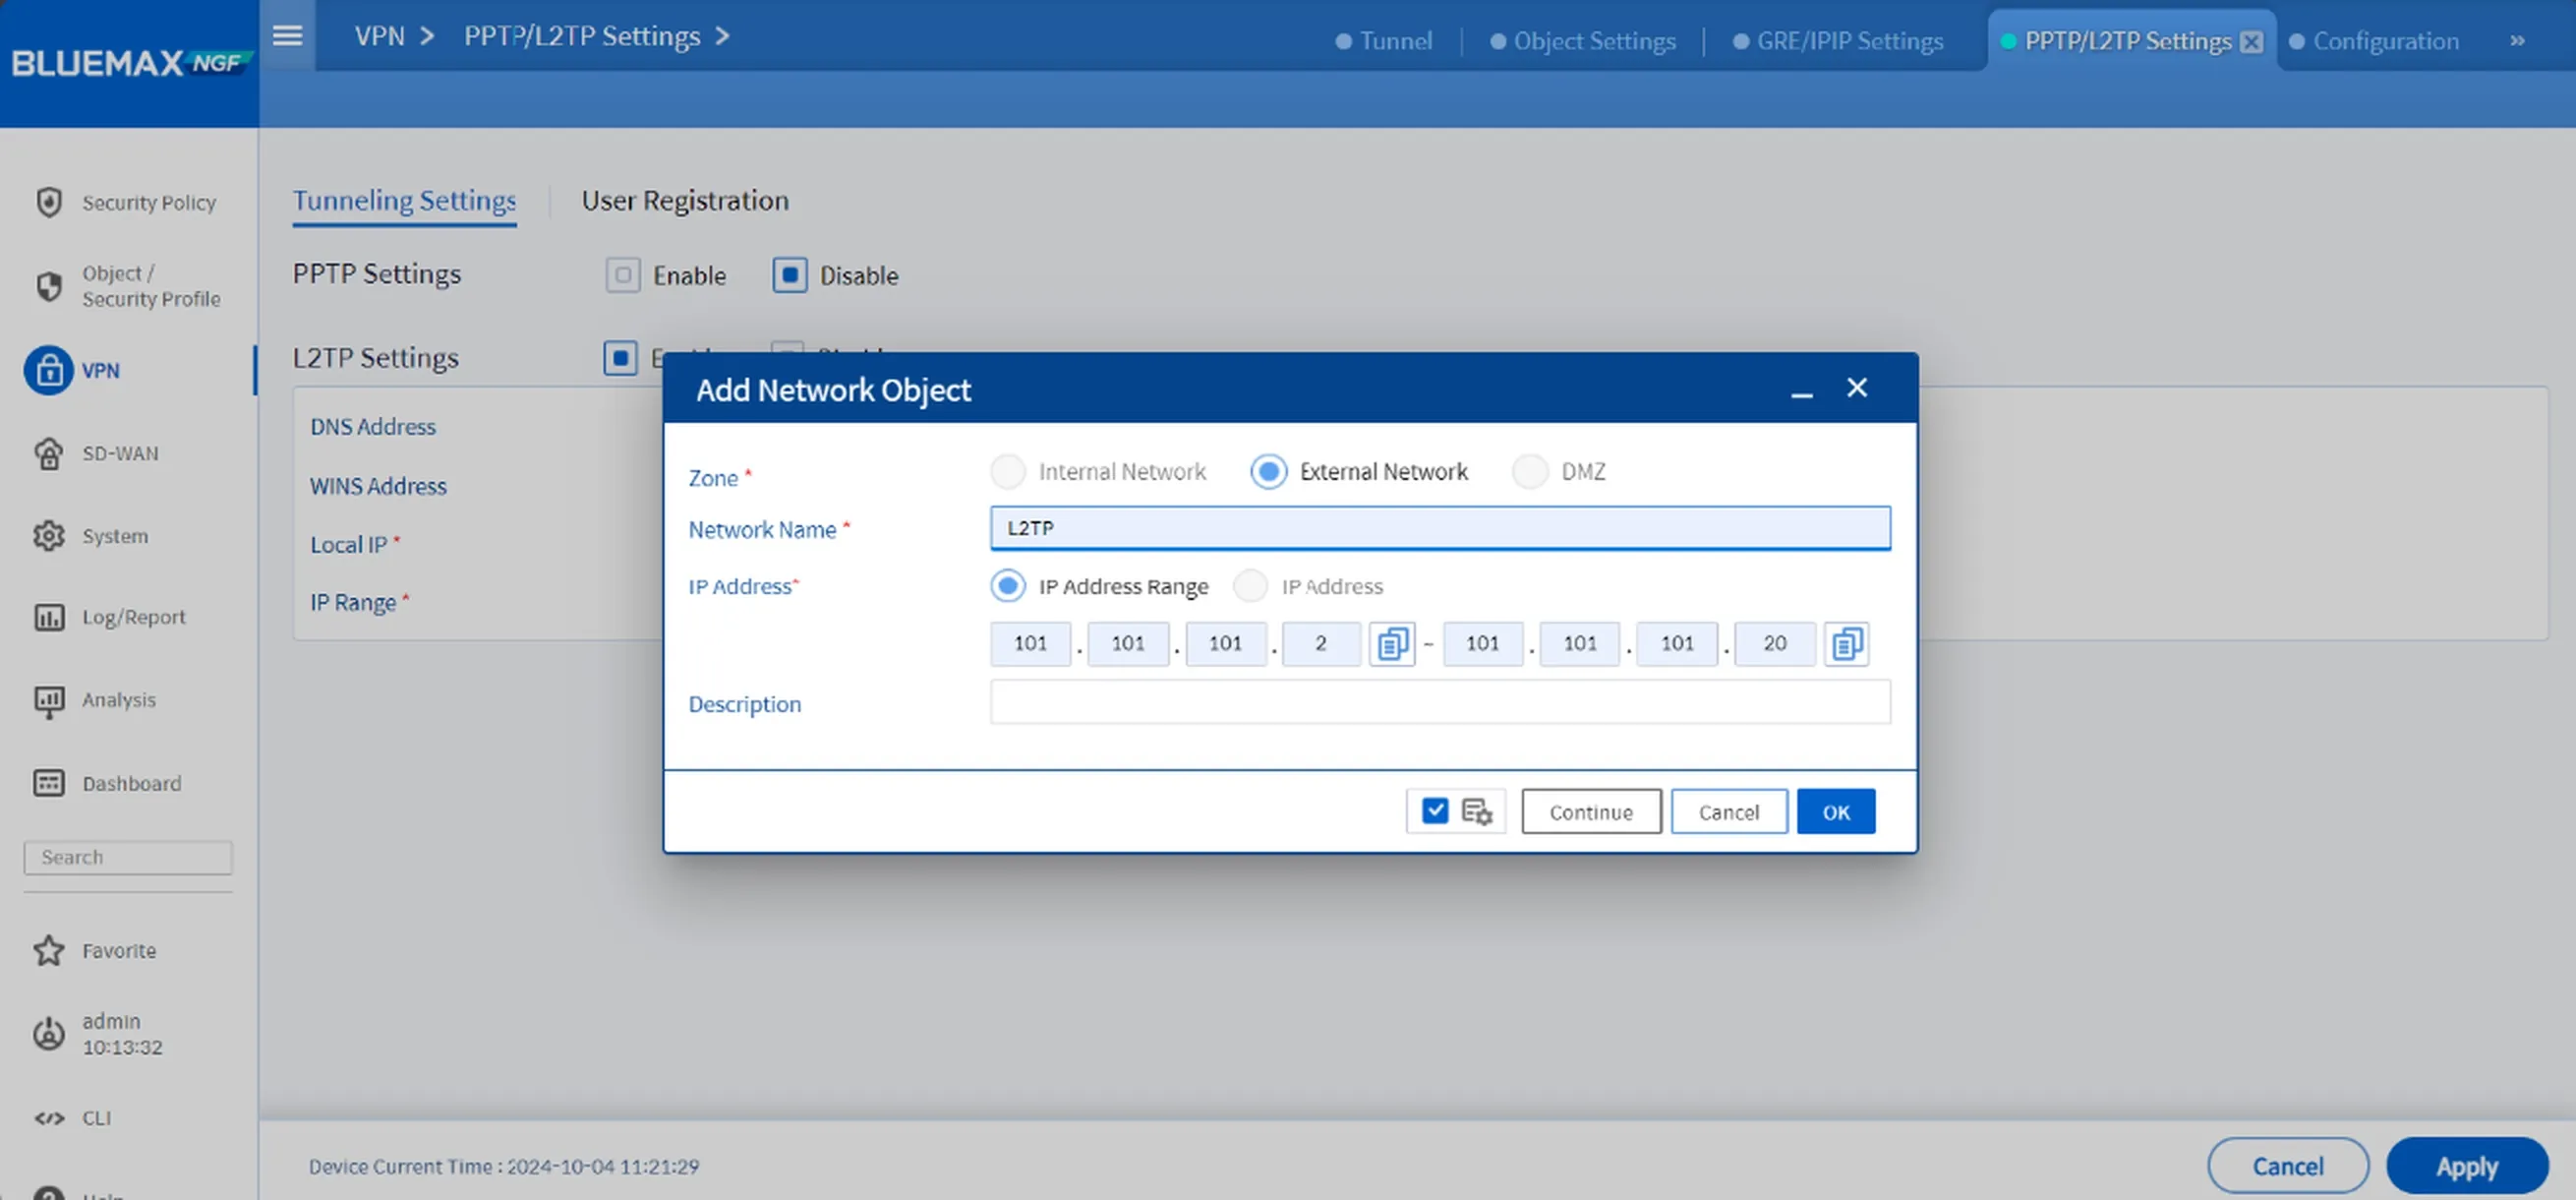
Figure 4.2 Add Network Object for IP Pool
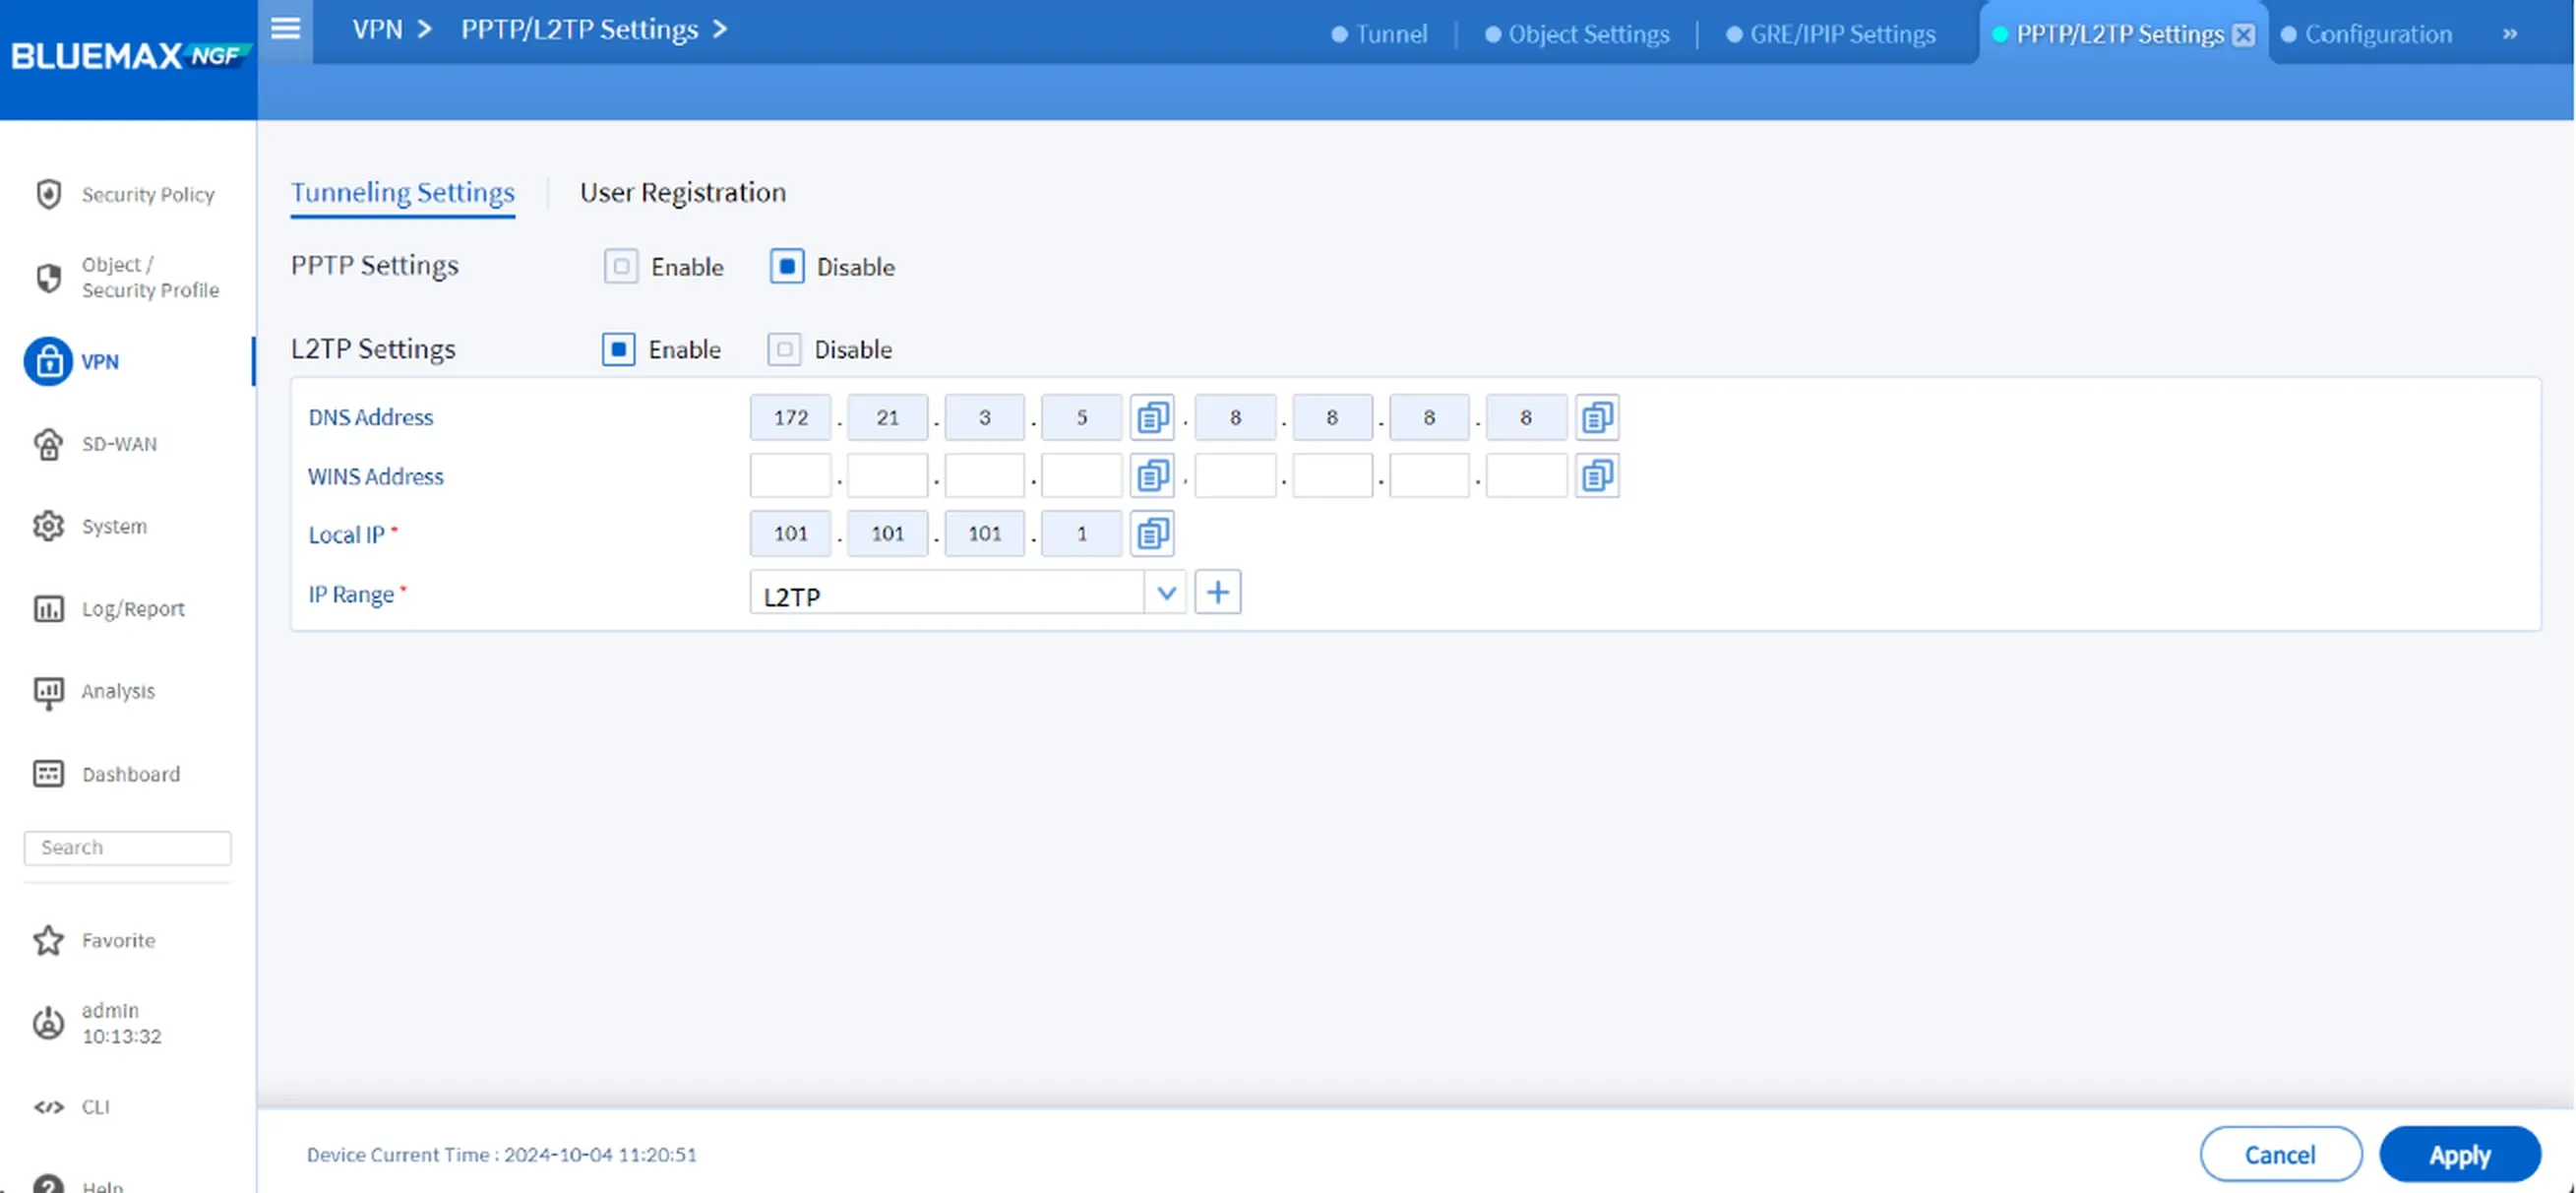
Figure 4.3 Add IP Range
5. Test the VPN Connection
After setting everything up, it’s time to test the tunnel.
In this example, we’re using Ubuntu Linux as the client:
- Create a new L2TP VPN profile.
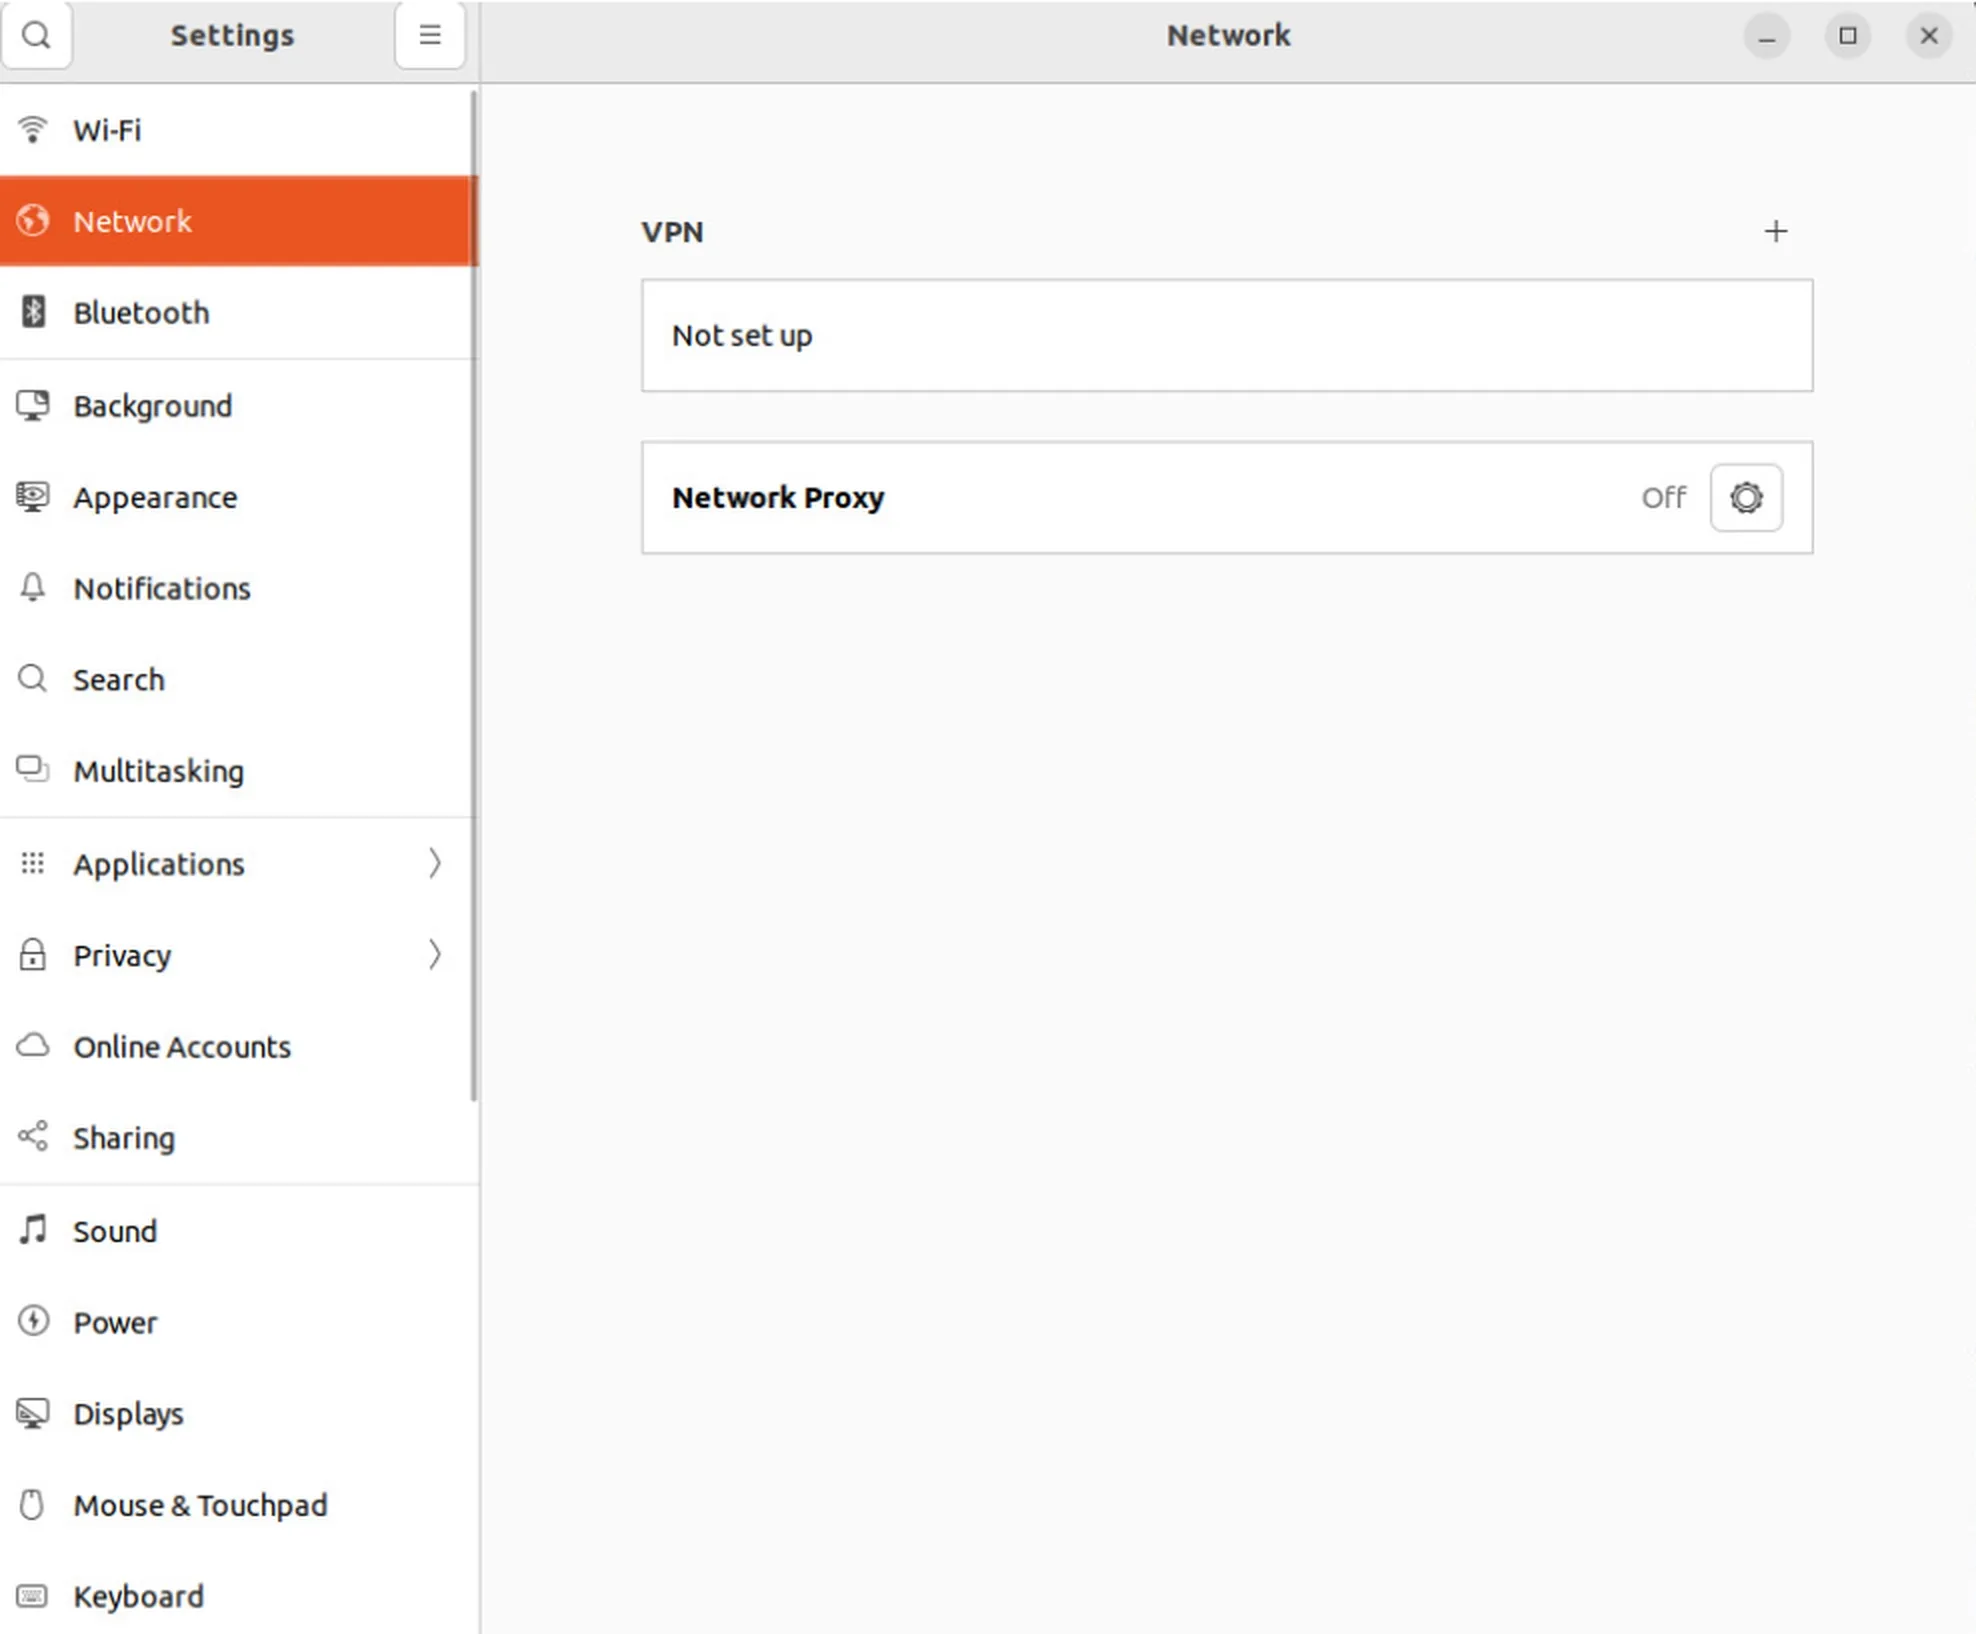
Figure 5.1 Add L2TP Profile on Ubuntu
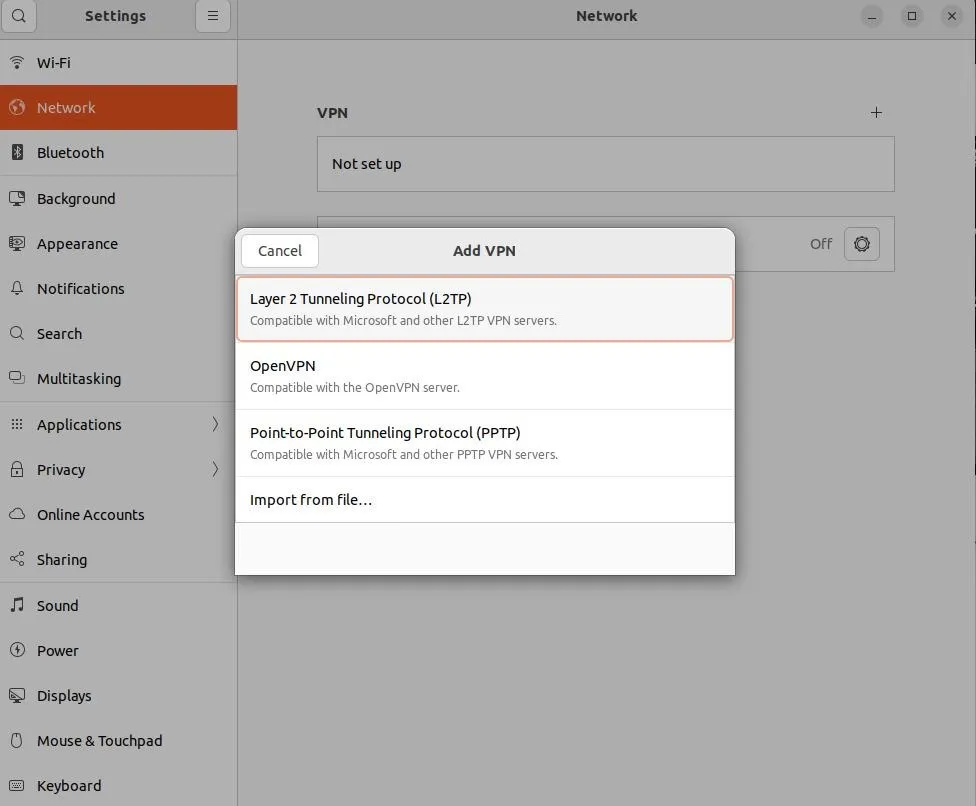
Figure 5.2 Add VPN in Ubuntu
Enter the connection details:
- VPN Name
- Gateway IP (your public-facing Secui IP)
- L2TP Username and Password
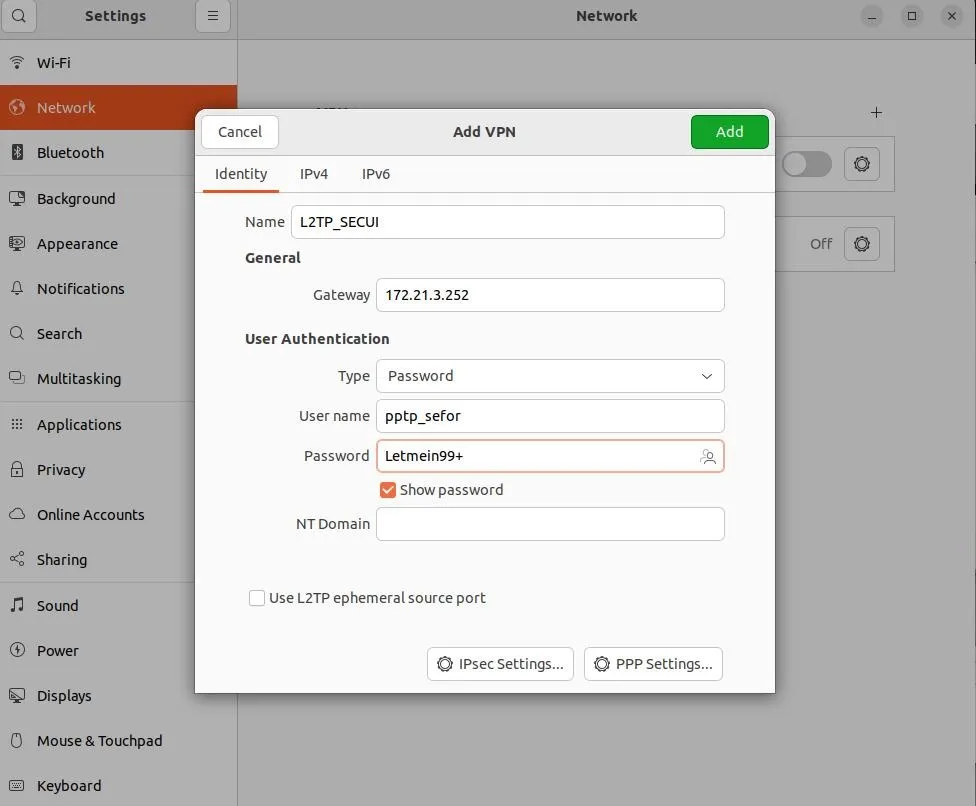
Figure 5.3 Complete VPN Identity
If everything is set up correctly, you’ll see a VPN icon appear in the top right corner, indicating that the tunnel is live and you’re securely connected.
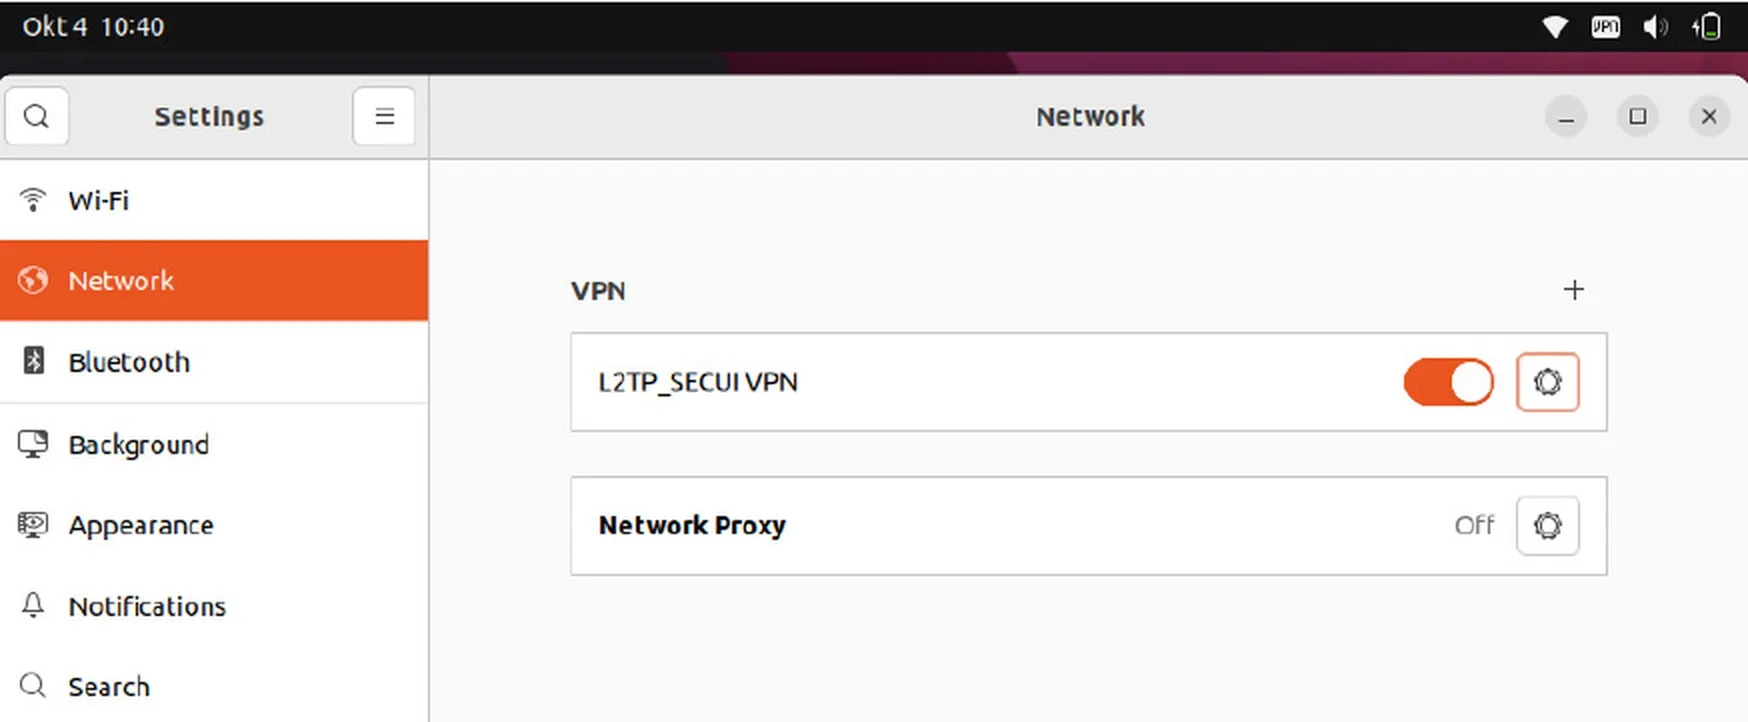
Figure 5.4 Successful L2TP VPN Connection
Conclusion
Setting up an L2TP VPN tunnel on Bluemax NGF is pretty straightforward once you know the steps. With this configuration, remote users can securely access internal resources, ideal for employees working from home or off-site.
And don’t forget to enable logging so you can monitor and audit VPN usage when needed.
Need help configuring VPN or looking for a complete network security solution? Feel free to contact our team.
Last Updated
August 13, 2025
Category
Network Security, SECUI Configuration
Share This
On This Page
Contact us for
Free Consultation!
Share your challenges, and we'll provide the best solutions for your business, Connecting with us is as simple as clicking a button, and let us come to you.