RADIUS Configuration Guide on SECUI Bluemax NGF
The RADIUS-based authentication system configuration on SECUI Bluemax NGF aims to strengthen network access control, particularly in SSL VPN implementations. This process involves several key stages including adding an authentication server, creating authentication policies, user grouping, and testing the connection using Bluemax Client.
1. Topology
The implementation topology involves a connection between the user endpoint, SECUI Bluemax NGF, and the RADIUS server as the authentication center. Users authenticate through Bluemax Client, which forwards the request to the RADIUS server via the NGF gateway. Only users successfully verified by the RADIUS server are granted VPN access to the internal network.
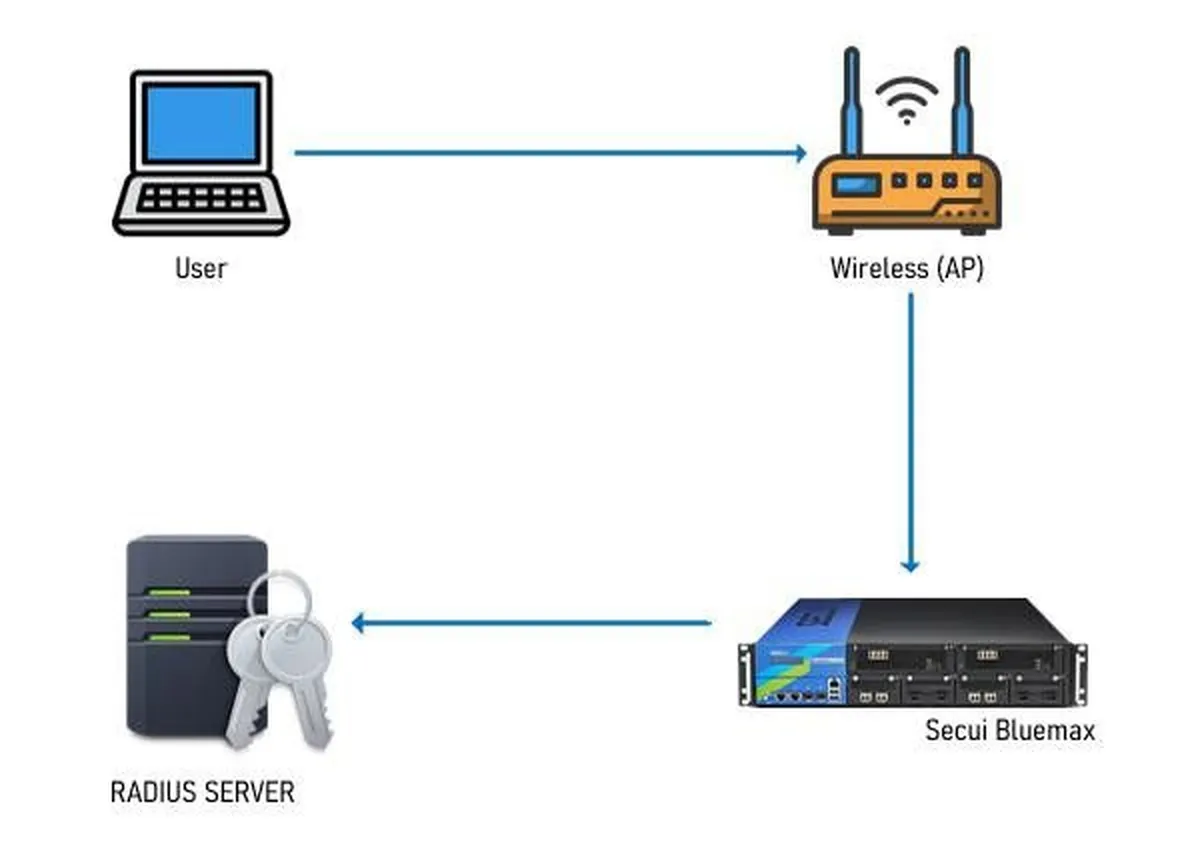
Figure 1. RADIUS Implementation Topology on NGF Bluemax SECUI
2. Accessing the SECUI Bluemax NGF Device
The first step is to access the SECUI Bluemax NGF web interface via a browser. Simply enter the device's IP address and log in using administrator credentials.
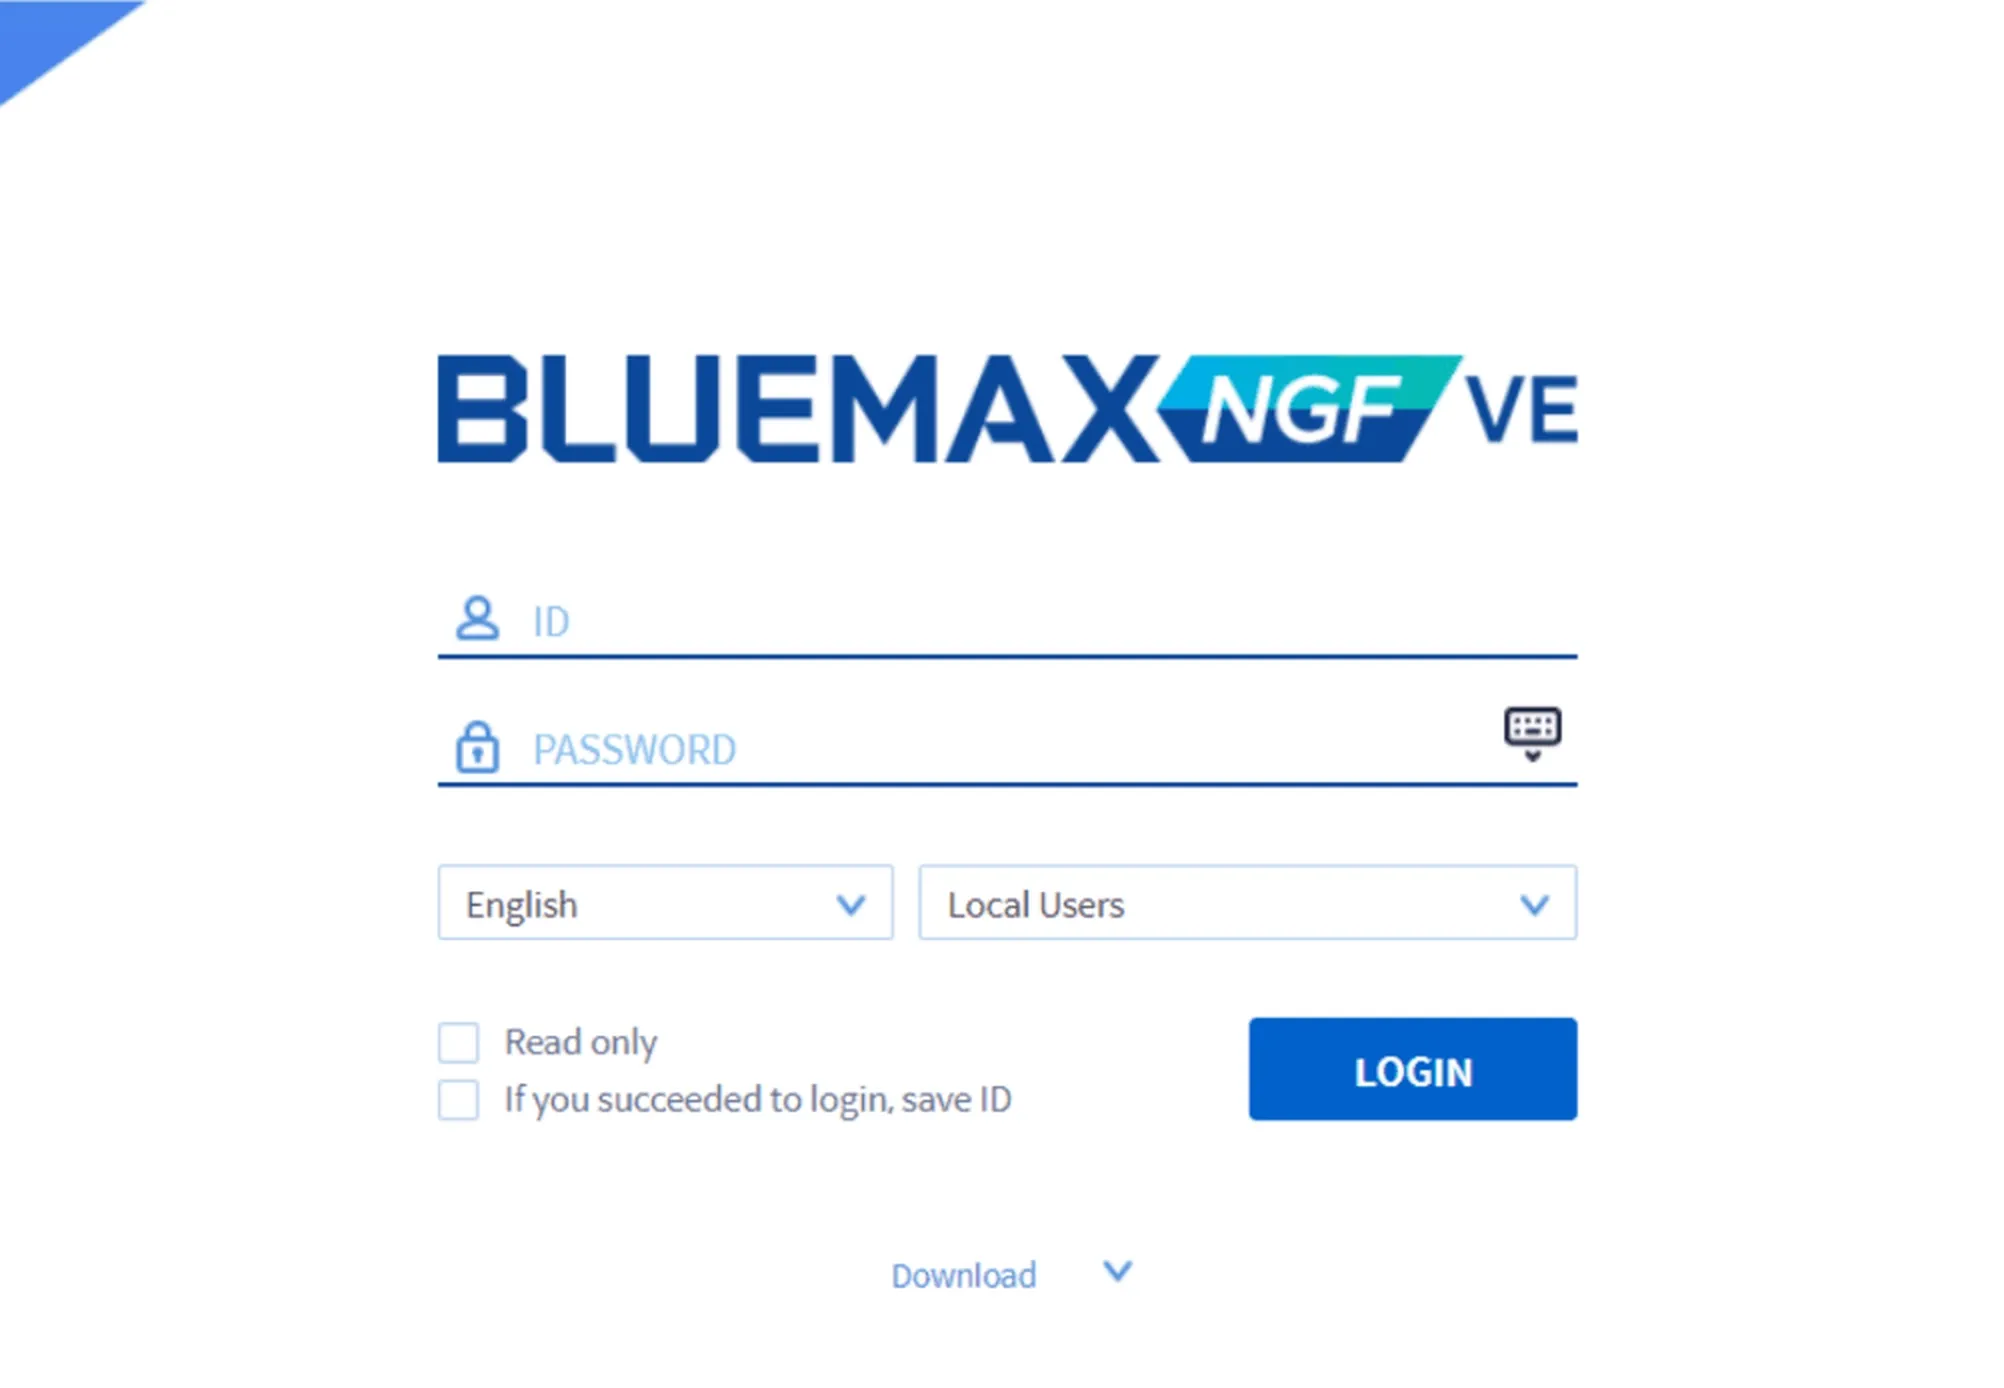
Figure 2. Administrator login page on SECUI Bluemax NGF
3. Navigating to the Authentication Server Menu
Once logged in, navigate to System > Authentication > Authentication Server. Here, you can add or configure authentication servers to be used by the device.
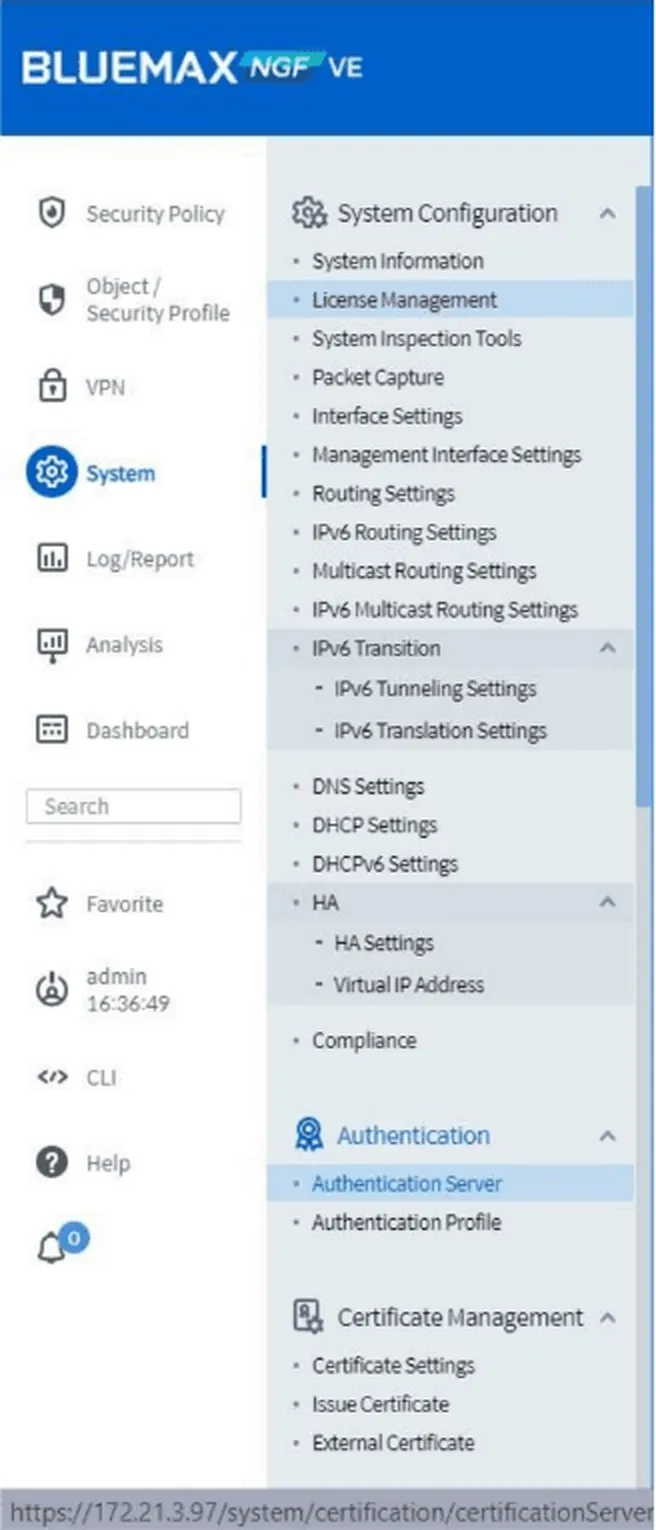
Figure 3. Navigating to the Authentication Server menu
4. Adding a RADIUS Server
Under the RADIUS tab, click the Add button to begin configuring a new RADIUS server.
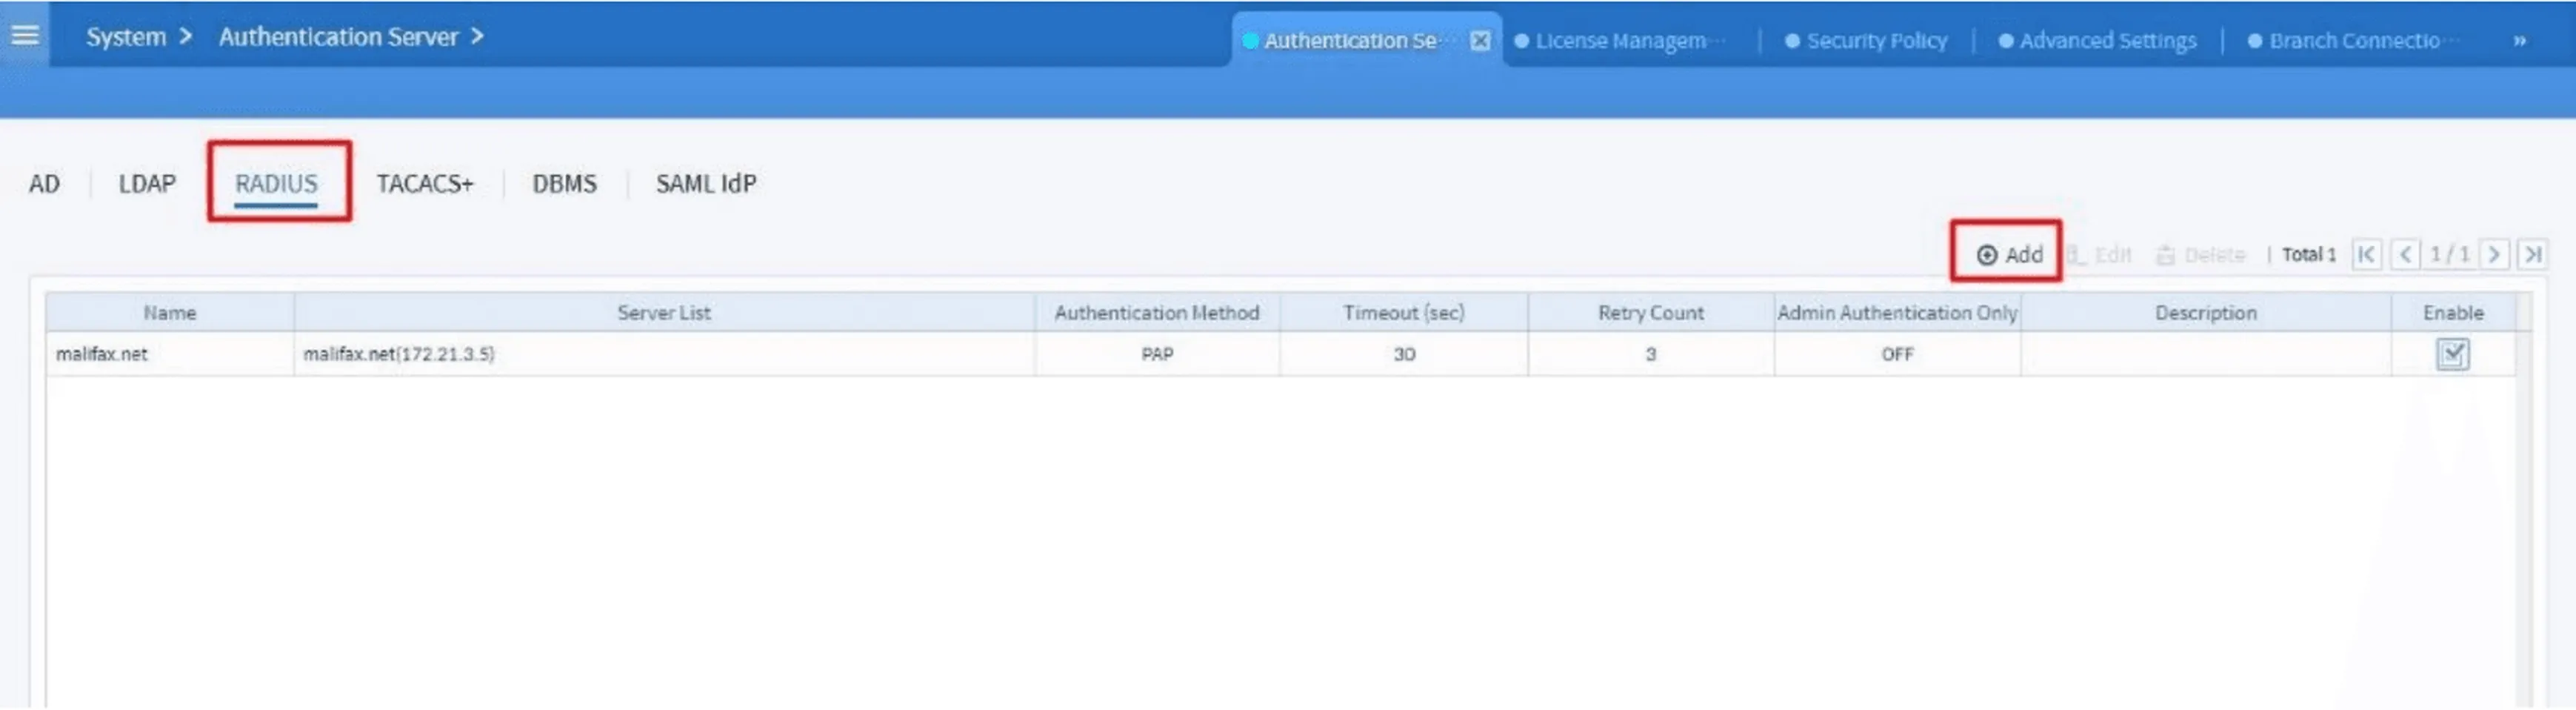
Figure 4. Authentication Server dashboard
5. Configuring the RADIUS Server
In the Edit RADIUS Server screen, fill in details such as:
- Name (server name)
- Add the IP and shared secret in the Server List section
- Set the appropriate Authentication Method for your scenario
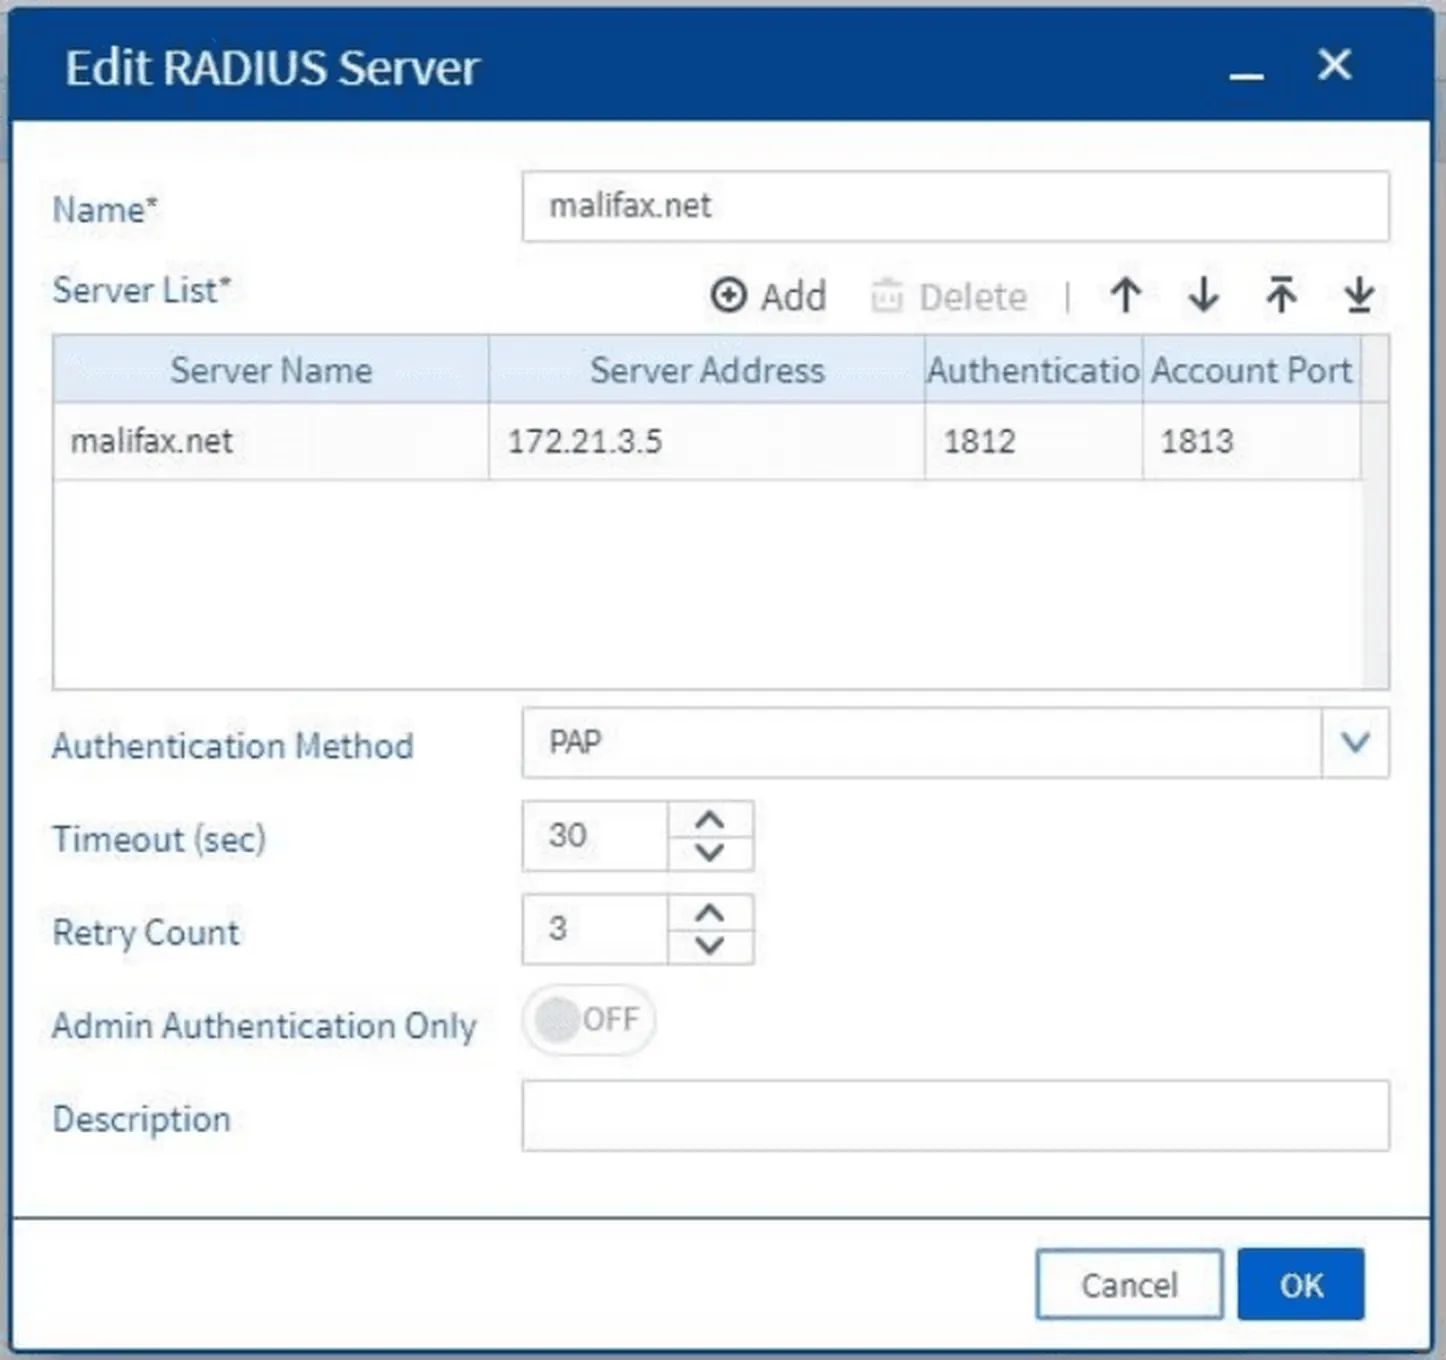
Figure 5. RADIUS Server configuration form

Figure 6. Adding RADIUS Server details into the Server List
Click Apply to save the configuration.
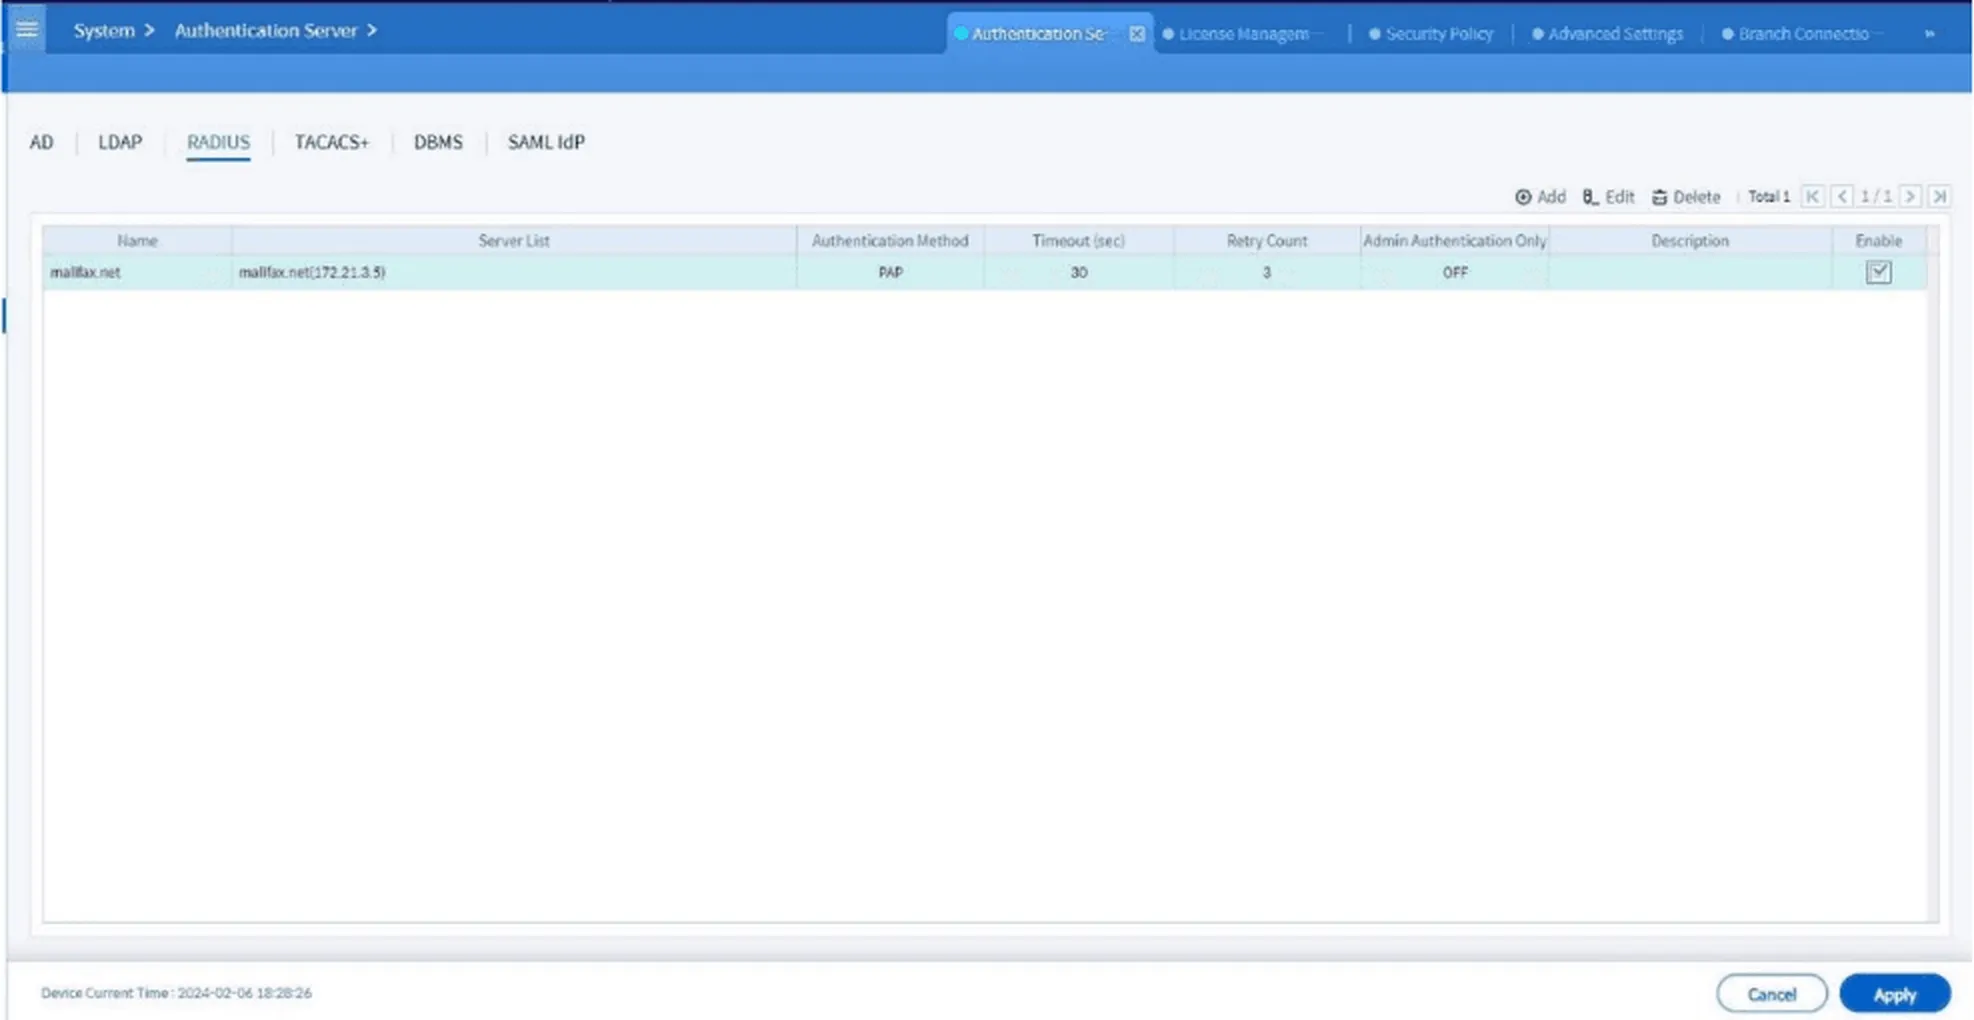
Figure 7. Dashboard view after successfully adding the RADIUS server
6. Accessing the Authentication Policy Menu
Next, go to VPN > SSL VPN > Authentication Policy. Here, you can create authentication rules for VPN users.
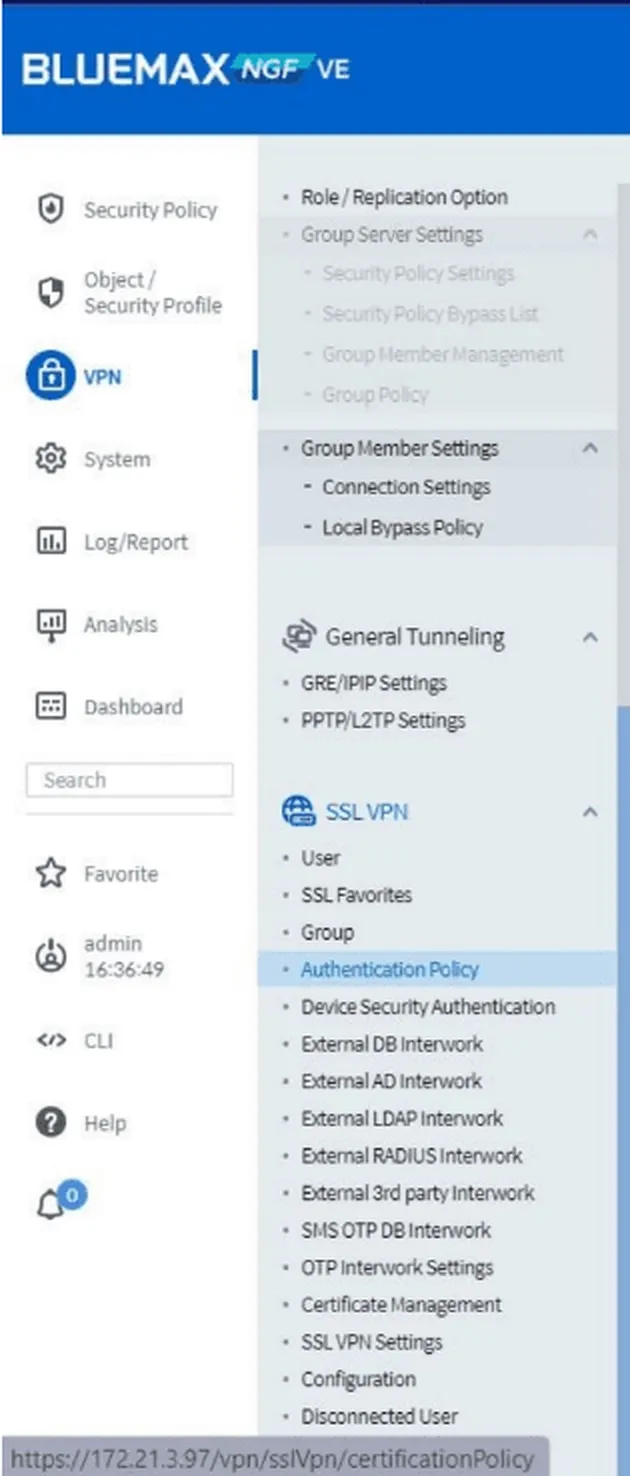
Figure 8. Navigating to the Authentication Policy menu
Click Add and fill in details such as:
- Policy name
- Allowed operating systems
- VPN connection URL
- Select RADIUS as the main authentication method
- Add the configured server to the Selected List
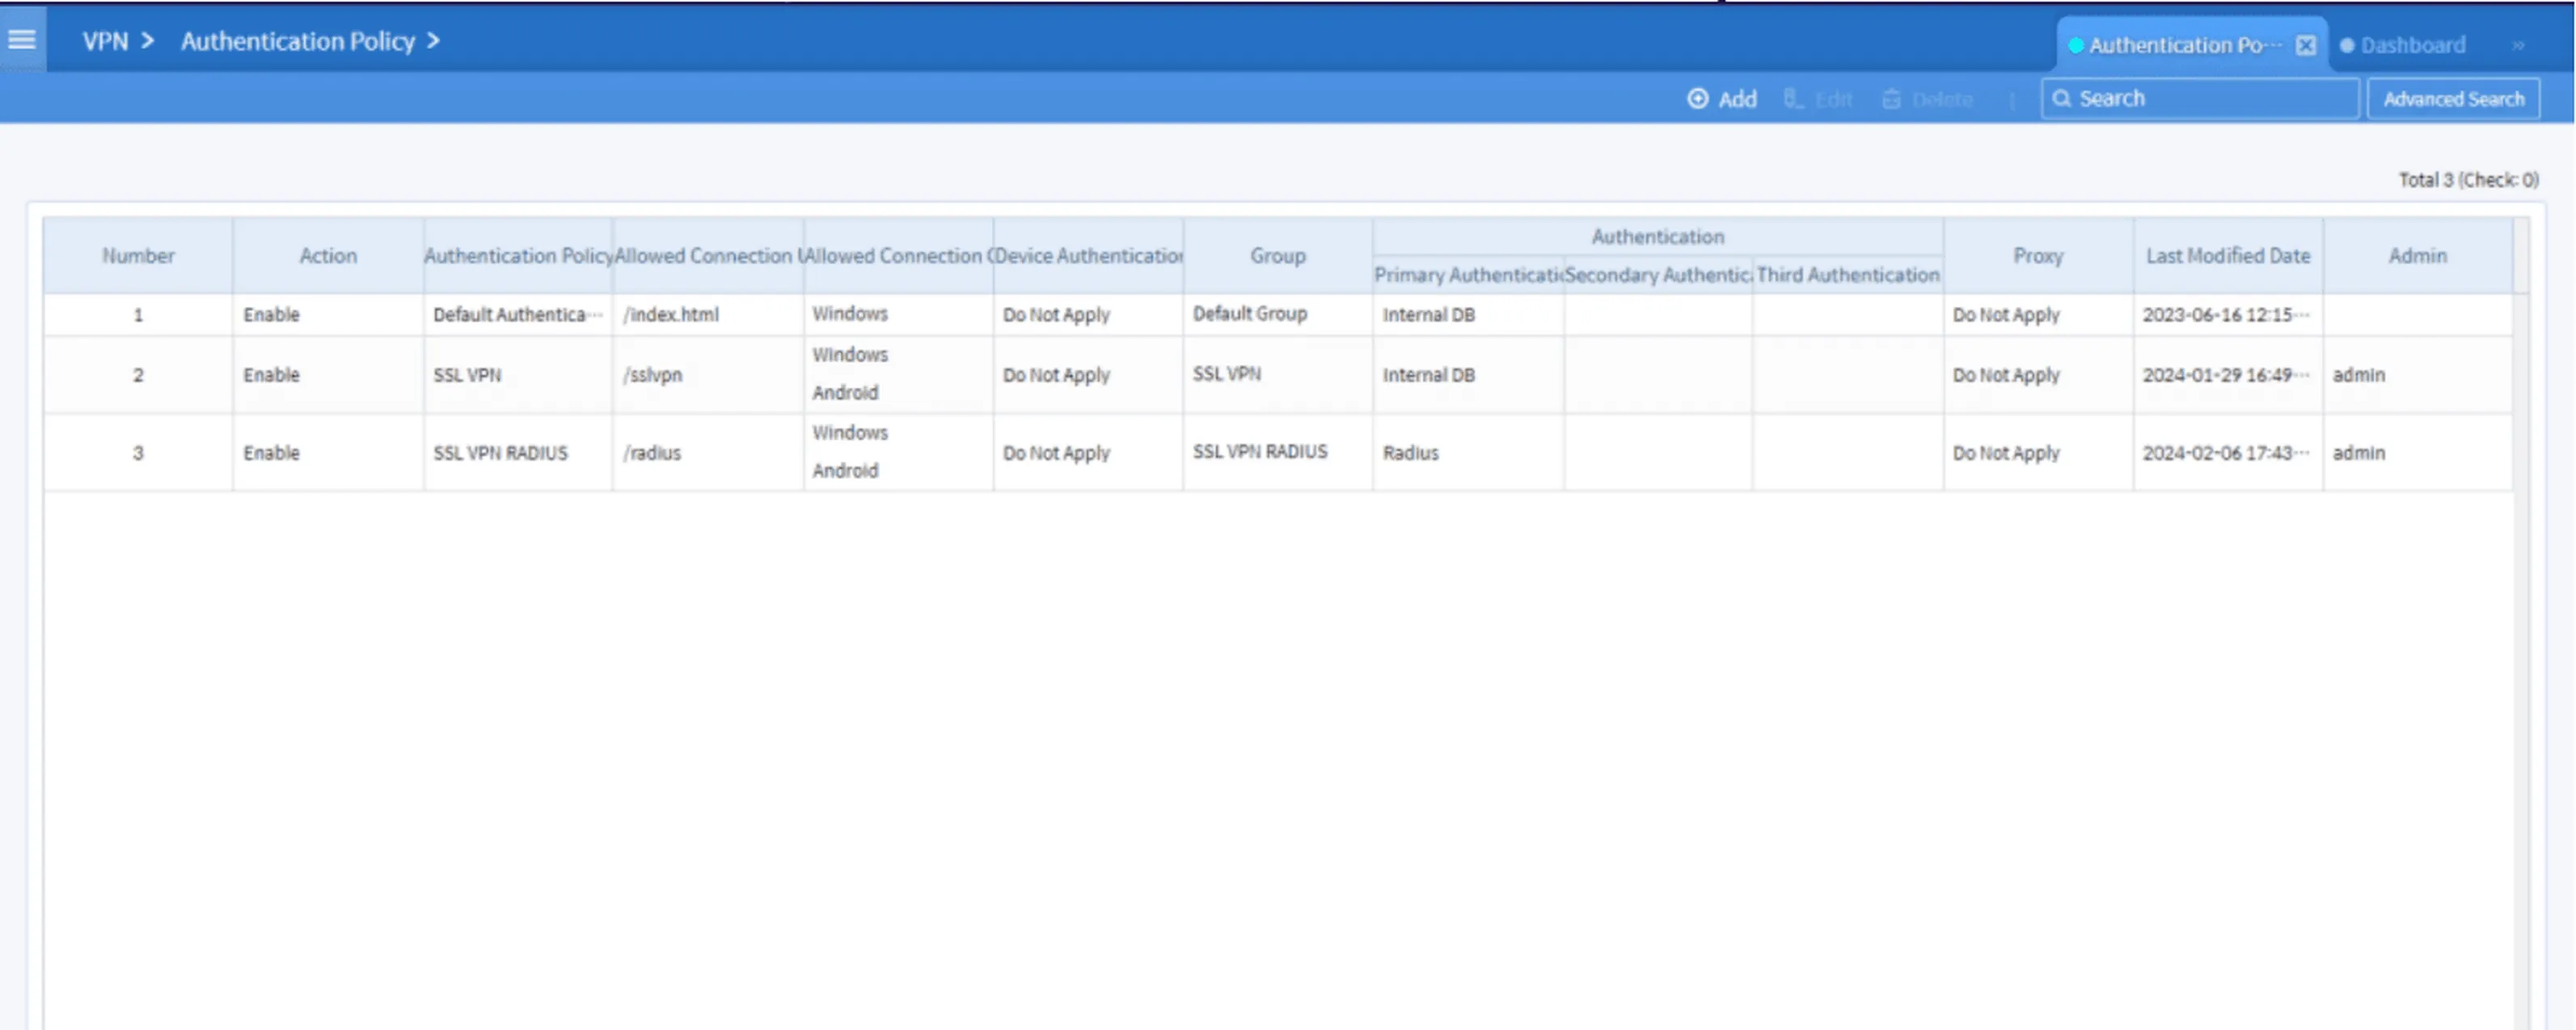
Figure 9. Authentication Policy dashboard view
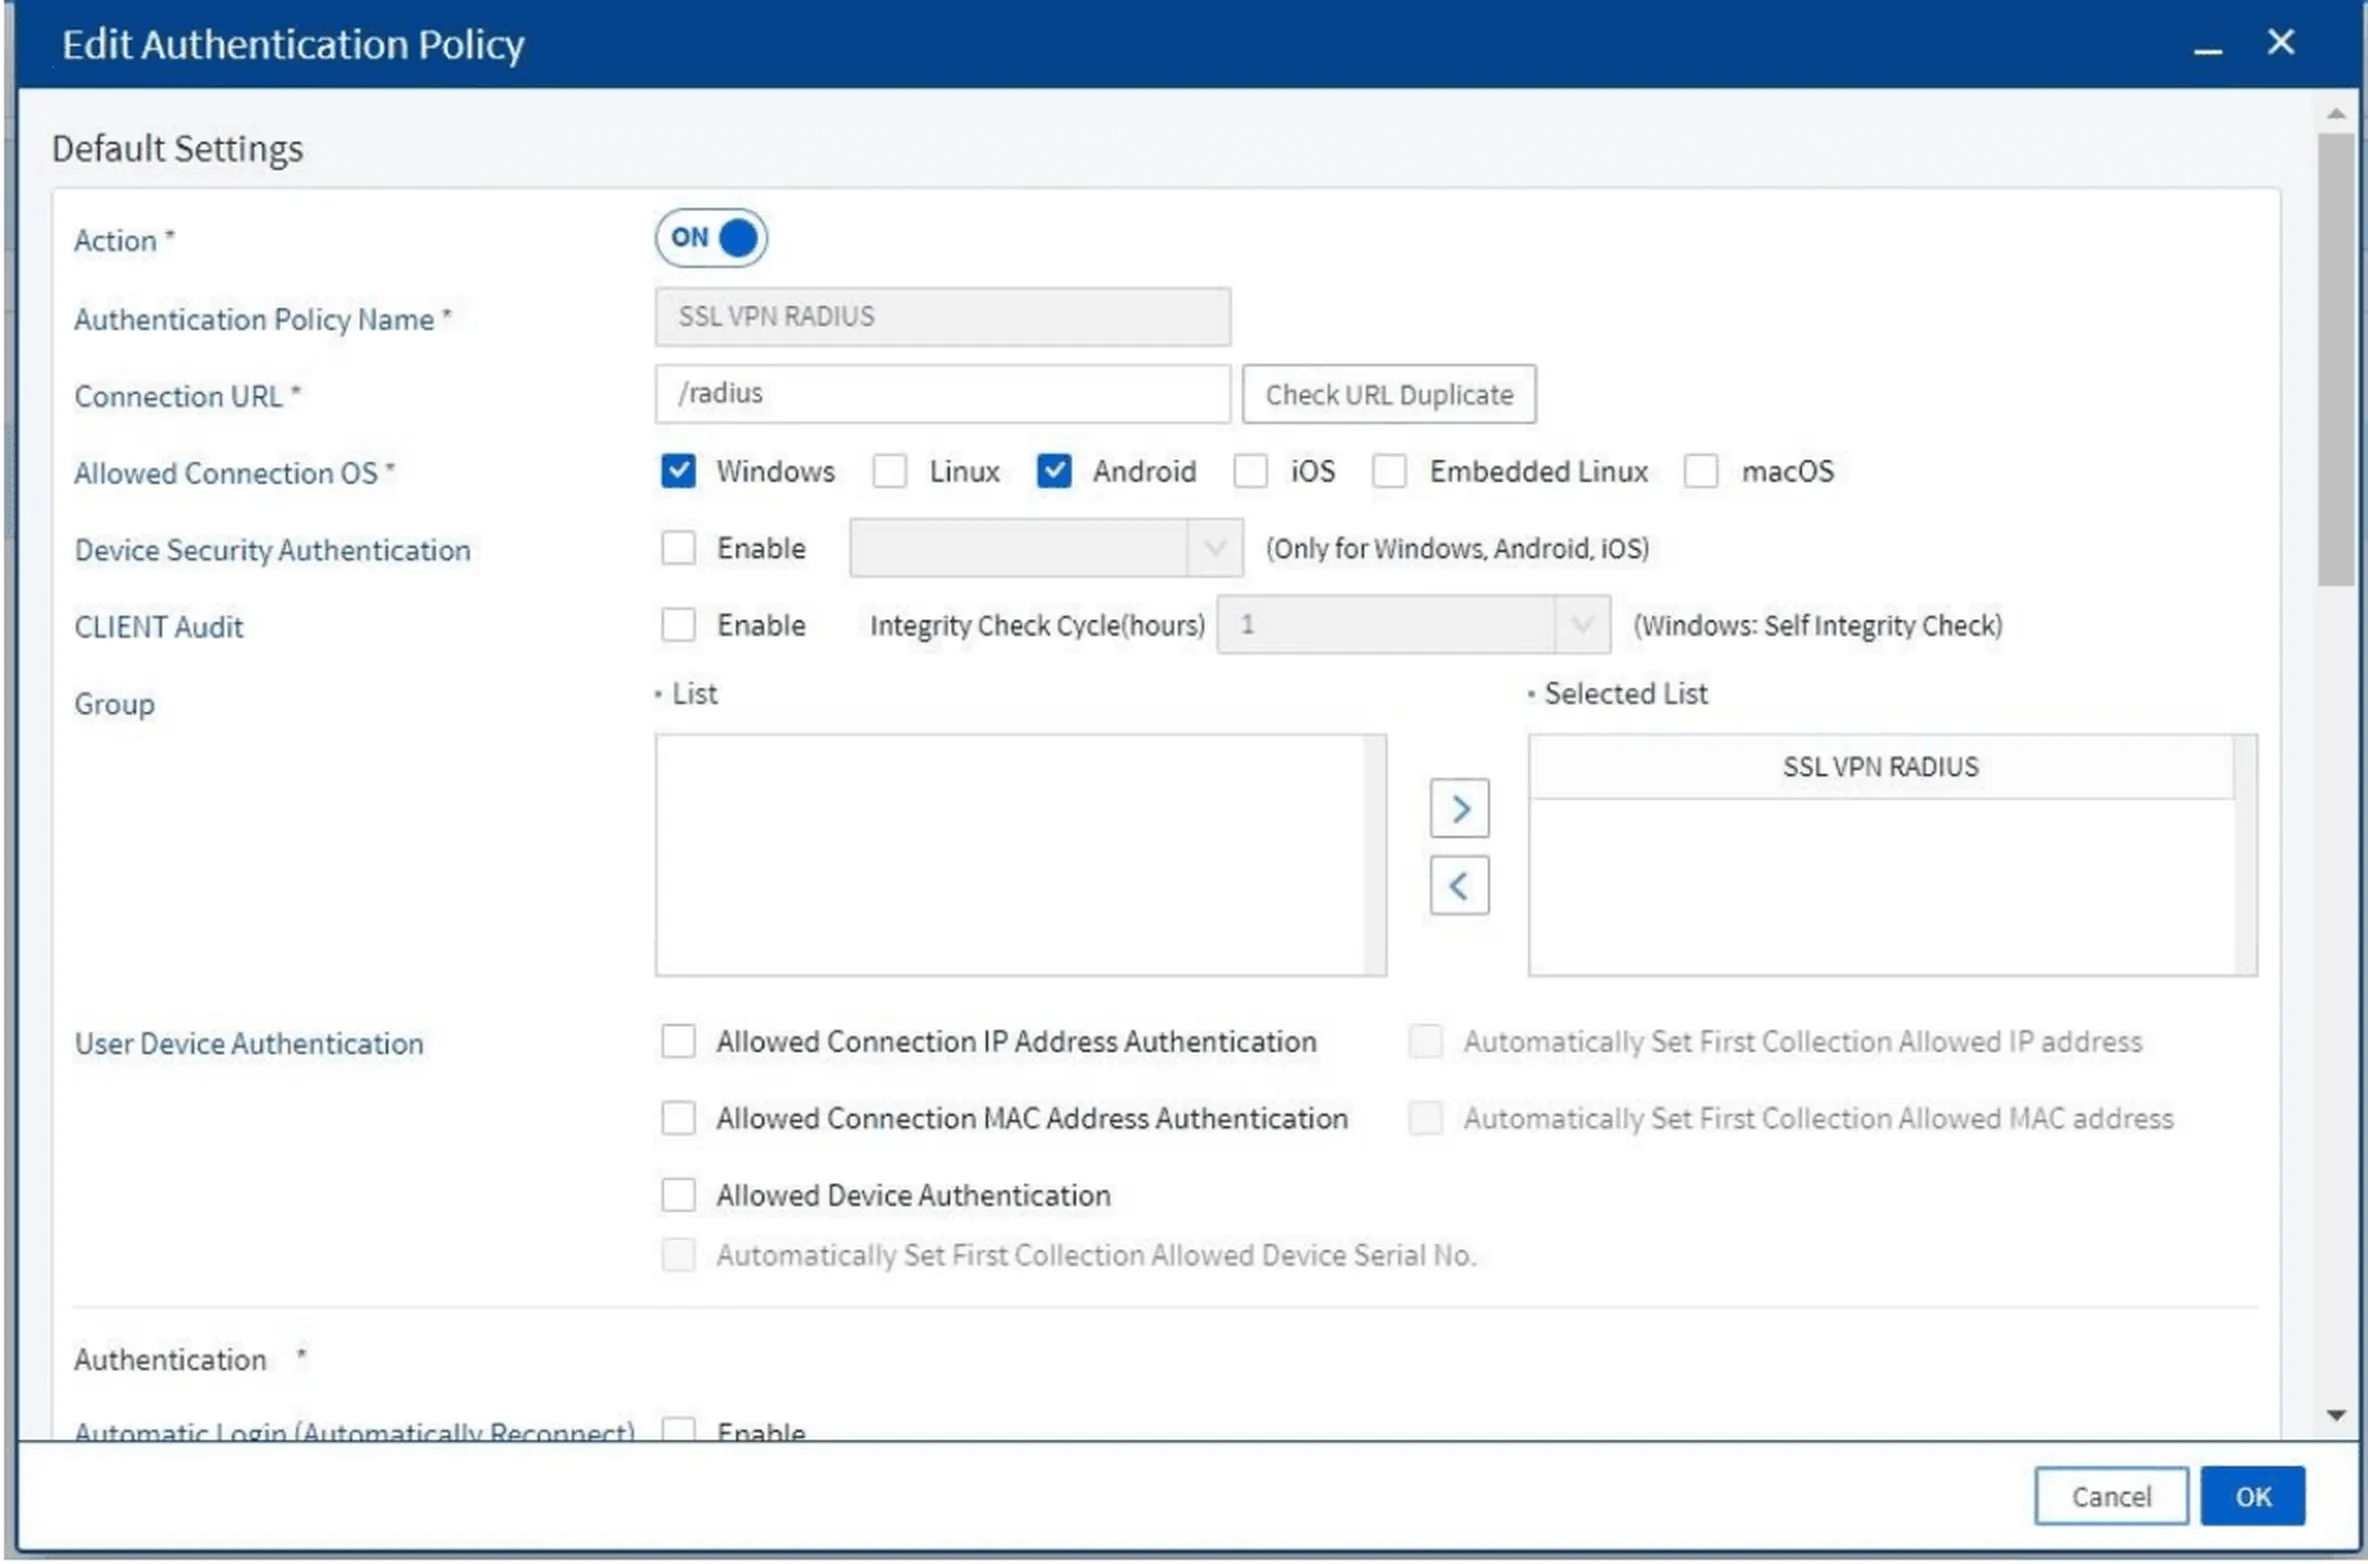
Figure 10. Authentication Policy configuration form
7. Creating a Group for SSL VPN Users
Access VPN > SSL VPN > Group to create user groups. These groups will use the authentication policies just created.
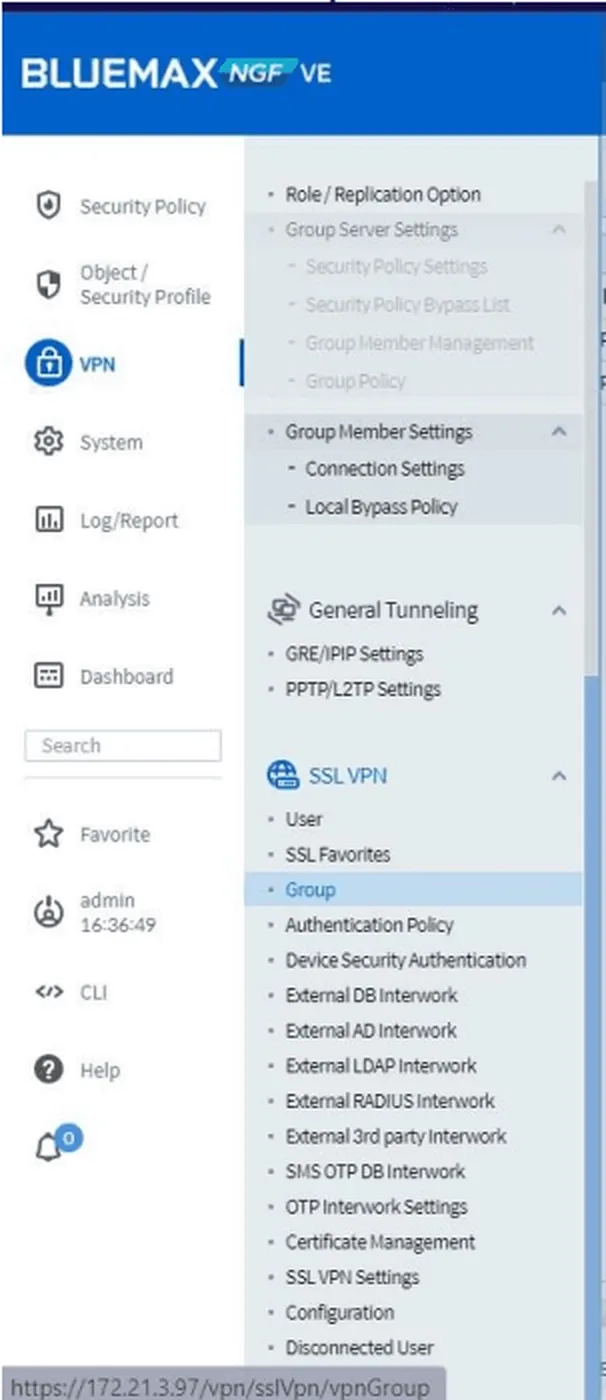
Figure 11. Navigating to Group menu for SSL VPN
Click Add, then fill in:
- IP address range
- Group name
- Select the appropriate authentication policy
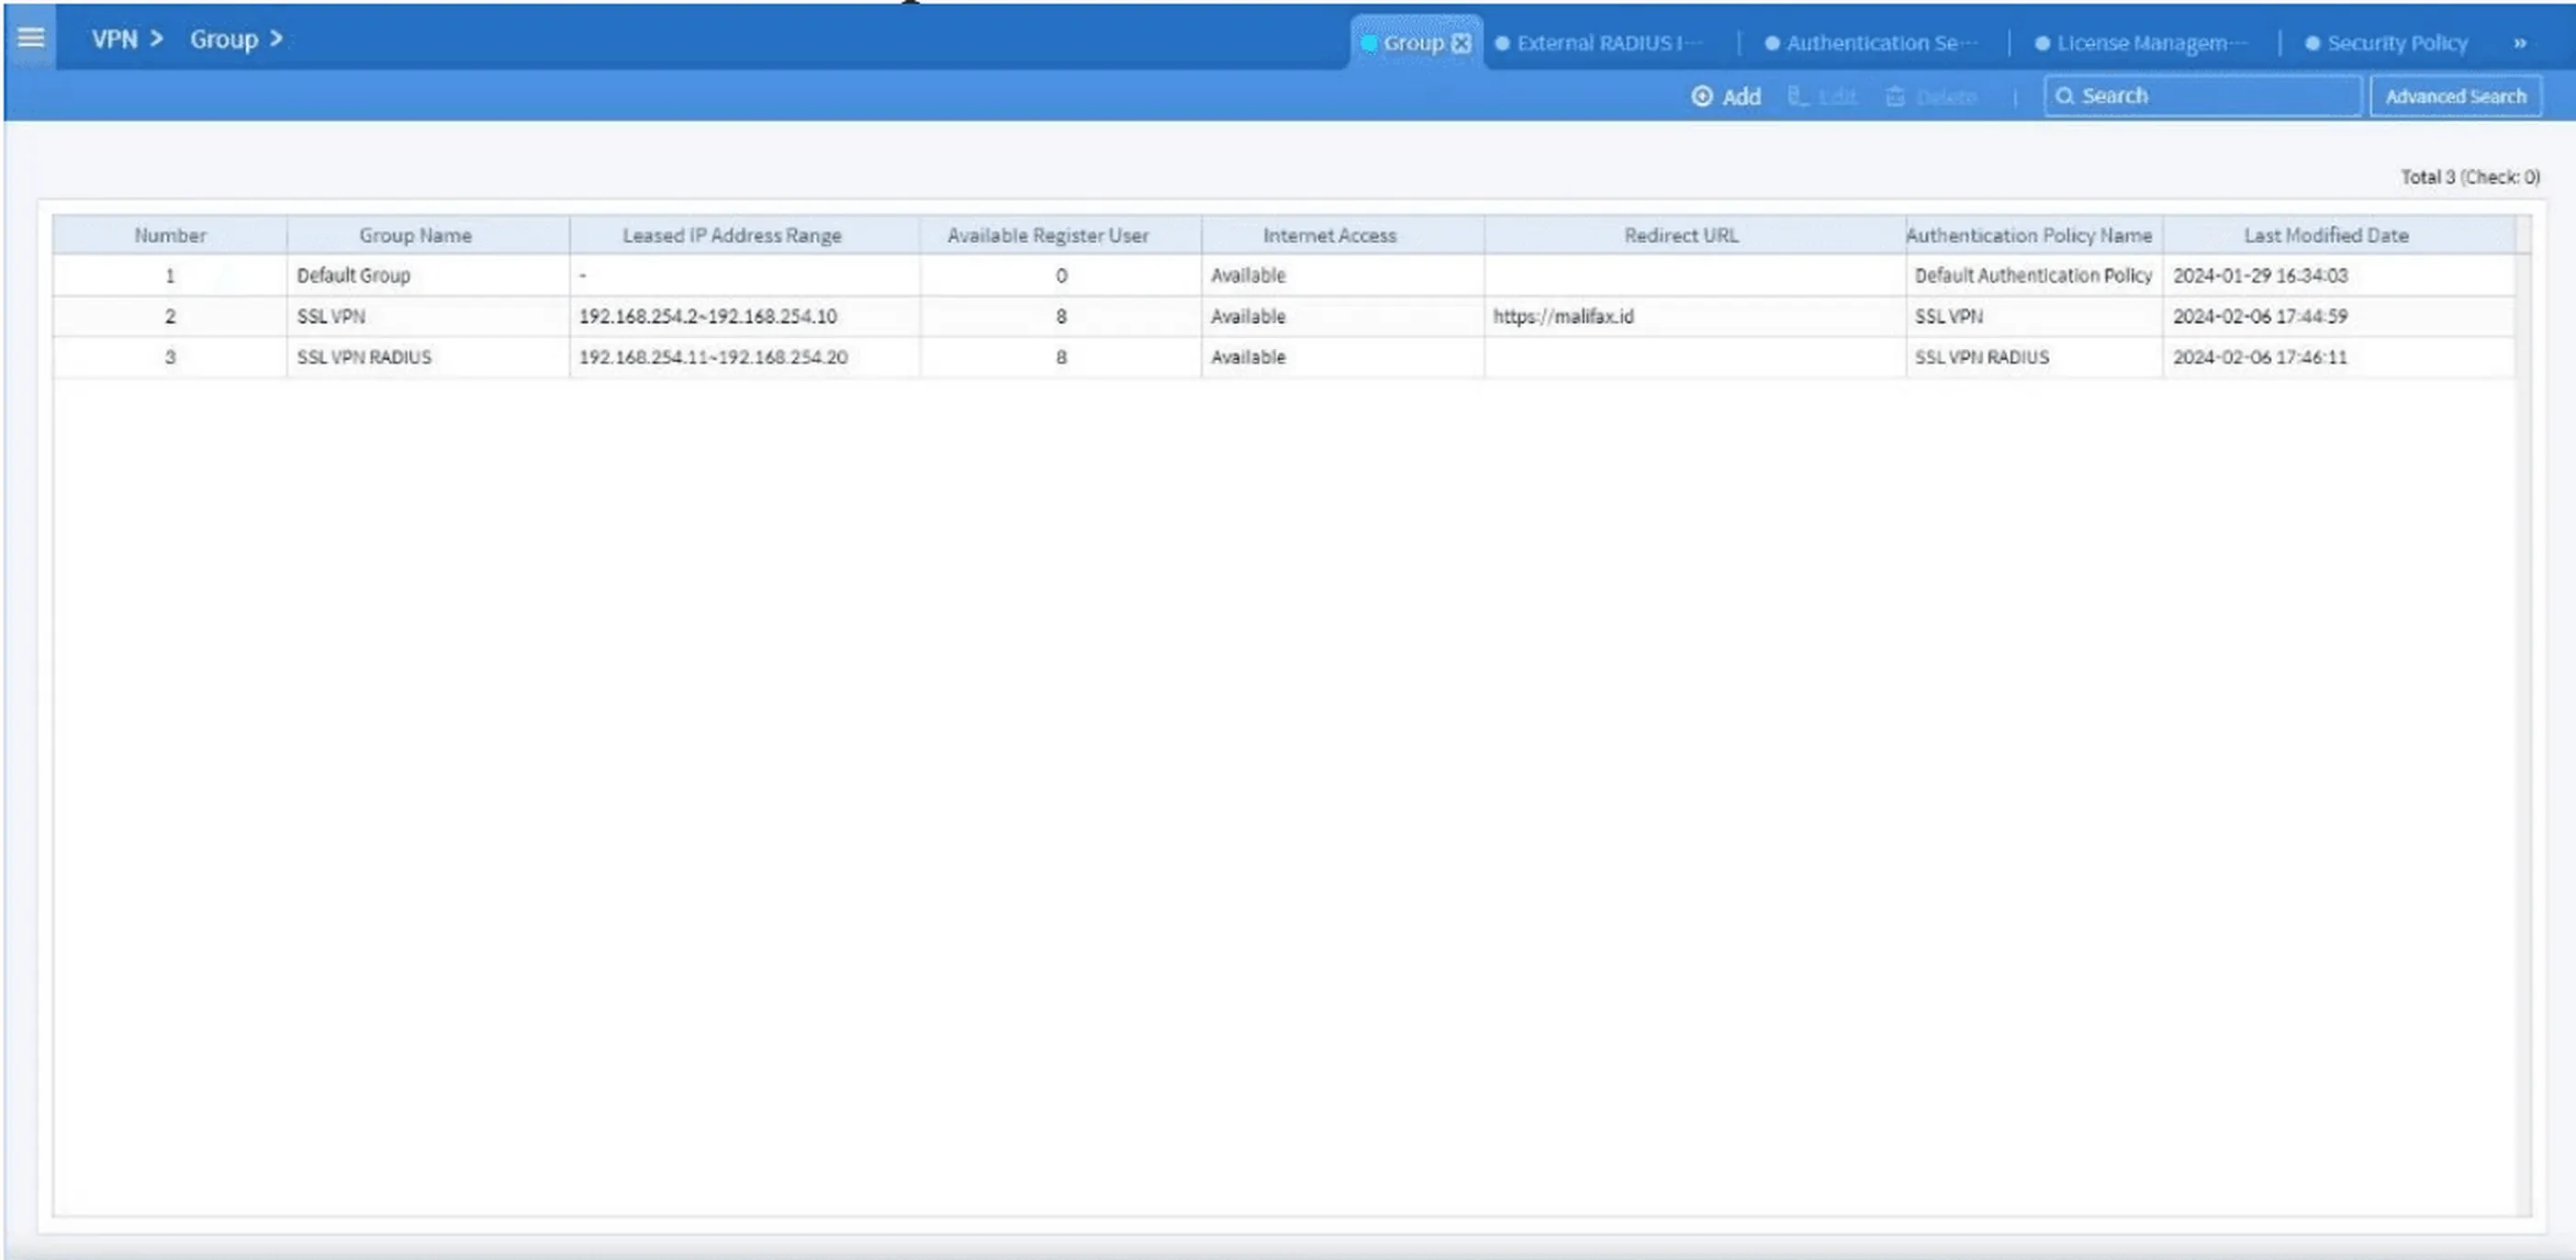
Figure 12. SSL VPN Group dashboard
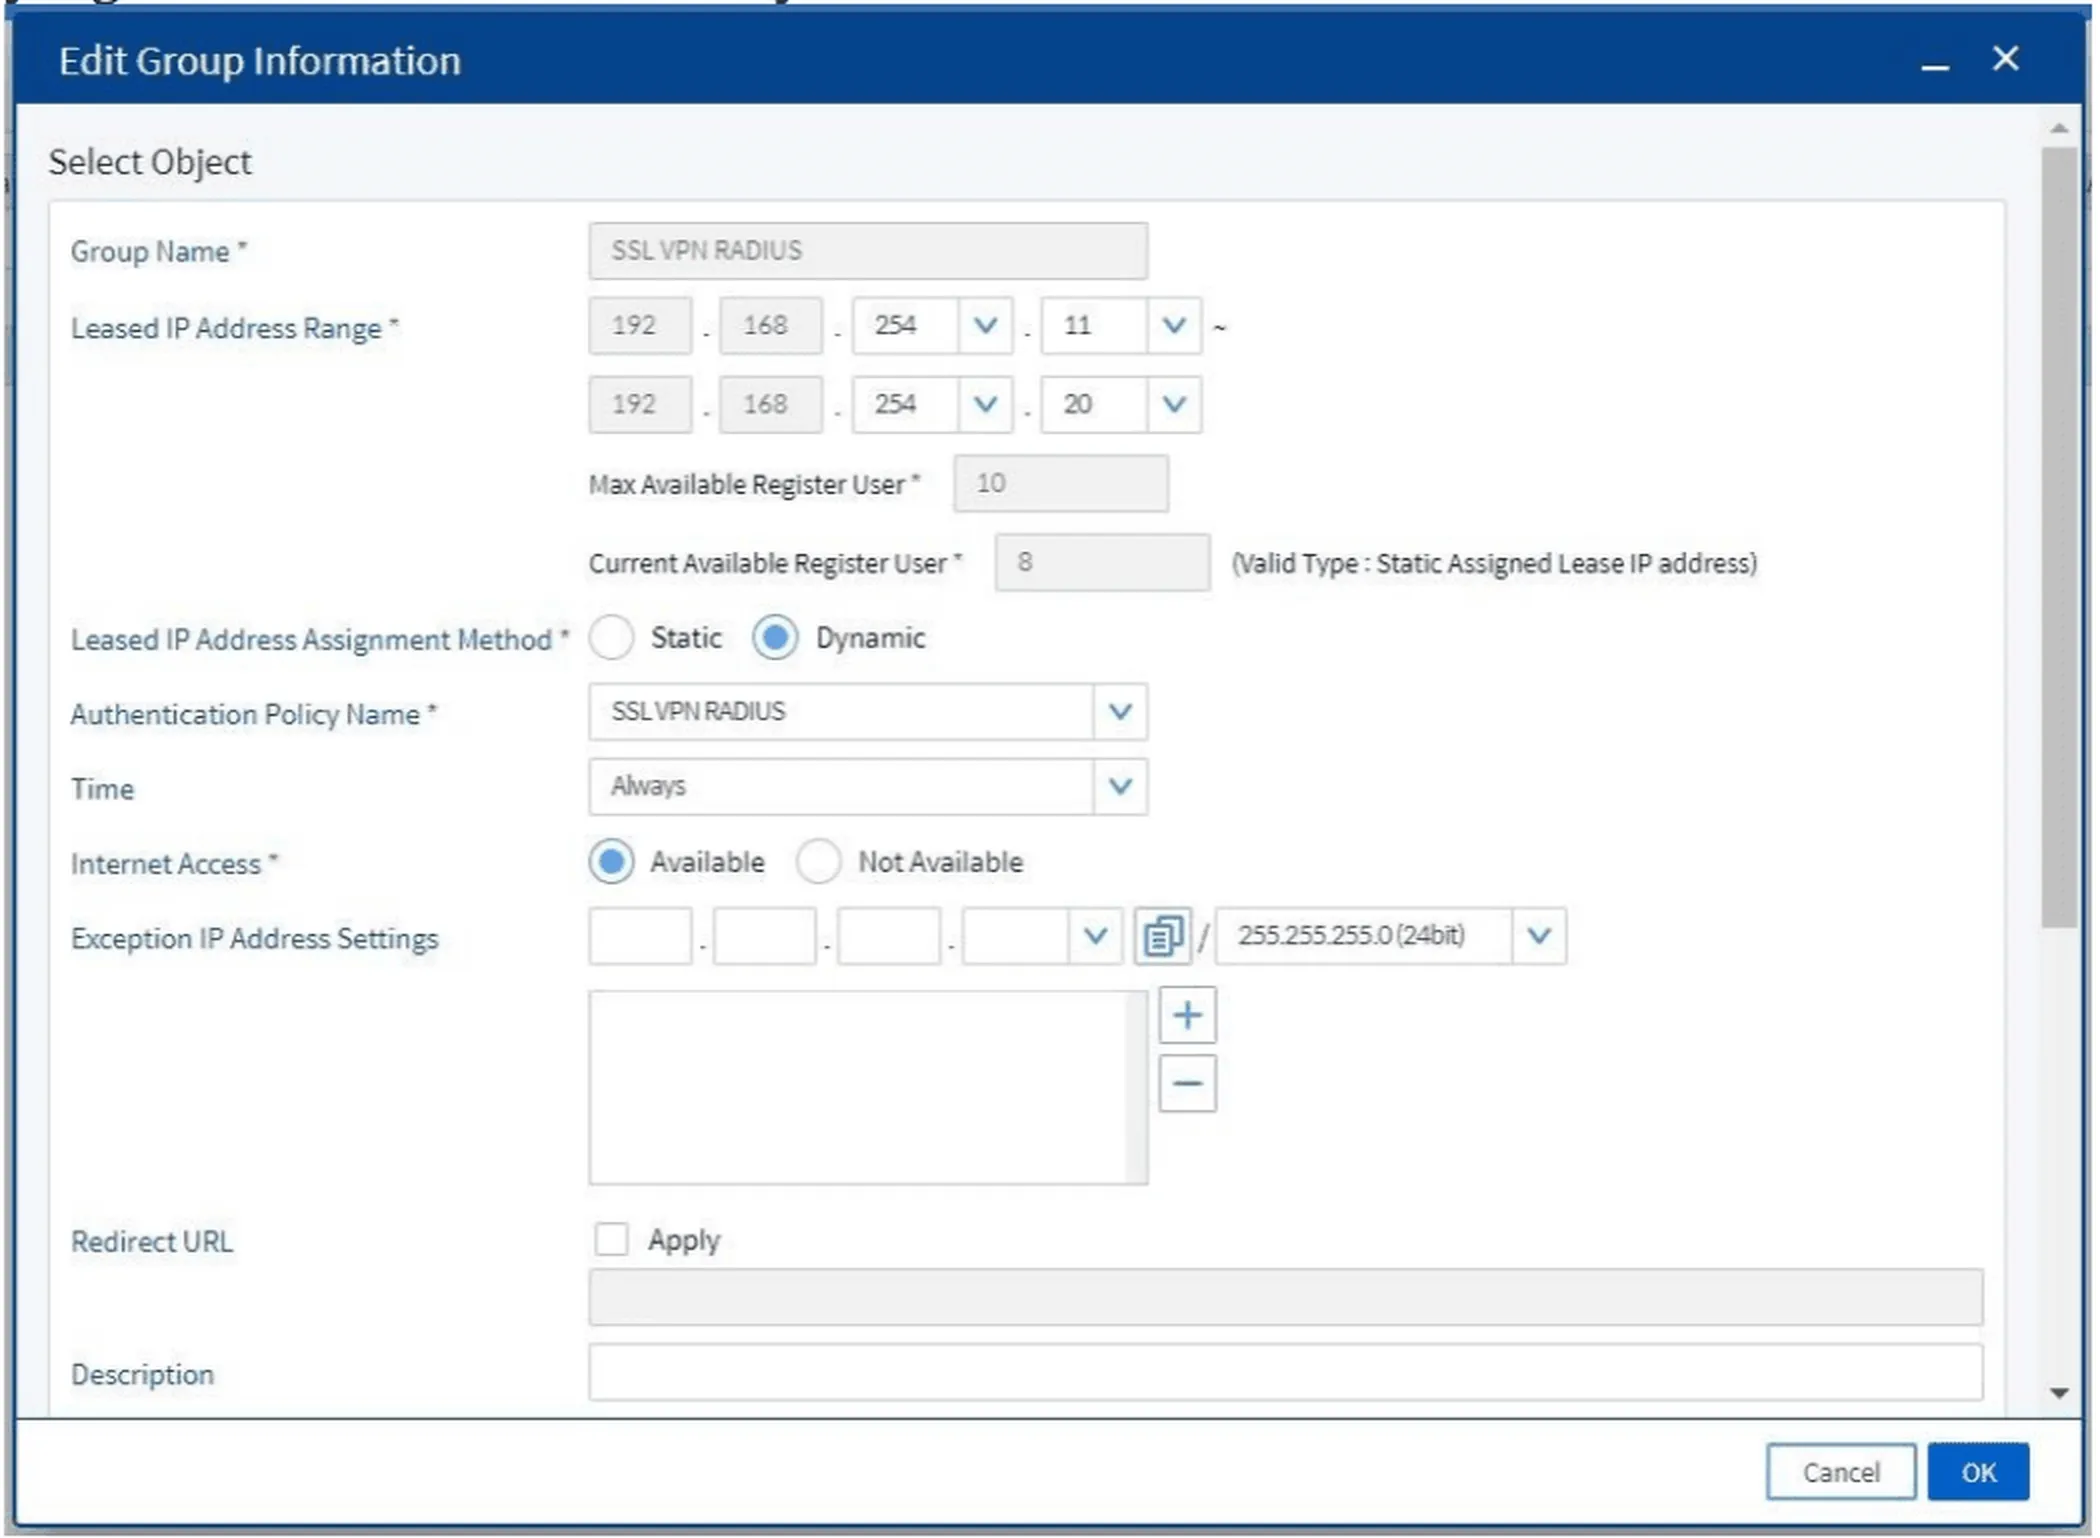
Figure 13. Group information input form for SSL VPN users
Also configure:
- Users included in the group
- Destination servers accessible by the group
- SSL Favorites if needed
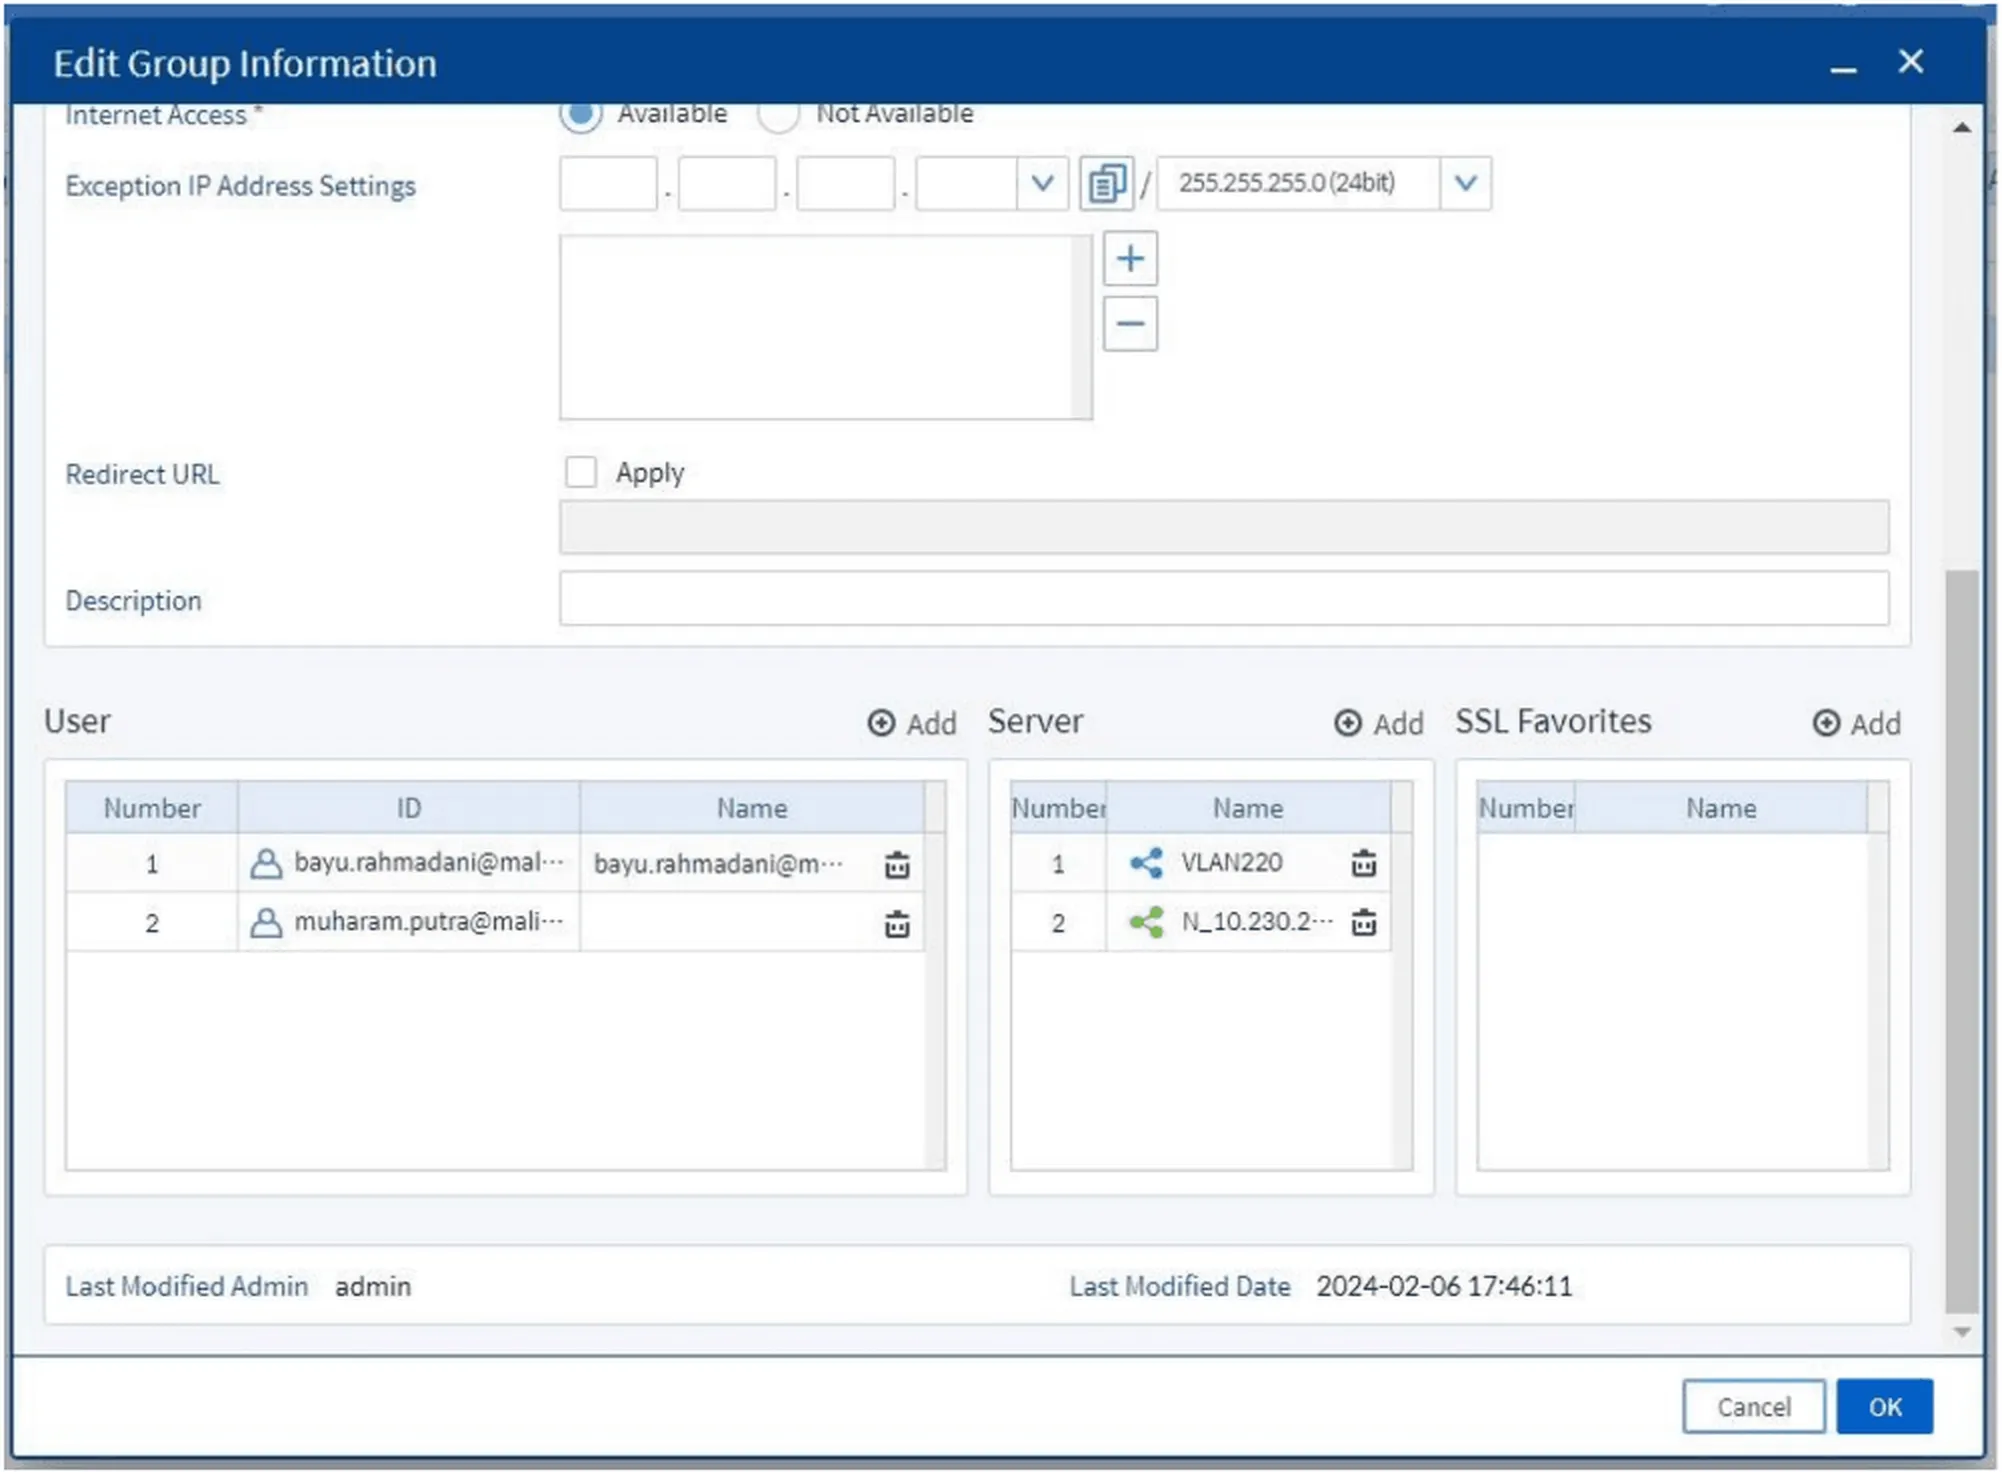
Figure 14. Configuration of users, servers, and SSL Favorites
8. Configuring External RADIUS Interwork
Navigate to VPN > SSL VPN > External RADIUS Interwork to link NGF with an external RADIUS server.
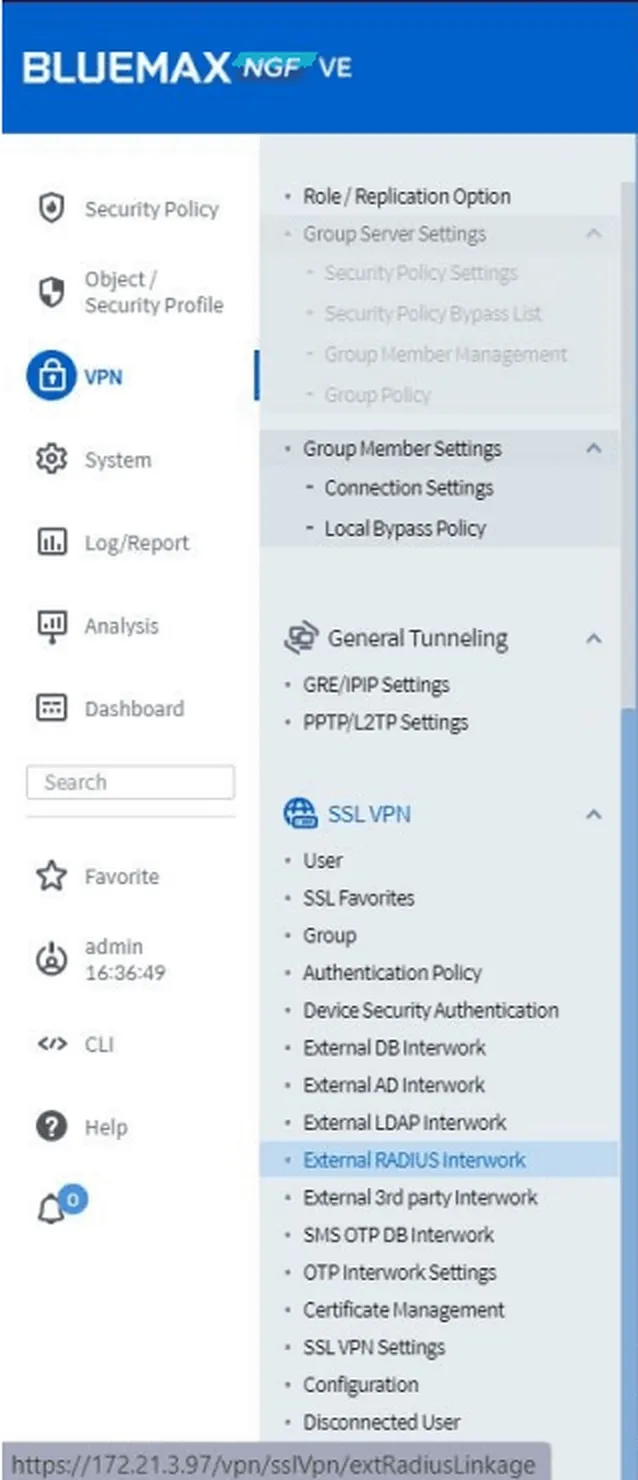
Figure 15. Navigating to External RADIUS Interwork menu
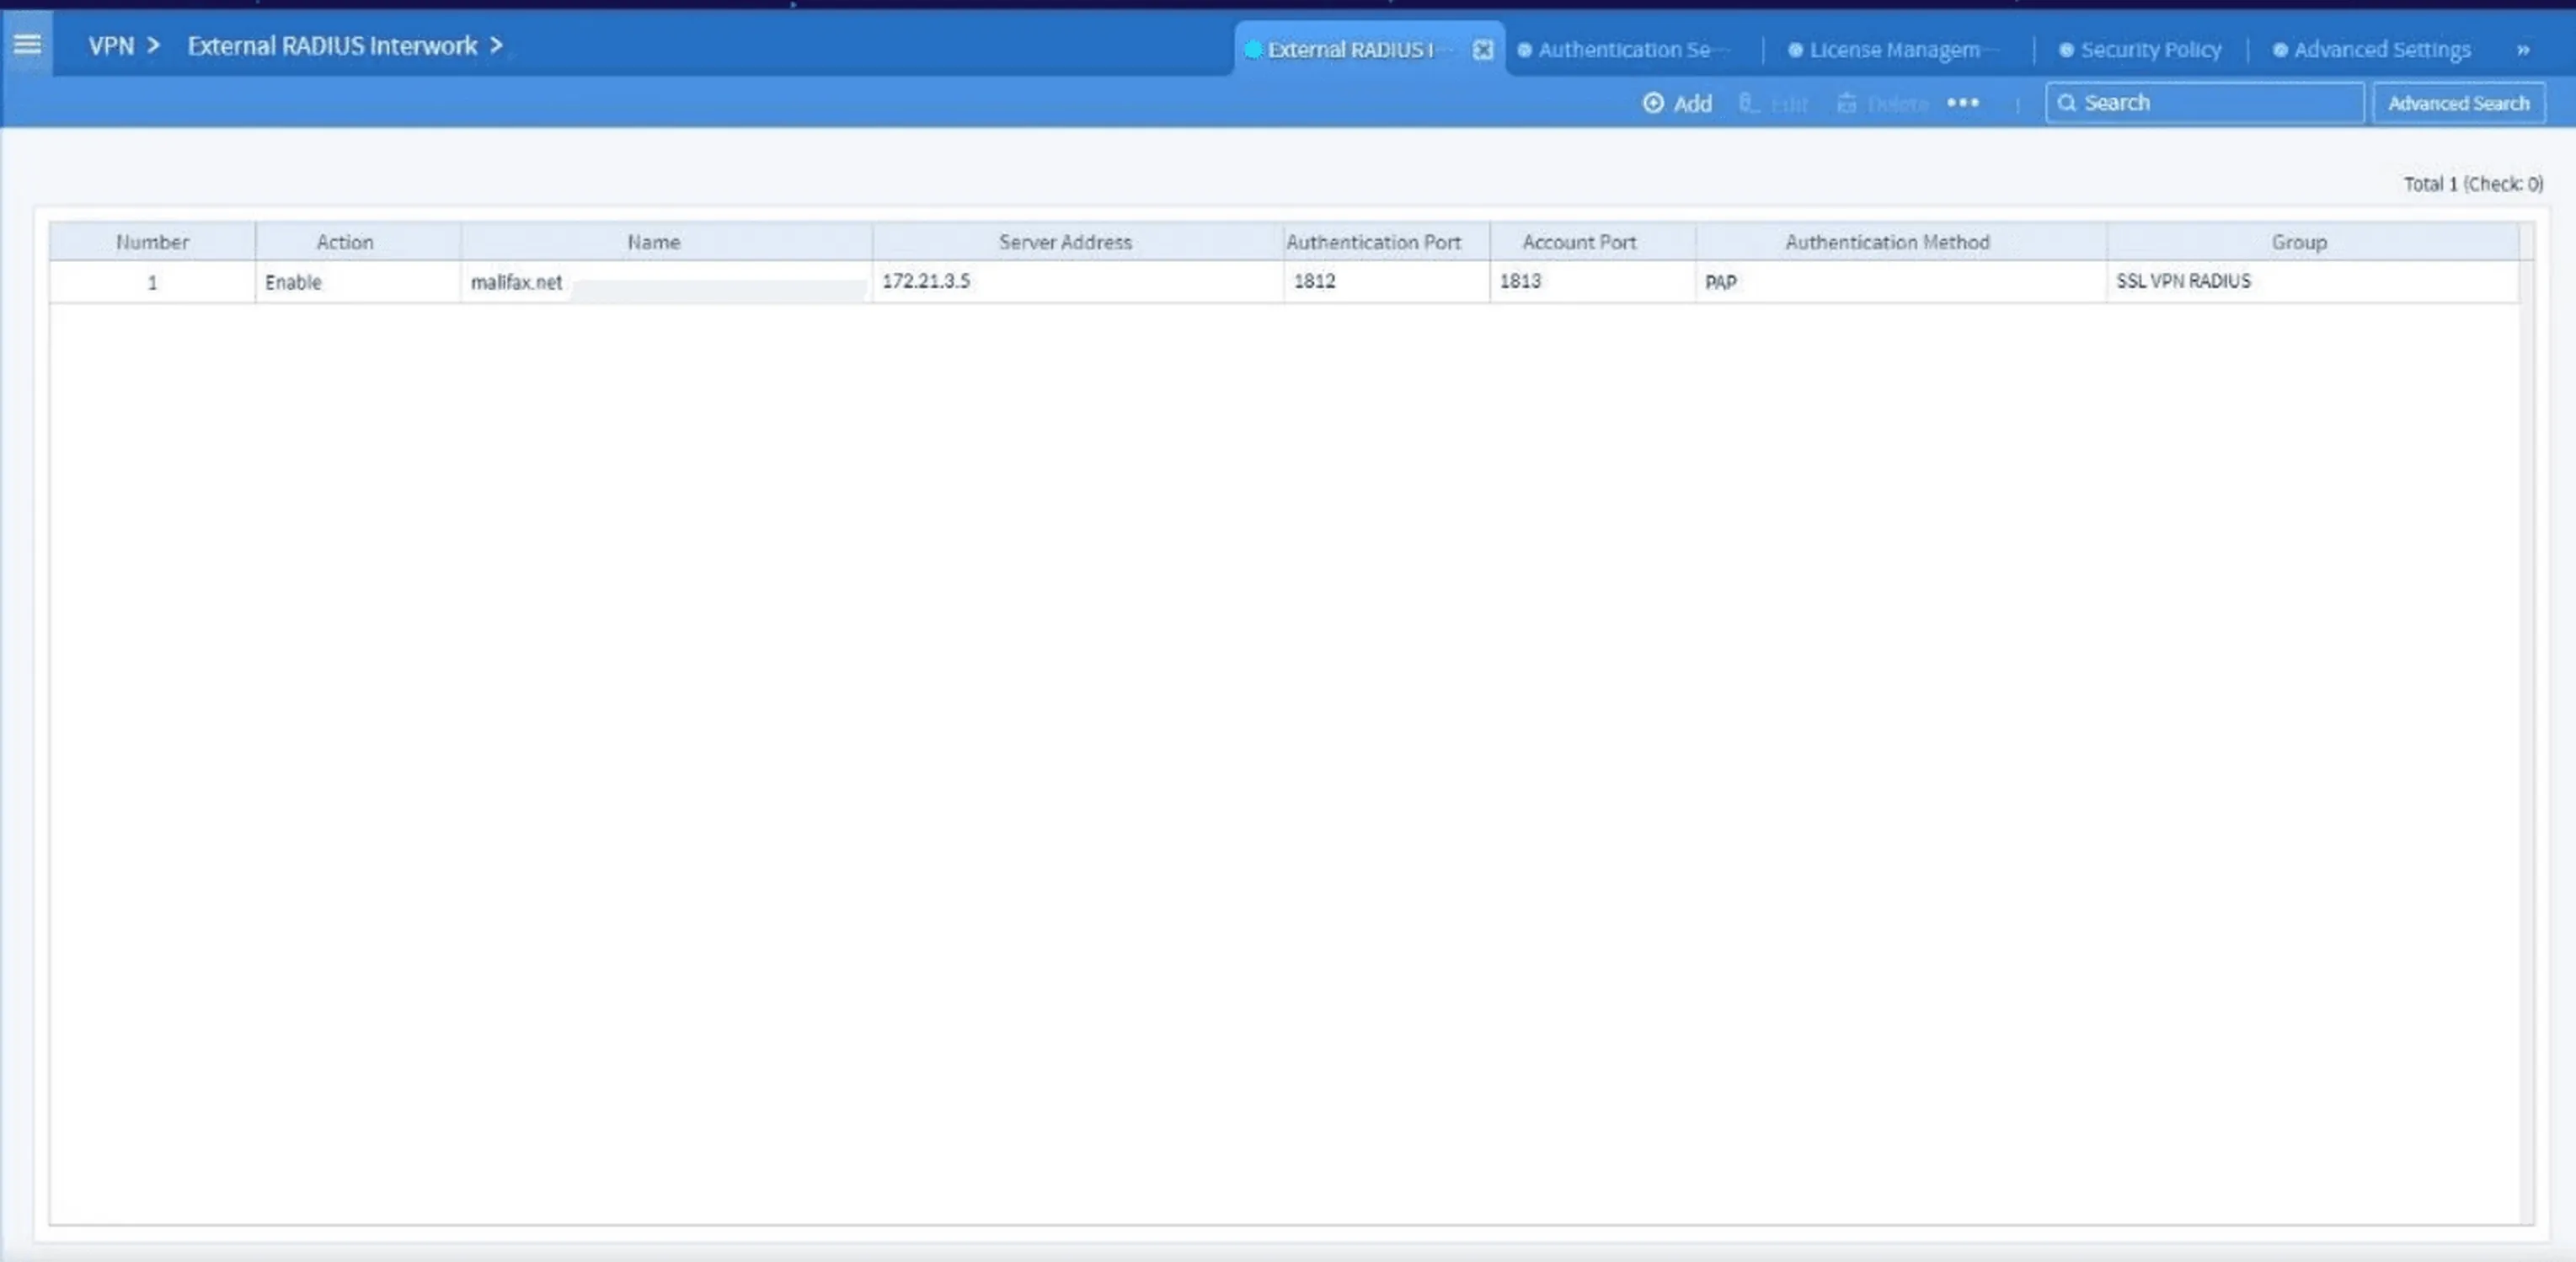
Figure 16. External RADIUS Interwork dashboard
Click Add and fill in:
- Connection name
- The group previously created
- Perform a connection test by entering a username and password, then click Connection Test
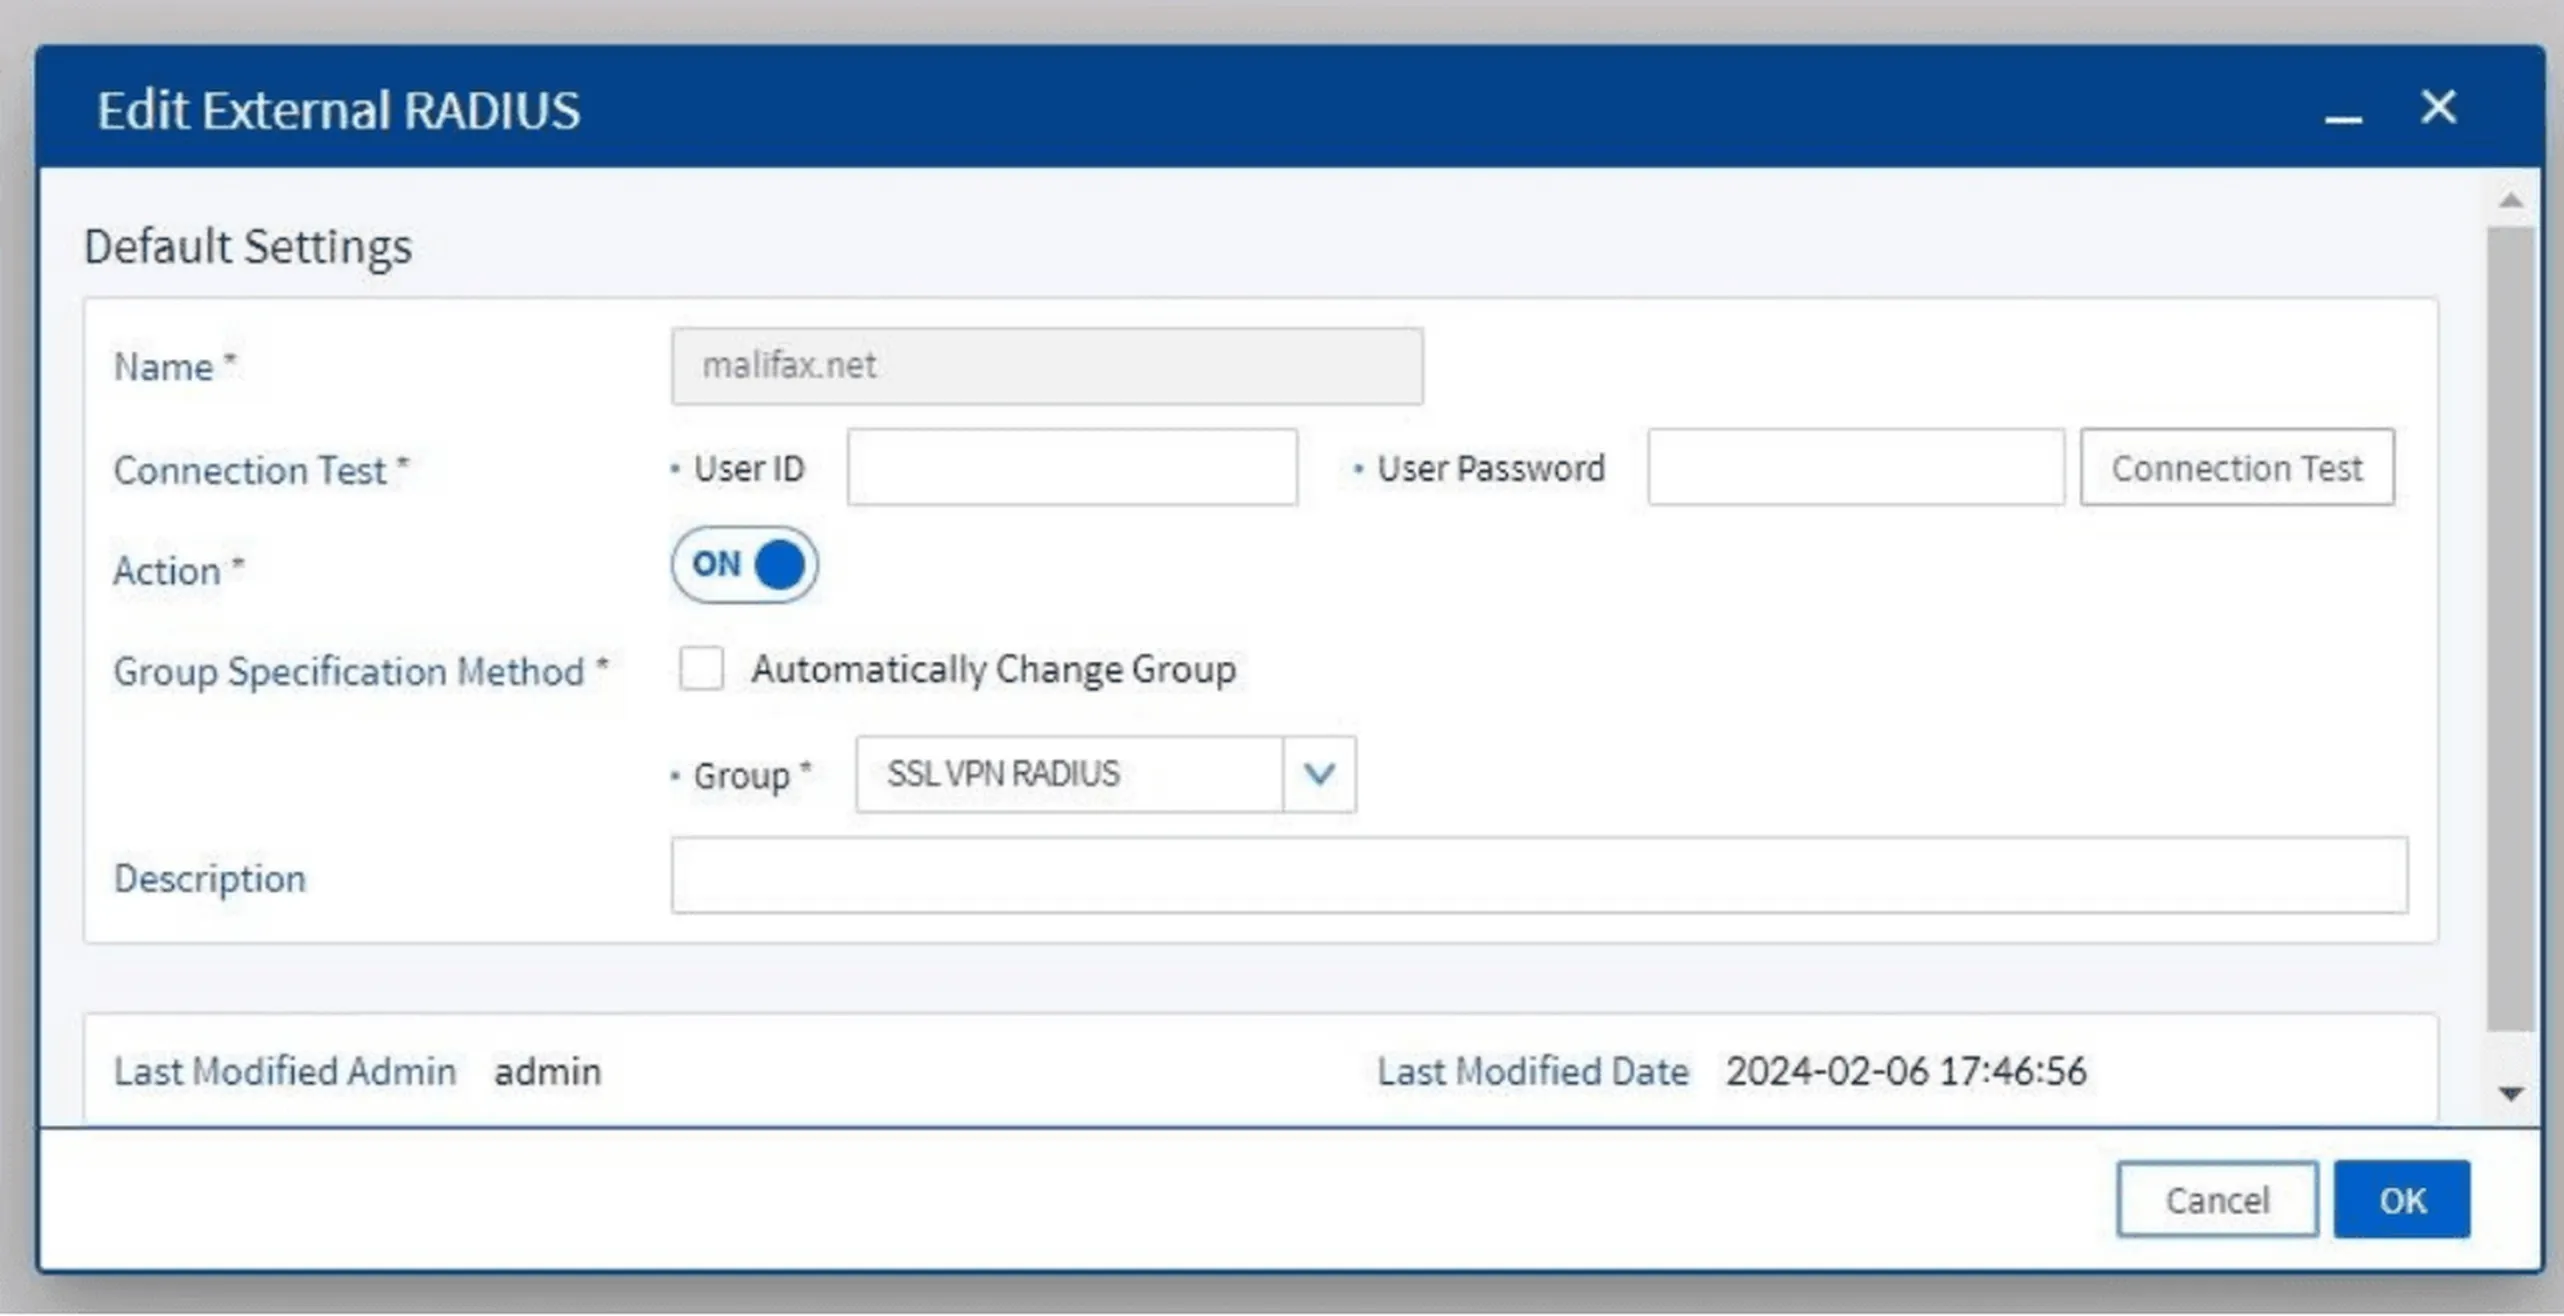
Figure 17. Connection configuration form to External RADIUS
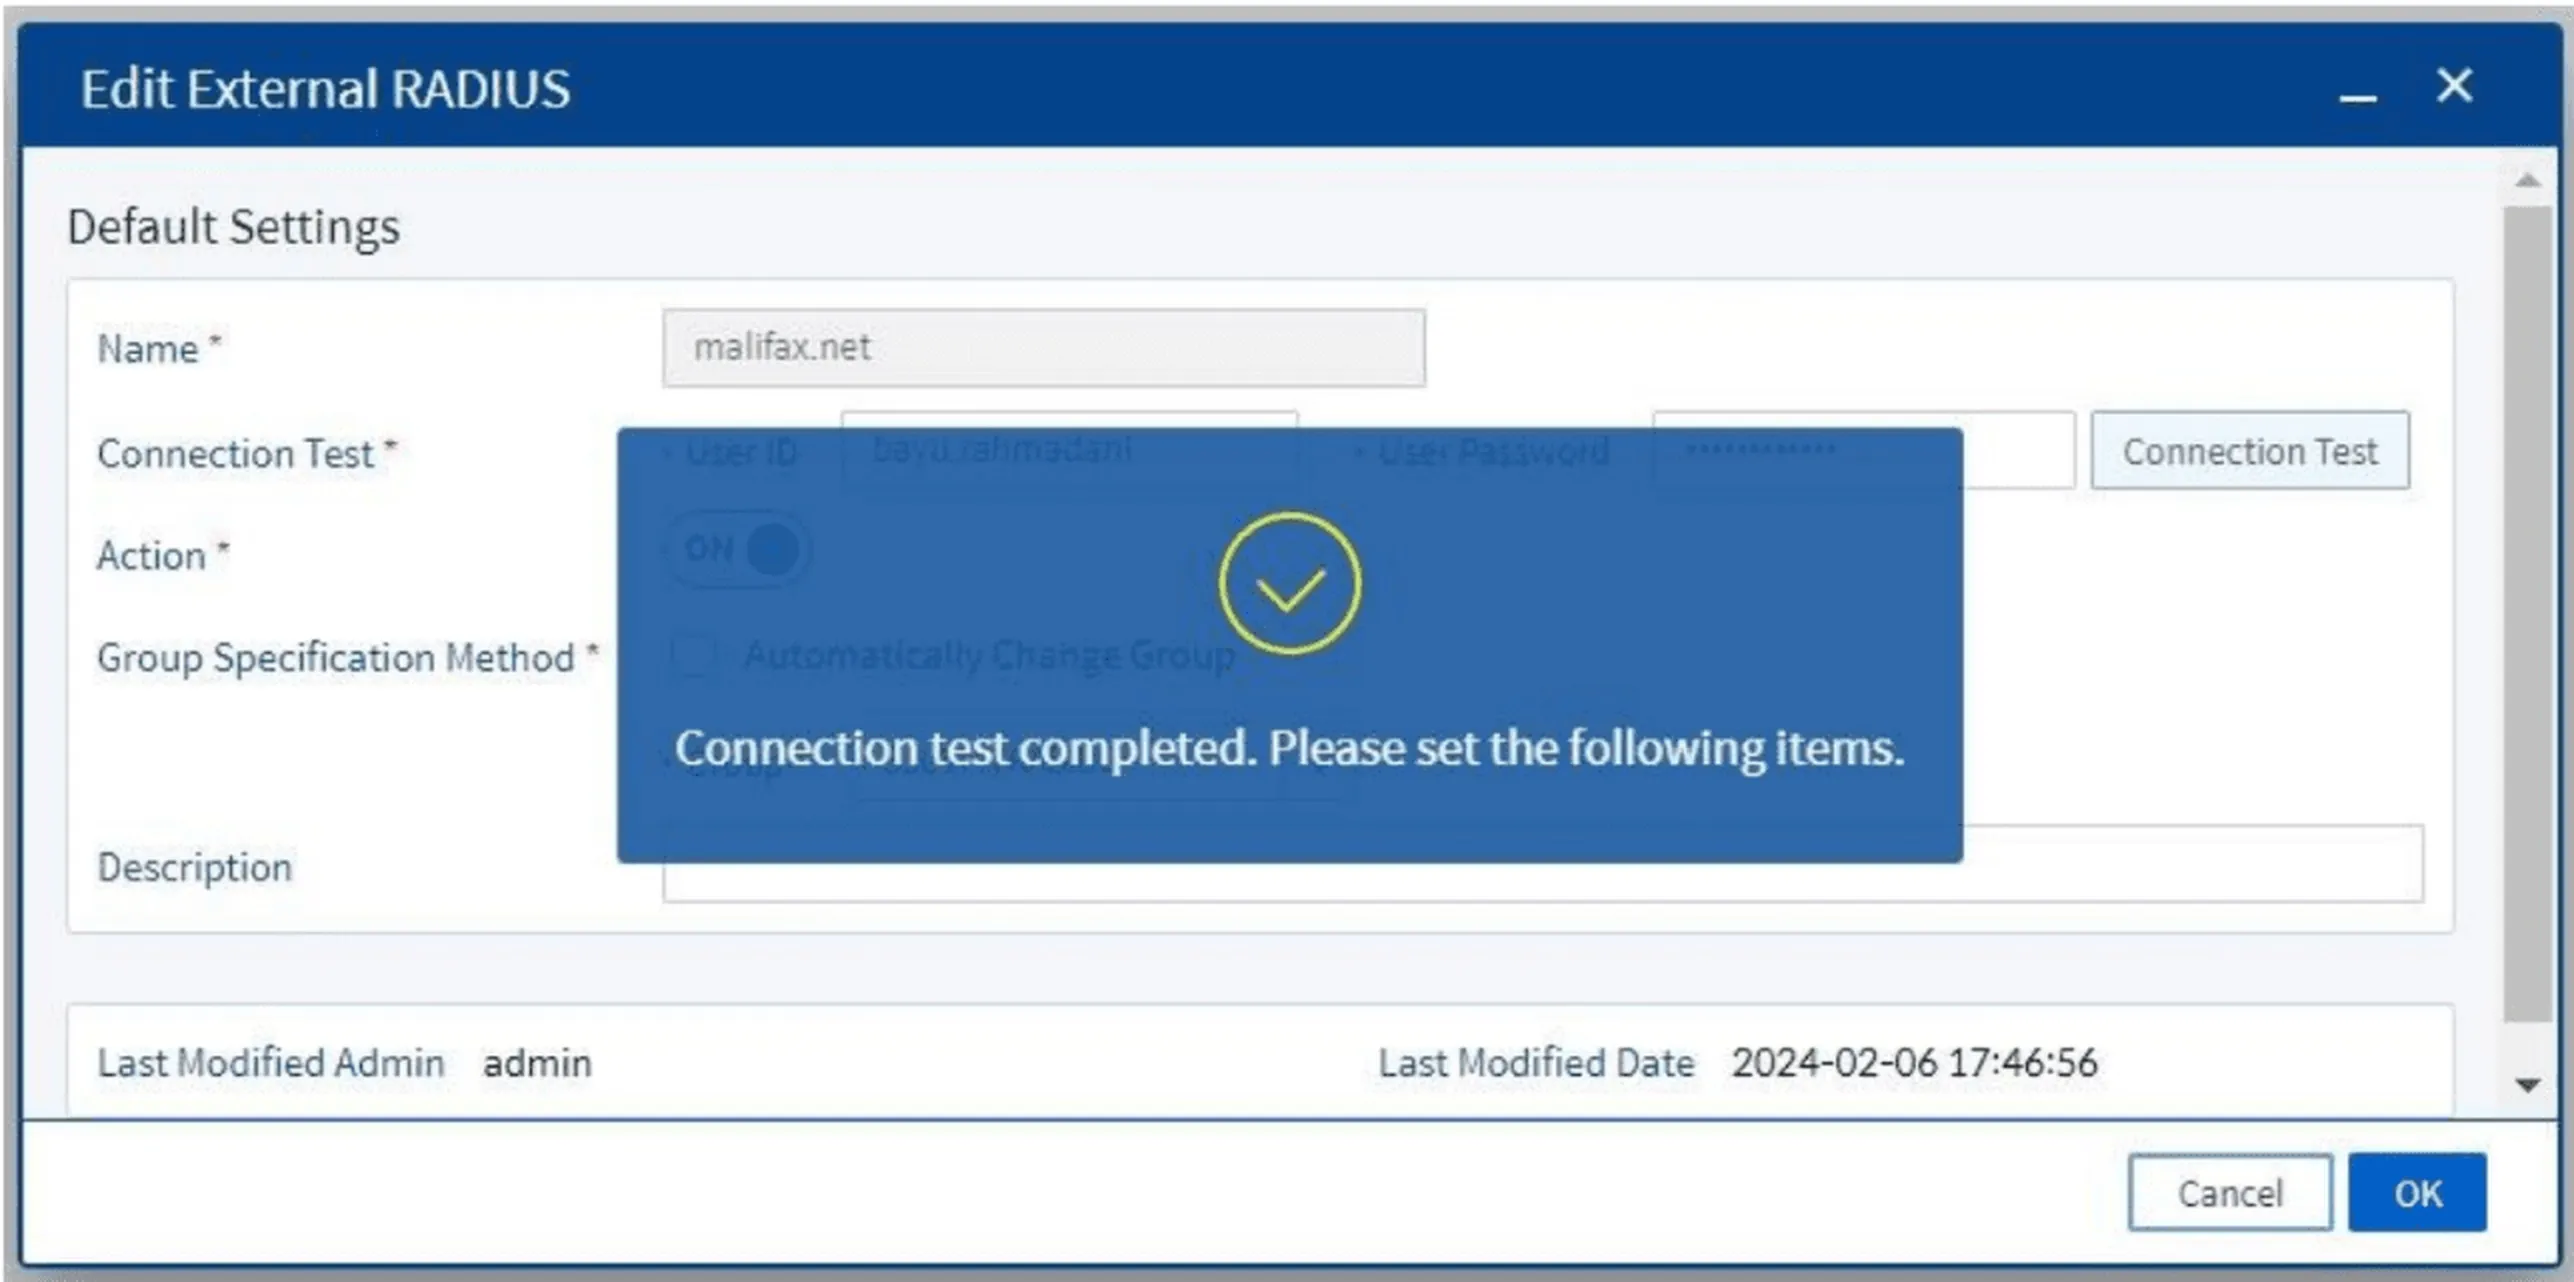
Figure 18. Successful result of connection test to external RADIUS
9. Testing the Connection Using Bluemax Client
Open the Bluemax Client application and enter the following URL: https://<bmx_ip_address>:8443/radius, and then, click Connect.
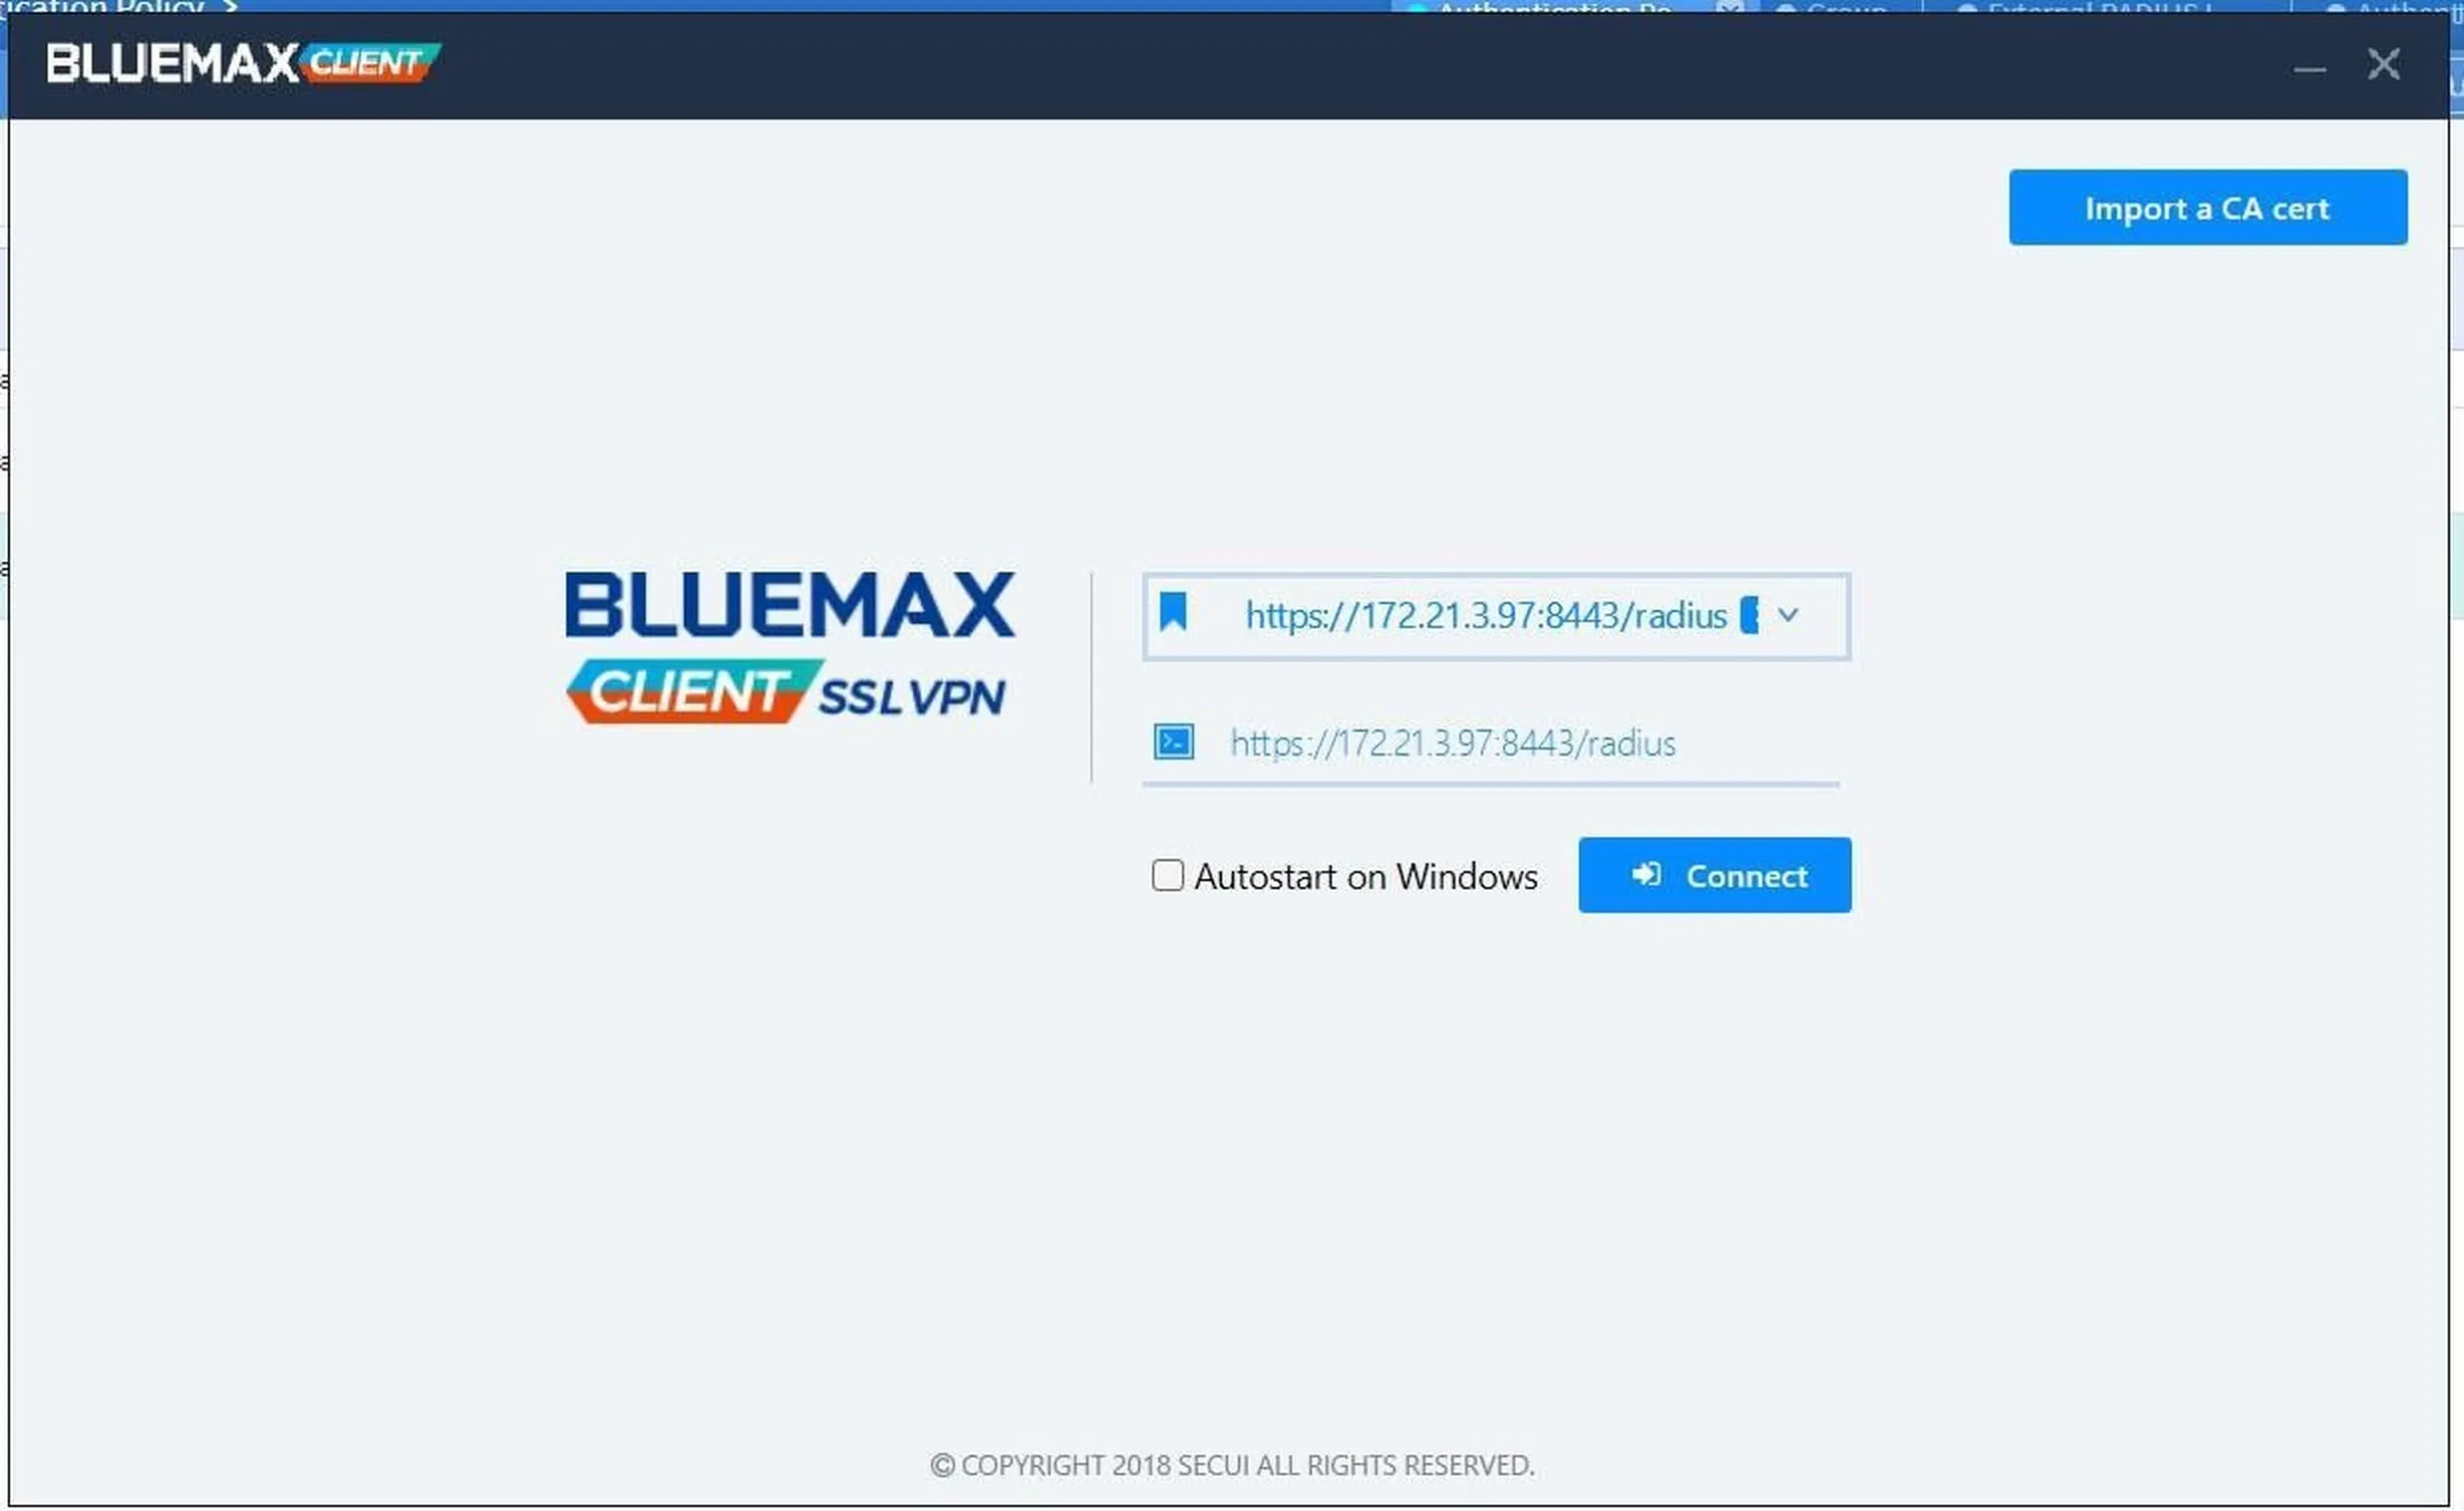
Figure 19. Initial connection screen in Bluemax Client
Enter the username and password configured on the RADIUS server.
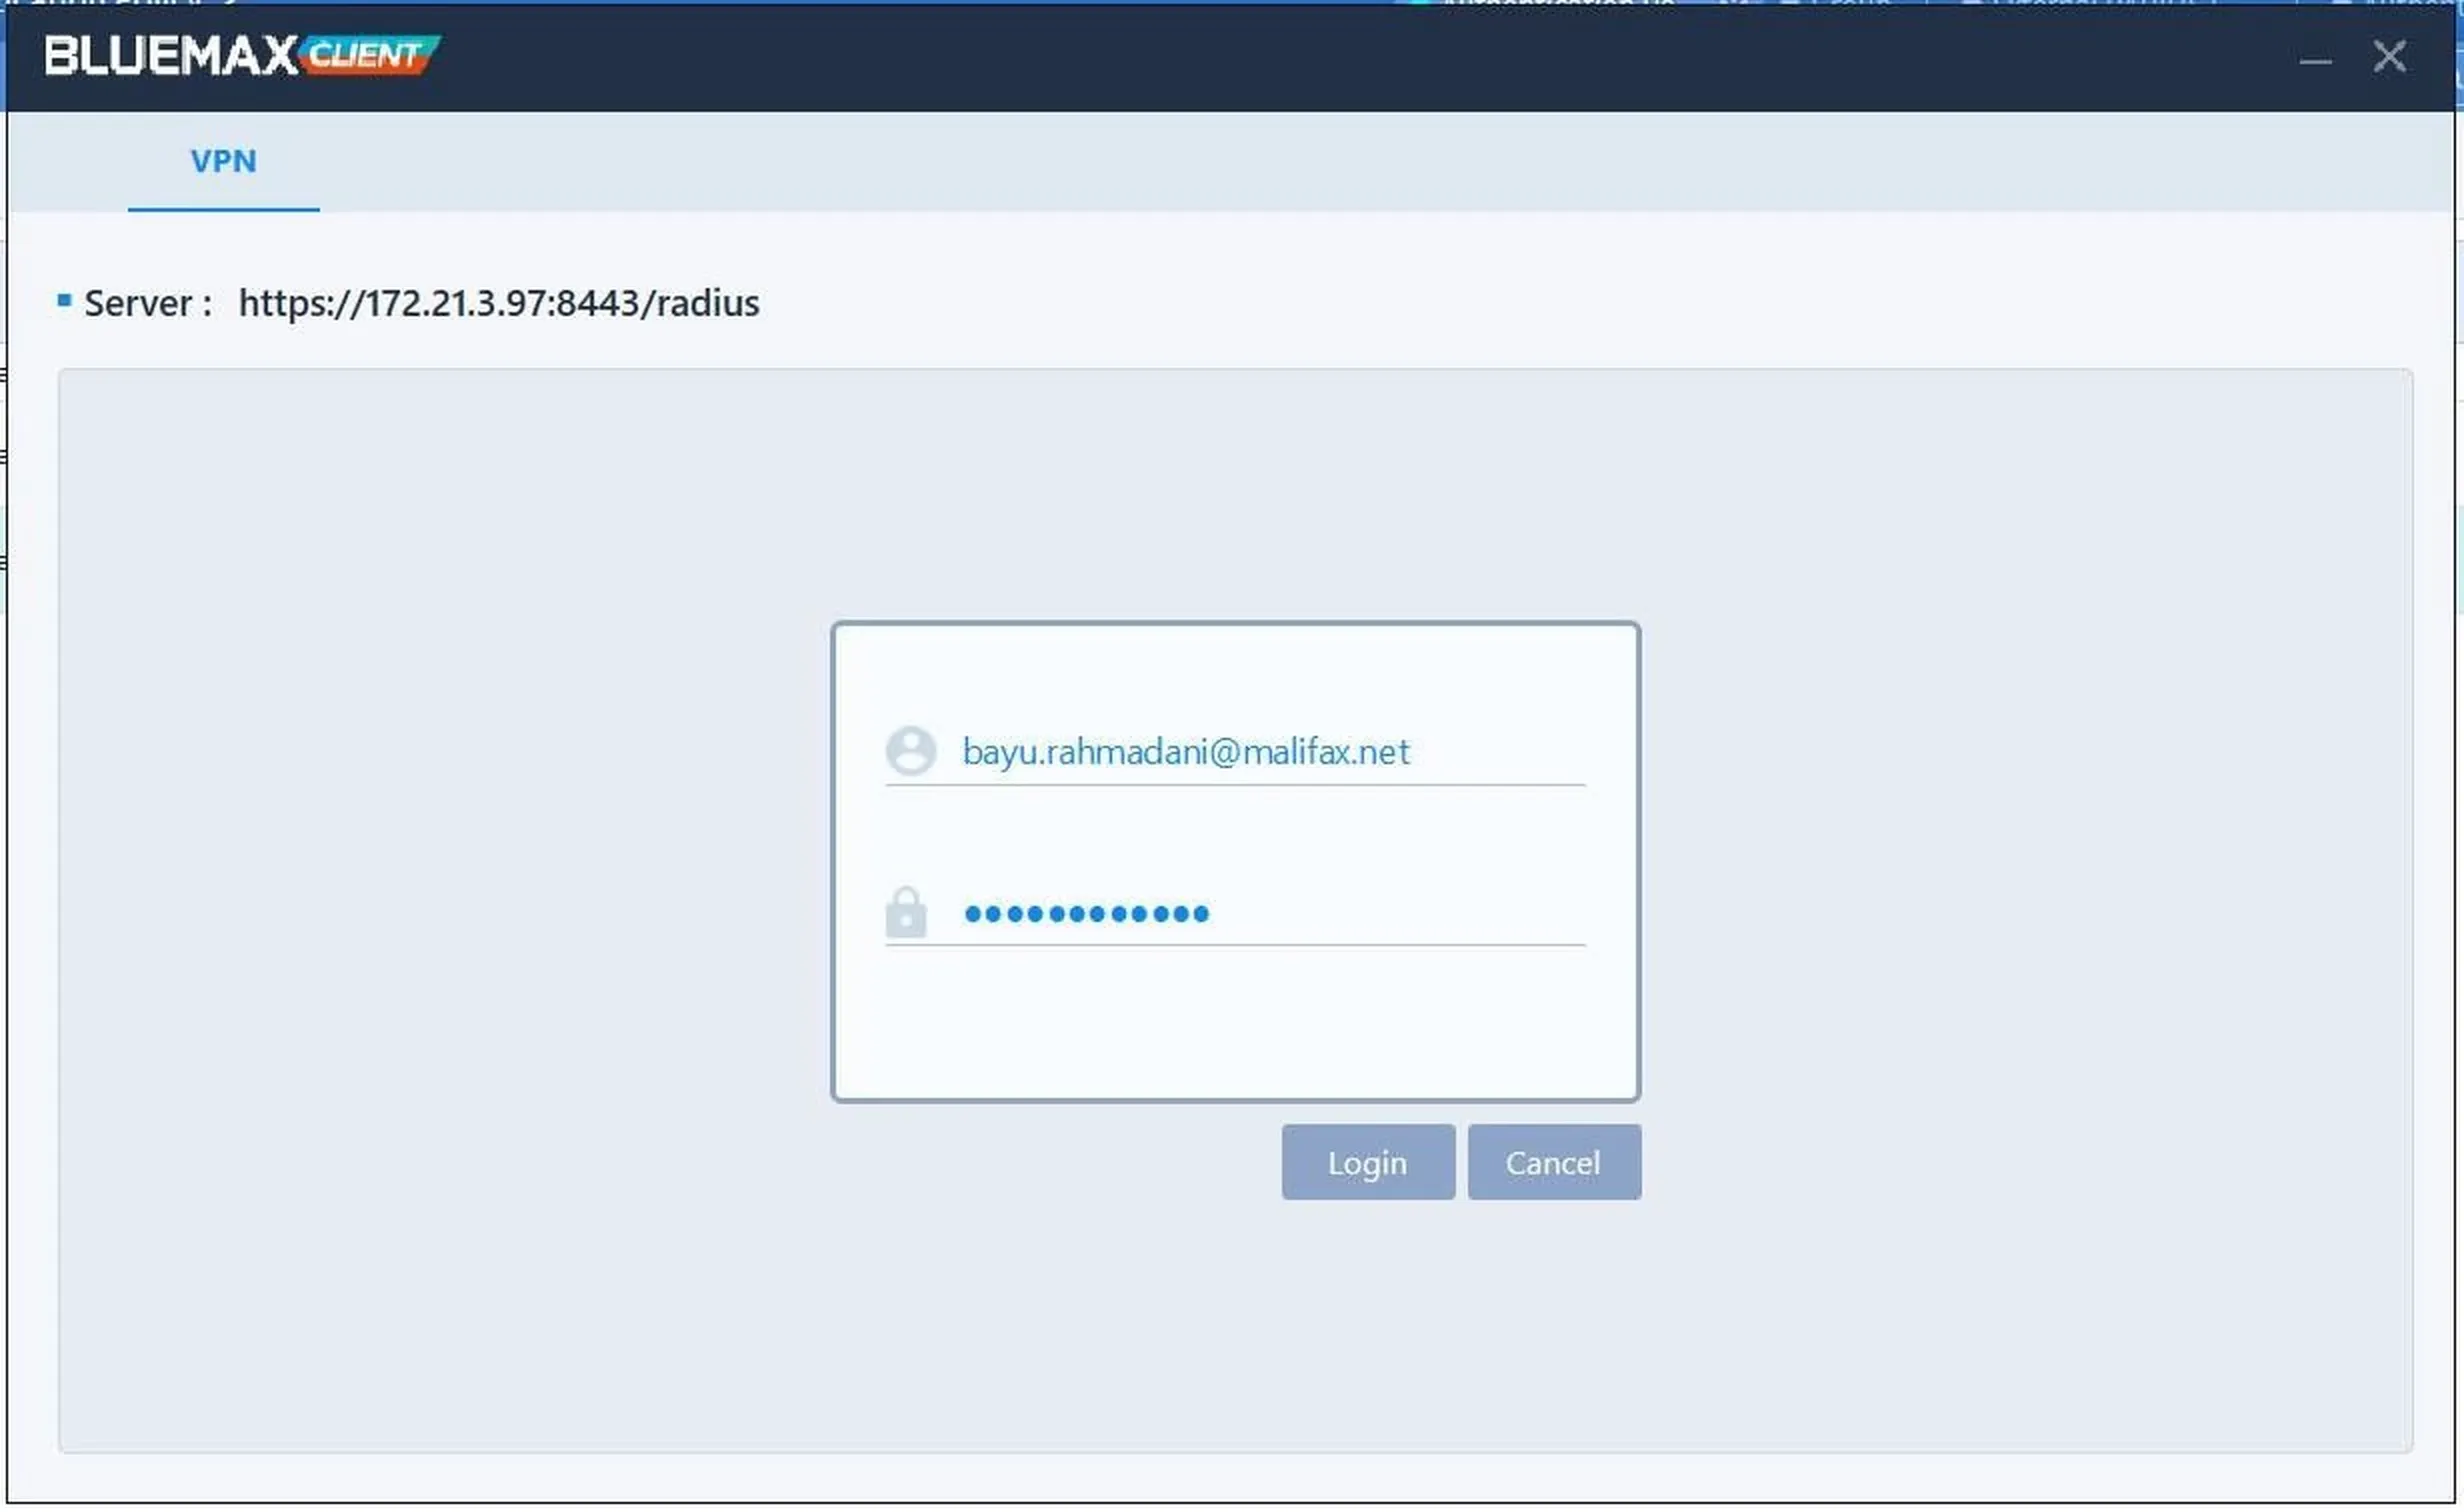
Figure 20. Username and password input on Bluemax Client
If the credentials are correct, you will be connected to the internal network via SSL VPN.
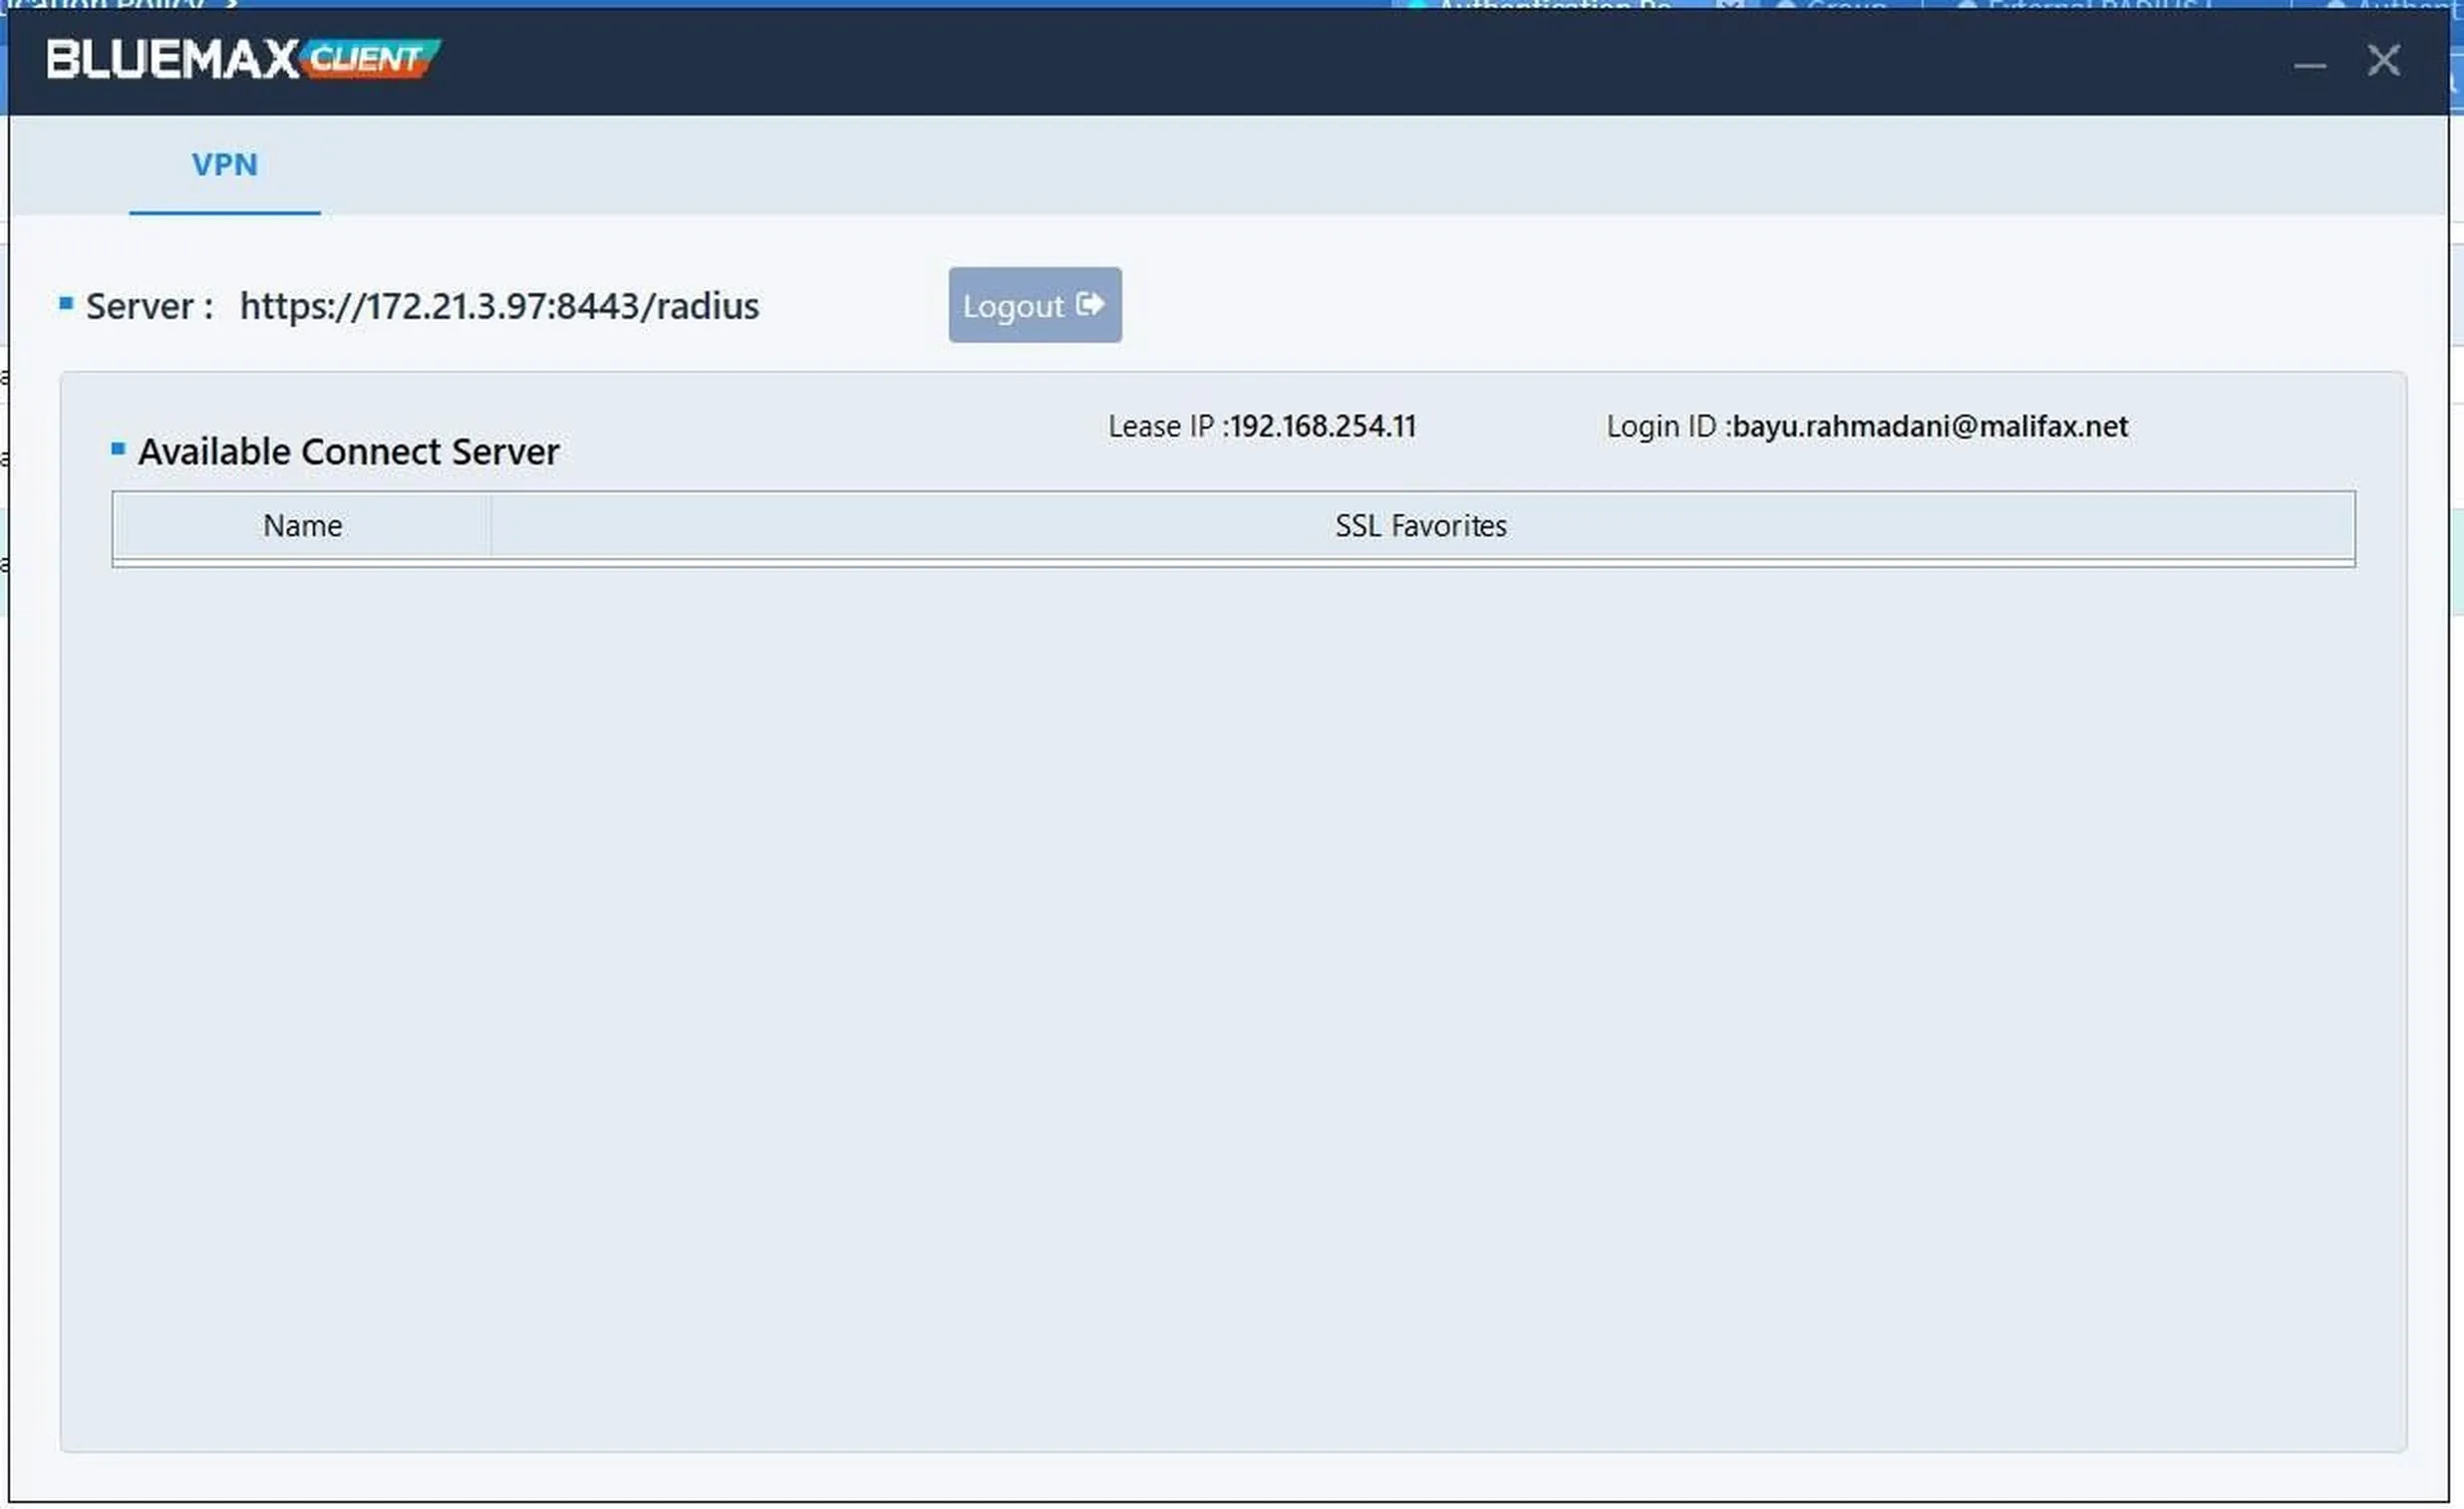
Figure 21. Successful connection to the internal network via SSL VPN
By following this guide, you can enhance secure network access through RADIUS integration on SECUI Bluemax NGF. Feel free to implement these steps in your production environment and contact our technical team for further support if needed.
Last Updated
August 11, 2025
Category
SECUI Configuration, Network Security
Share This
On This Page
Contact us for
Free Consultation!
Share your challenges, and we'll provide the best solutions for your business, Connecting with us is as simple as clicking a button, and let us come to you.