Static Route Configuration in SECUI Bluemax Next Generation Firewall
In enterprise networking, routing is like a roadmap. If it’s not configured properly, traffic can go the wrong way, or worse, get dropped altogether. That’s why understanding how to set up Static Routes on your Bluemax Next Generation Firewall is a must.
This feature is especially helpful when you want specific traffic to follow a particular route, whether it’s directing traffic to a head office router, a VPN tunnel, or a backup ISP.
If you're looking for a straightforward but thorough guide, this one’s made for you.
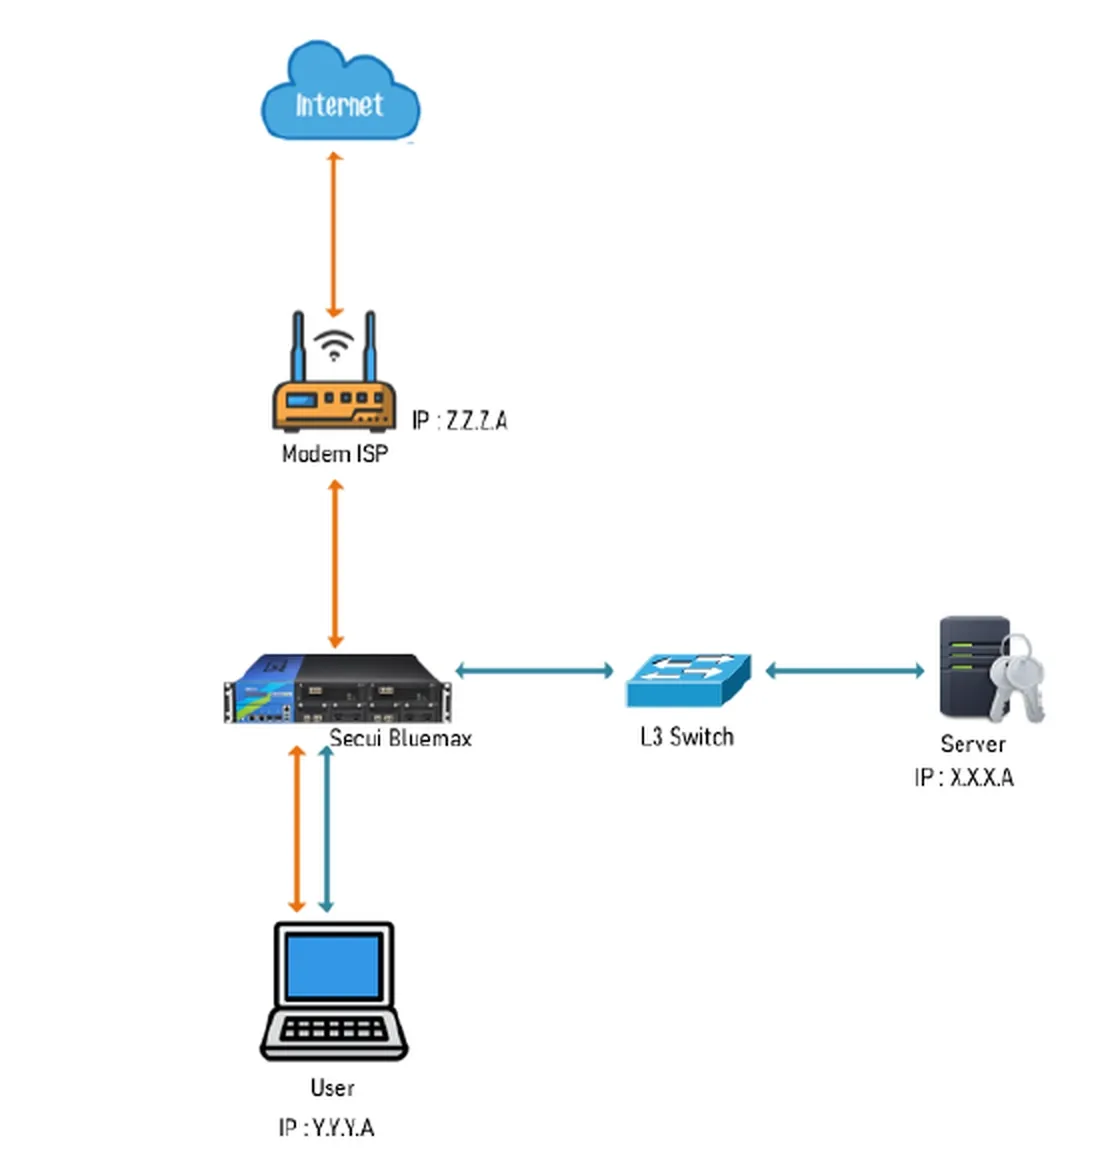
Figure 0.1 Network Topology
1. Login to Bluemax Next Generation Firewall
Start by logging in to the Bluemax Next Generation Firewall web interface via your browser. Make sure you're using an account with admin-level access.
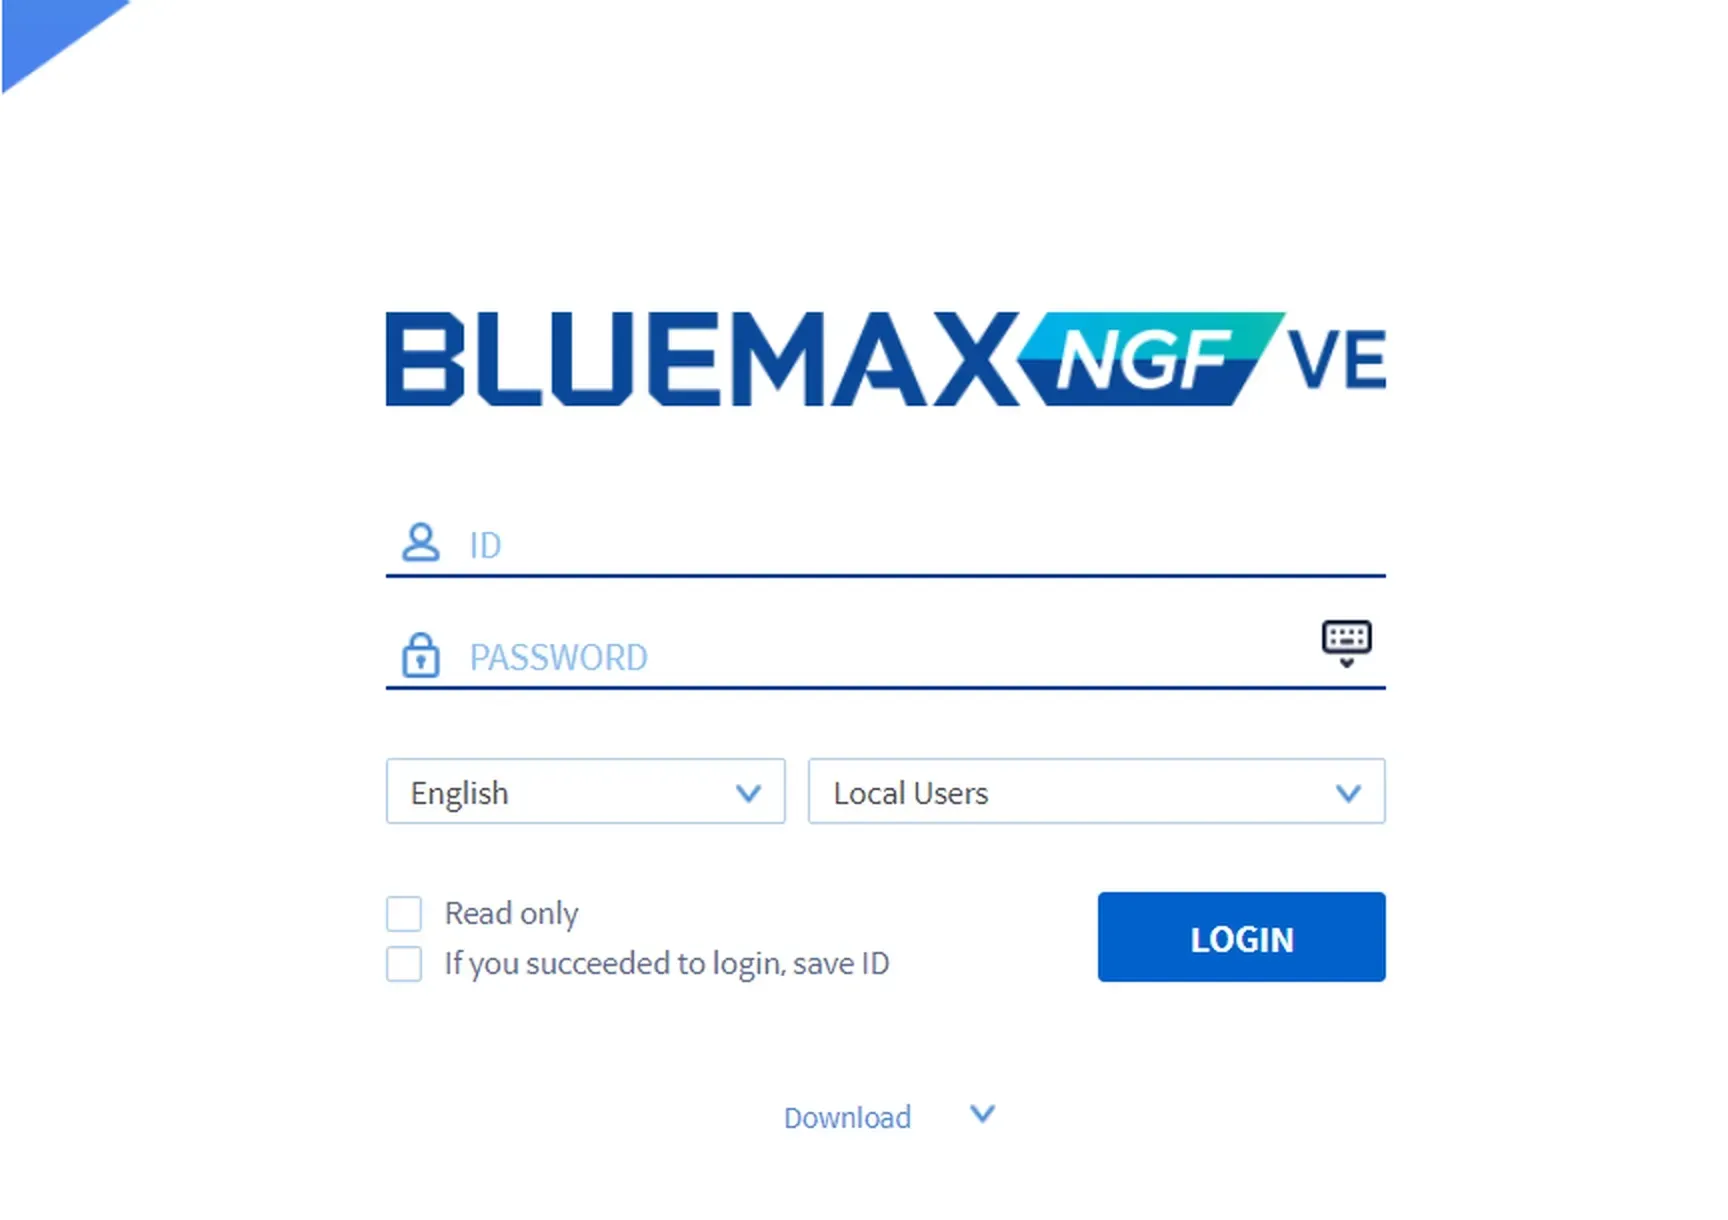
Figure 1.1 Login Page
2. Navigate to Routing Settings
After logging in, go to:
System > System Configuration > Routing Settings
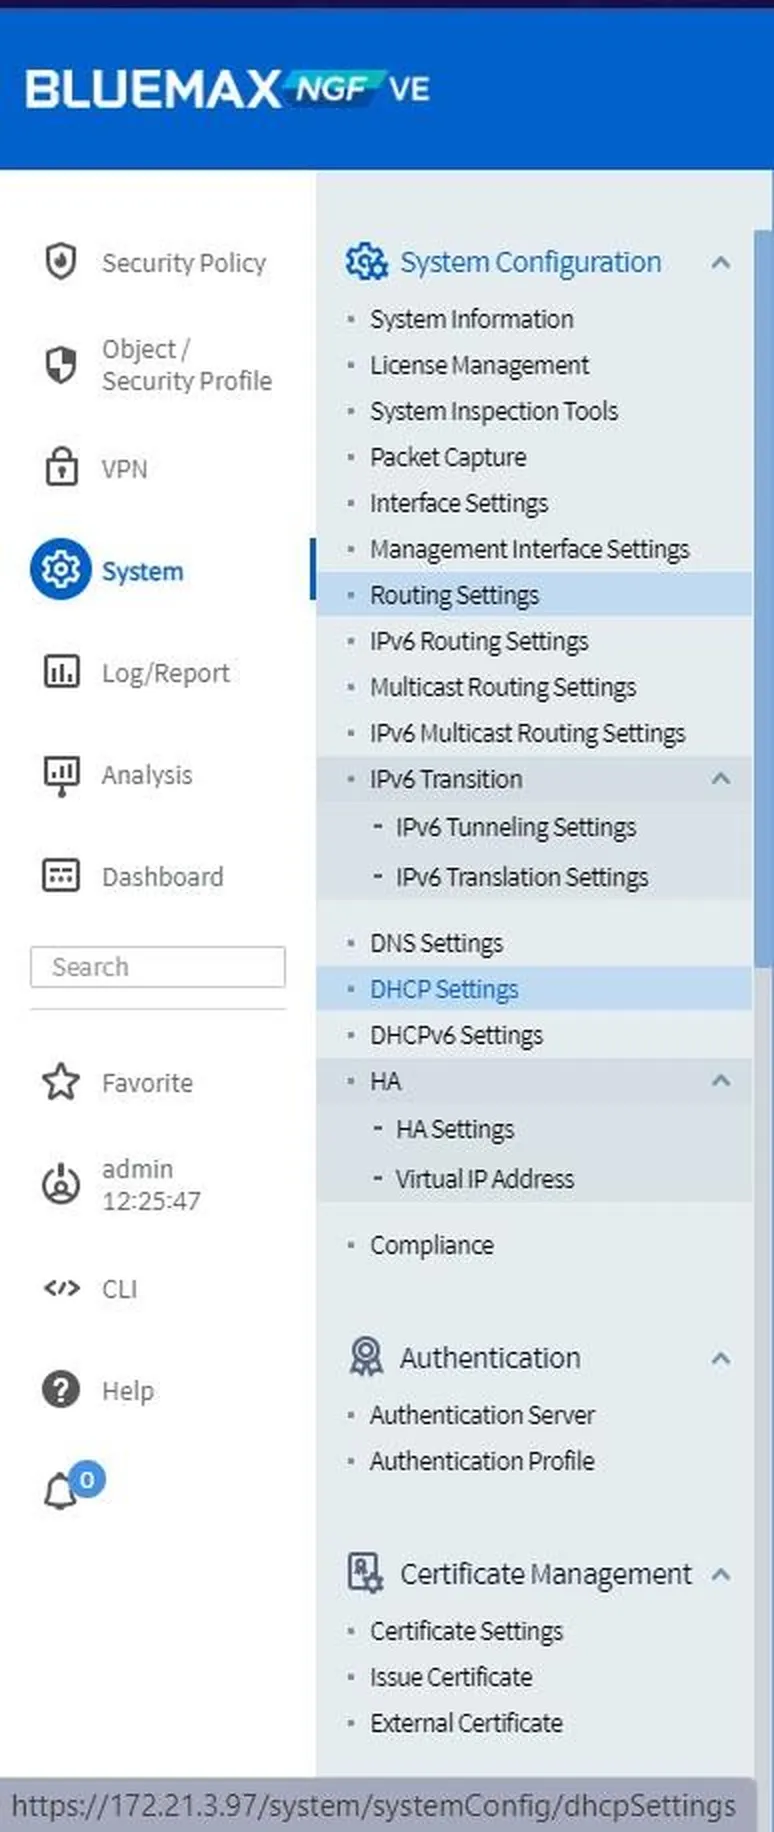
Figure 2.1 System Menu
3. Add a New Static Route
In the Routing Settings panel, find Static Routing and click Add.
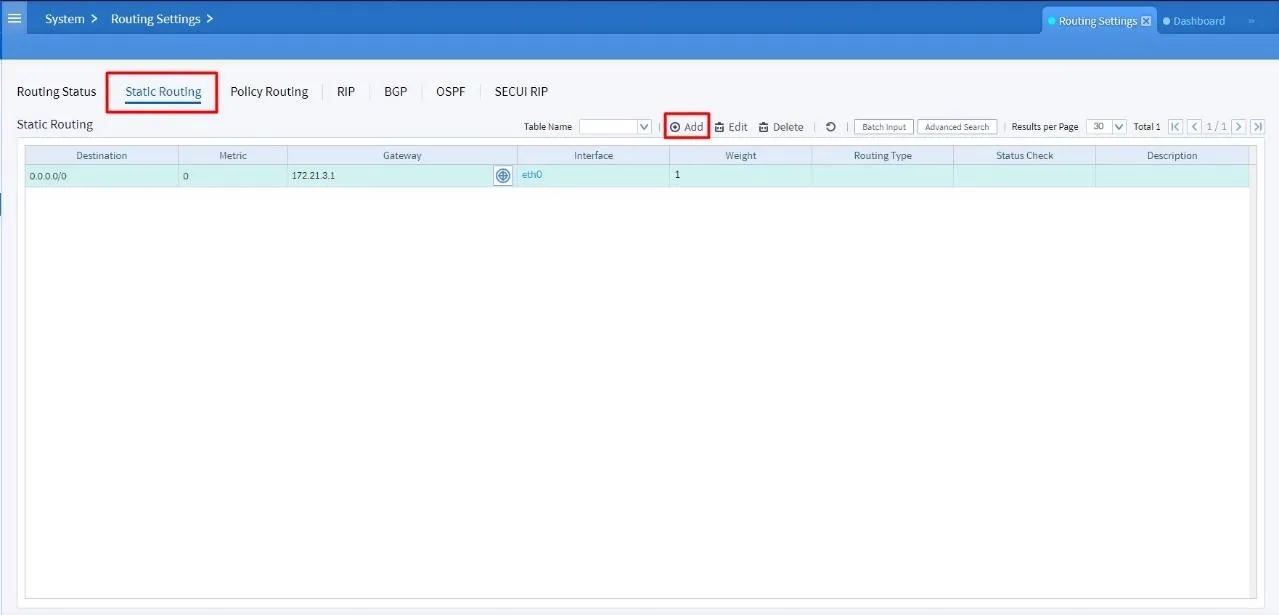
Figure 3.1 Routing Settings
This will open the Static Routing Entry form where you define your route. You’ll have two gateway options:
- Default Gateway Use this for sending all outbound traffic to the internet (0.0.0.0/0). Choose this if you want all outbound traffic to exit via the main gateway.
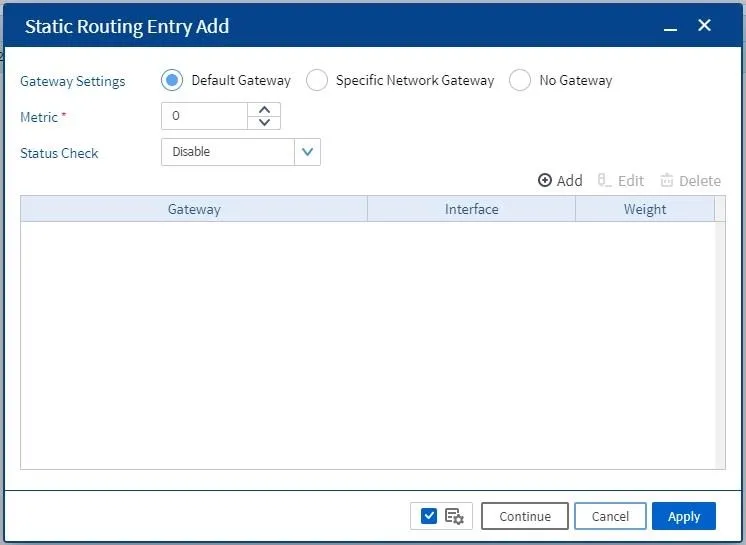
Figure 3.2 Default Gateway
- Specific Network Gateway Use this when you want routing to apply only to a specific network (e.g., 192.168.20.0/24). Perfect for internal routing, private segments, or site-to-site links.
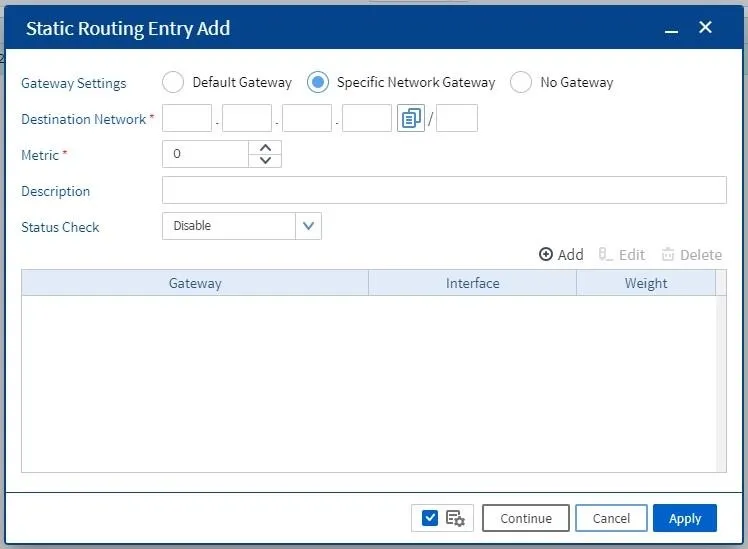
Figure 3.3 Specific Network Gateway
4. Add the Gateway IP
Click the Add button to input a new gateway IP. Then fill in the following:
- Gateway IP Address: The IP of your target router.
- Interface: Select the interface to use (e.g., WAN1 or LAN2).
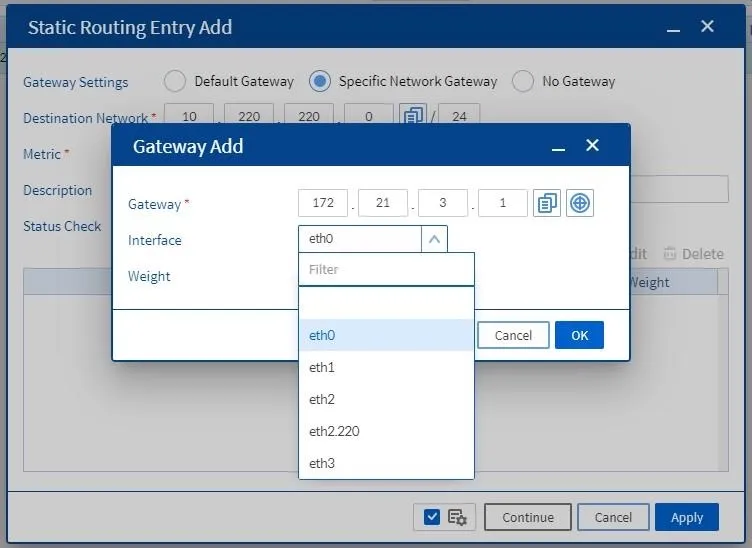
Figure 4.1 Add Gateway
Once done, click OK.
5. Apply the Configuration
Make sure all fields are filled out properly, especially the destination network and gateway address. Once everything checks out, hit Apply.
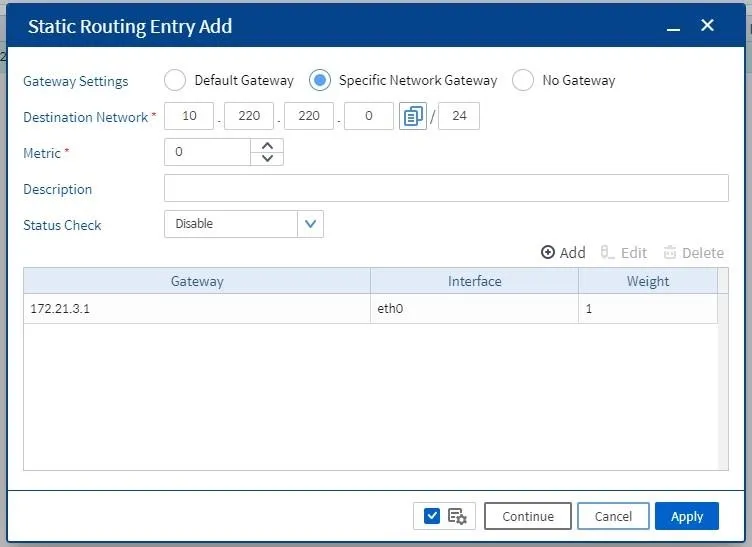
Figure 5.1 Verify Static Route Details
Done! Your static route is now active. To confirm, go to:
System > Routing Status
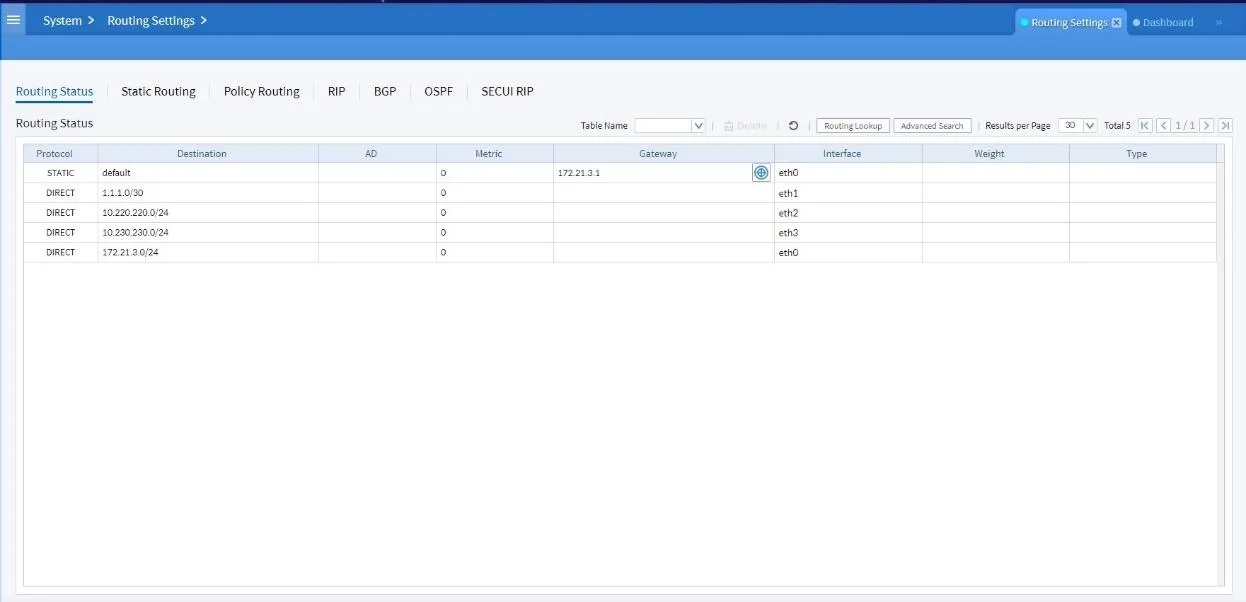
Figure 5.2 Routing Status
There you’ll see all active routing entries, including the one you just created.
Conclusion
Setting up static routes in Bluemax Next Generation Firewall isn’t complicated, but it’s a critical skill in managing complex network environments. With static routes, you gain full control over how traffic moves through your network, especially when dealing with multiple subnets or site-to-site links.
If you need more information or have questions about routing, firewalls, or need a large-scale network solution? Contact our team here.
Last Updated
August 10, 2025
Category
Network Security, SECUI Configuration
Share This
On This Page
Contact us for
Free Consultation!
Share your challenges, and we'll provide the best solutions for your business, Connecting with us is as simple as clicking a button, and let us come to you.